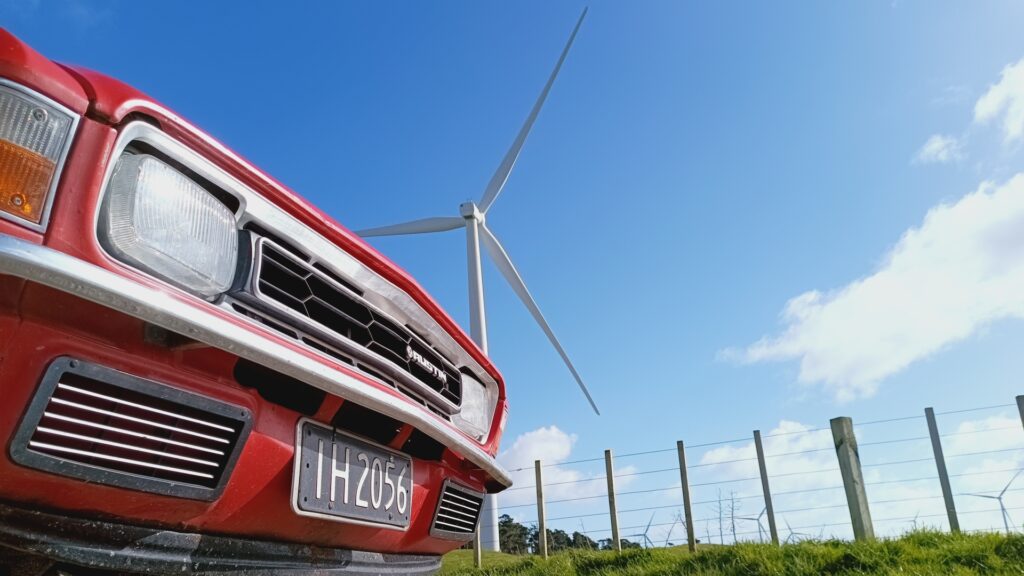
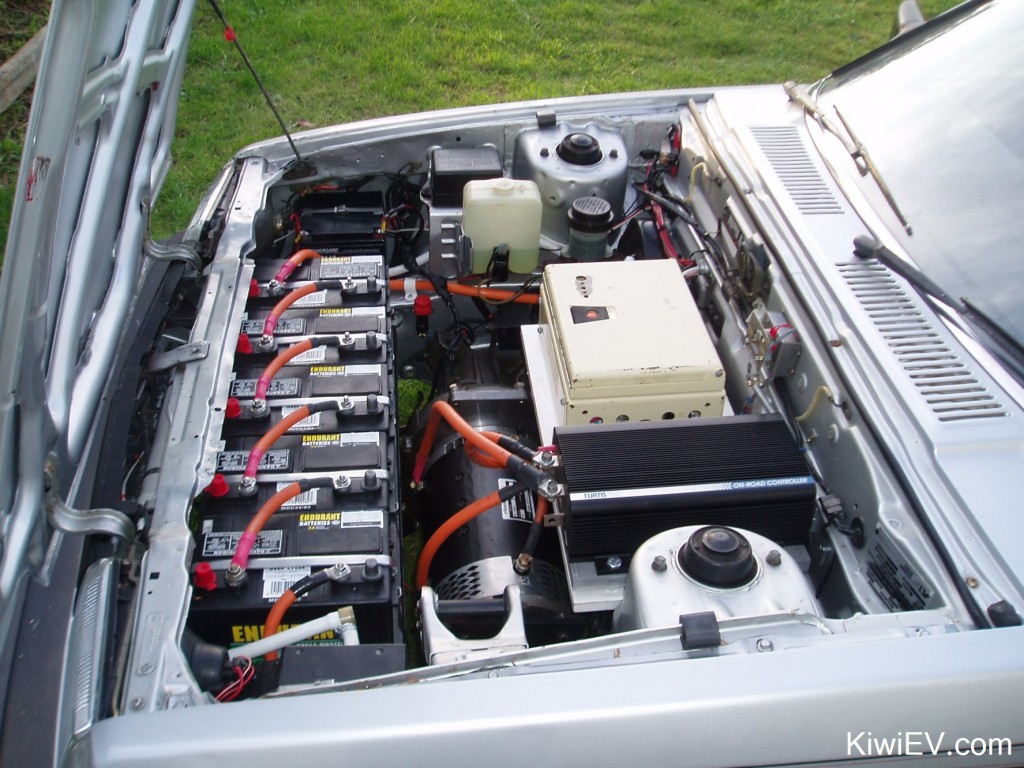
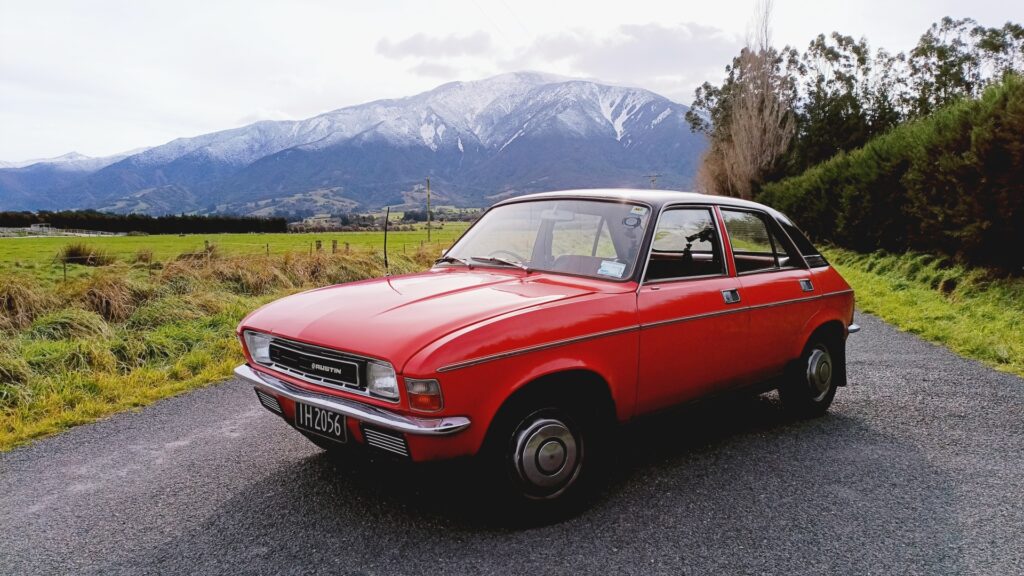
I just installed a Nissan LEAF electric motor into my 1977 Austin Allegro and it fits in perfectly!
But, as you can see, it wasn’t an easy task. Some serious fabricating was required to make sure this new powerplant (with twice the power and torque of the original engine) would be able to deliver all its power without twisting the flimsy metal of this 45 year old British car.
So, grab some popcorn and enjoy the show as this video details the process:
Author Archives: skodas110
Austin Allegro EV conversion 2: prepping
This fresh, new update is loaded with prepping, measuring and house hunting as I get closer to actually beginning my Austin Allegro electric car conversion project!
Even though I don’t yet have a place to start the conversion, this new video shows me rolling up my sleeves and getting ready to remove the engine by measuring and weighing the car:
[link]
So, the car weighs in at 880 kg (1940 lbs) which is light, but as you saw in the first video, the car was never built for hauling a lot of weight. And as you know, batteries are heavy!
But now that I have a house, the conversion is able to get underway, so stay tuned!
Austin Allegro EV conversion 1: Planning
Why am I converting a 1977 Austin Allegro to run on batteries? Well, why wouldn’t I!? The Allegro is an unreliable, slow car with a dirty, weak engine. It’s the perfect candidate for a power upgrade, and in this video I explain how I plan on doing it!
The video below explains my goals for the car conversion, what challenges I expect to find, and of course some of the resistance I’ve met from Austin Allegro “purists”. Yes, they do actually exist, believe it or not!
As you can see, the Austin Allegro is a fascinating vehicle, but converting it to electric power will be a challenge, given the car’s unusual Hydragas suspension system and finding space for the batteries.
The other problem I have is also space-related: where do I start the conversion when I have no garage? Well, that problem is addressed in the next video, so stay tuned!
I bought this Austin Allegro to convert to electricity
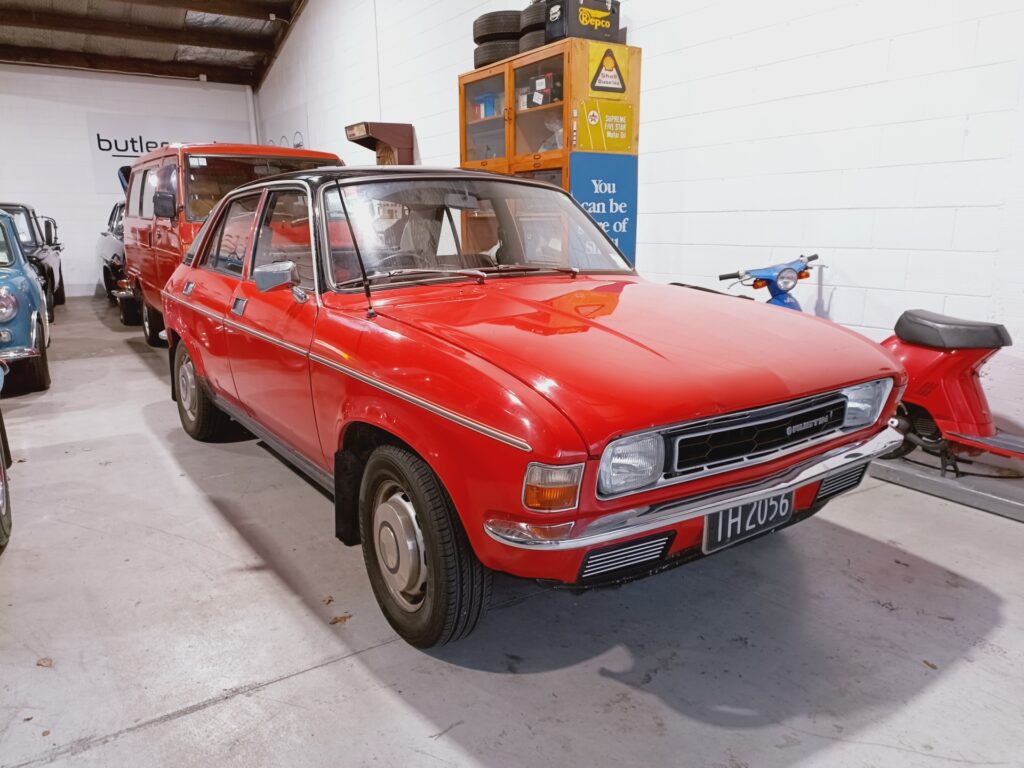
I finally pulled the trigger! I bought this 1977 Austin Allegro in order to rip out the engine and convert it to run on electric power!
Man, it’s been years since my first electric car conversion, when in 2007 I bought a rusty old Mitsubishi Tredia and began the slow process of converting to electricity. The operation was an incredible success and nine months later I had the car certified and drove around the small coastal city of New Plymouth for two years – until it failed its inspection due to rust! Argh! Check out the full story of this conversion here.
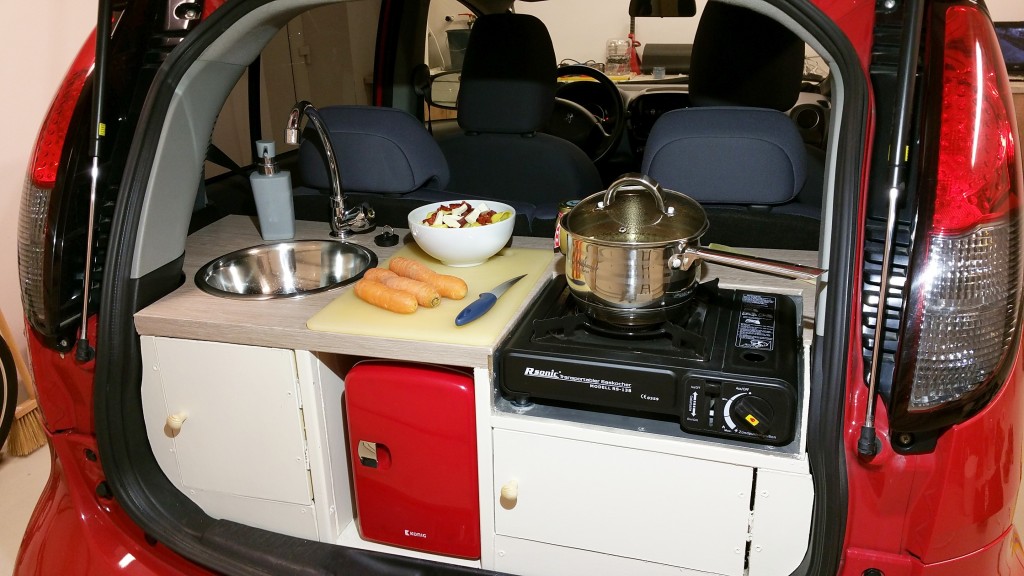
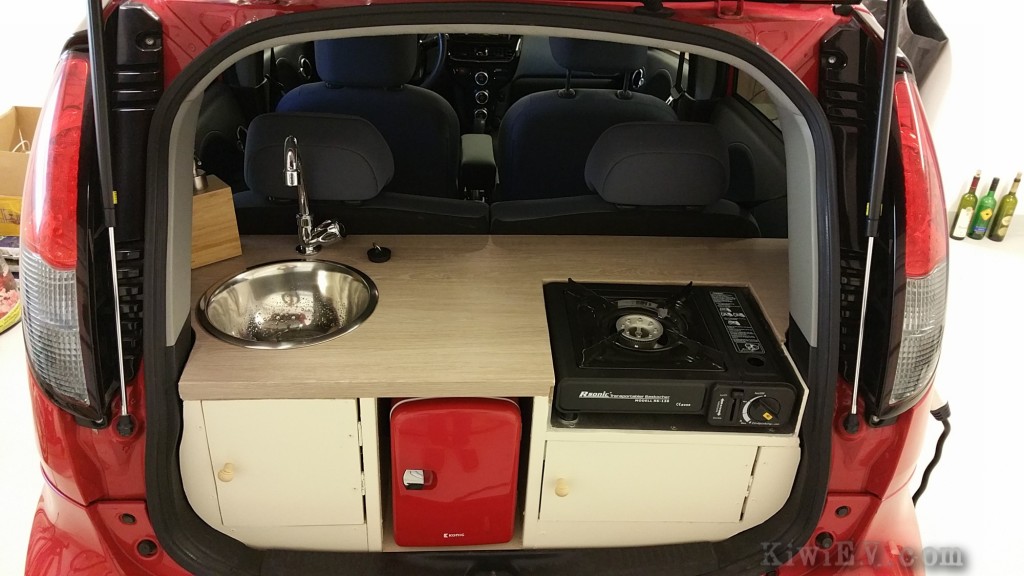
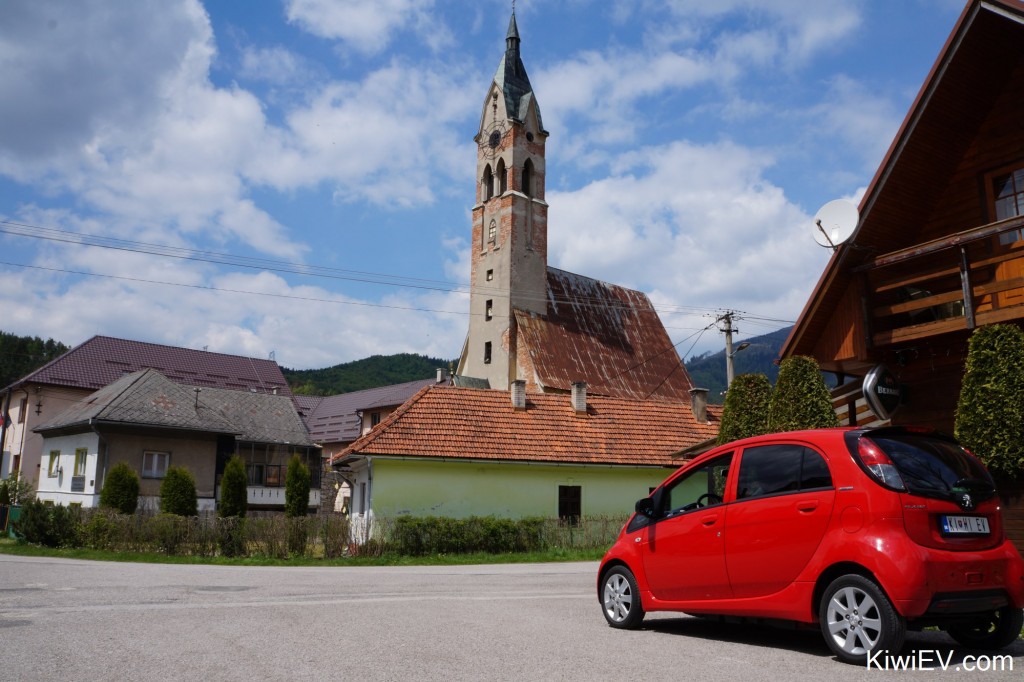
Many years passed since those days. I moved to Slovakia with my first wife to start a whole new series of electric car adventures with a 2012 Peugeot Ion electric car. It might have been a city car, but I drove that thing everywhere! Once I even drove the car across the entire Slovak Republic to Ukraine and back! And the craziness didn’t stop there. I even put a kitchen in the back of it! 😀
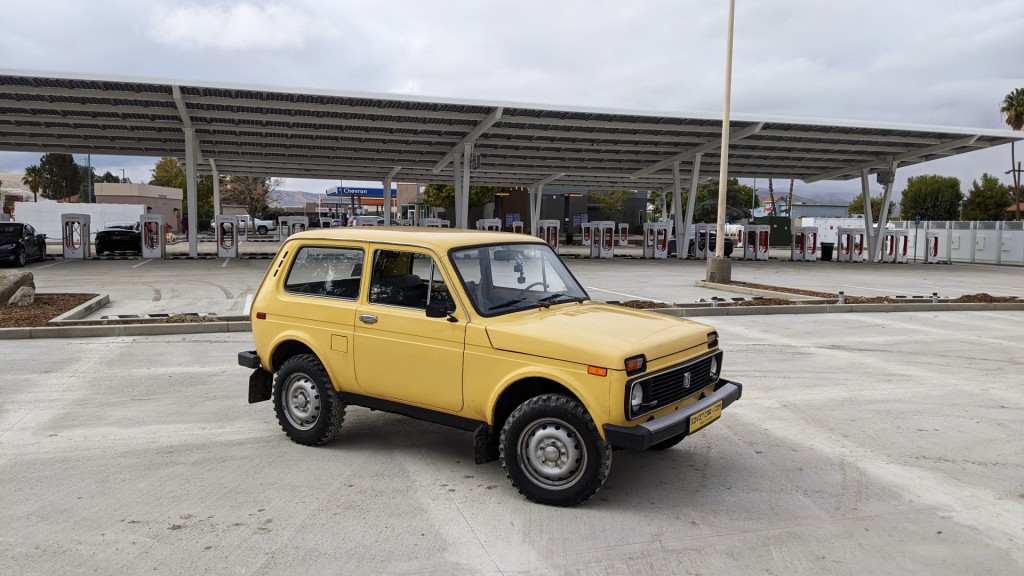
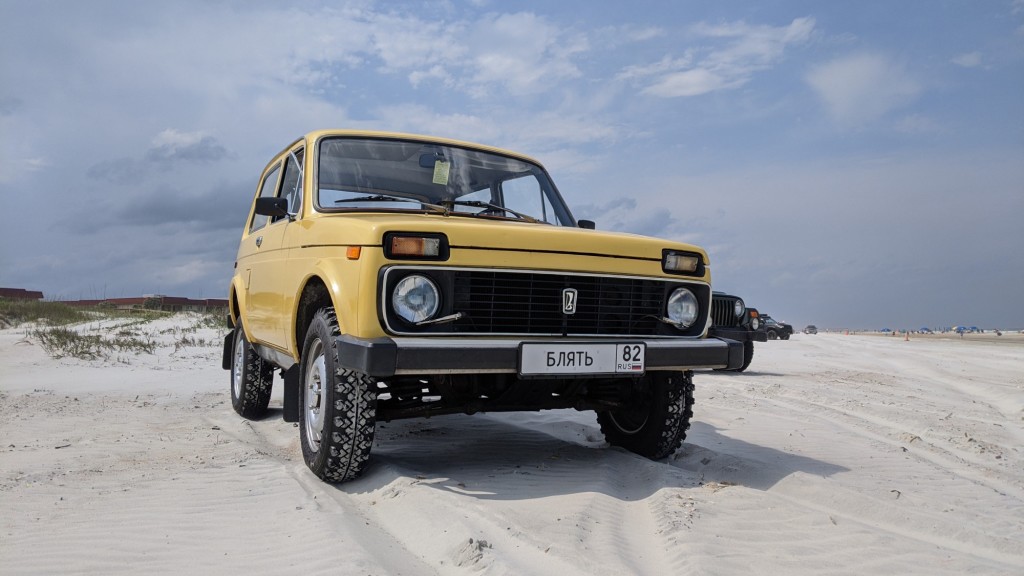
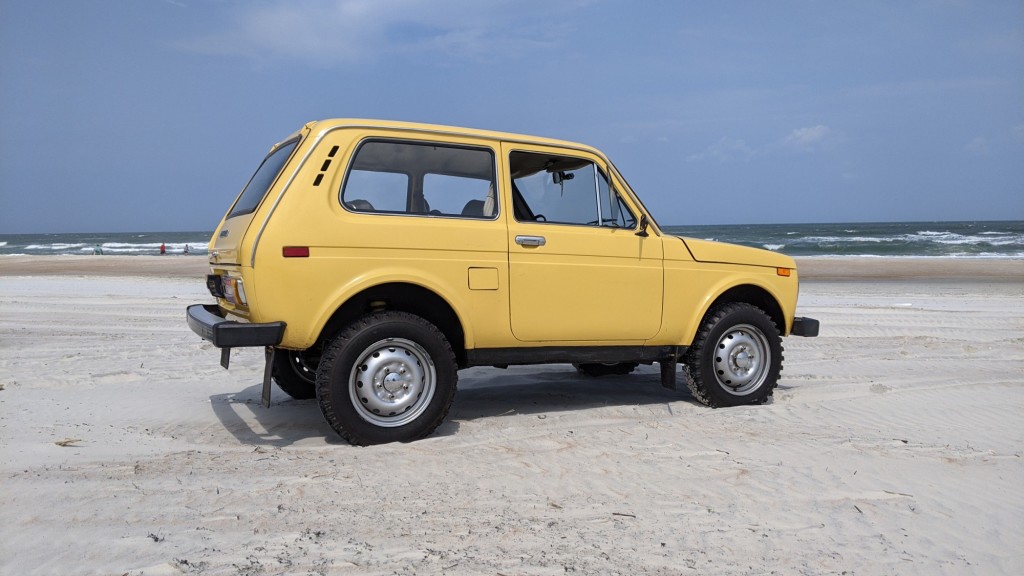
But life moves on and my marriage ended, so being the fool I am, I got married again and moved to America where I bought a 1982 Lada Niva off-road vehicle in brilliant condition, which I drove all the way across the USA in an epic road trip adventure! I planned to convert it to electric, even buying parts in preparation, but life happened again and my second marriage ended!
So I finally wised up, swore off marriage, and returned back to my beautiful homeland of New Zealand. It must have been destiny, because things have been working out well for me. I’ve got myself a great job making awesome electric vehicle reviews for a brilliant company, and I’m saving hard for a house.
But… my passion for electric car conversions can’t be extinguished. I think about EV conversions perhaps a dozen times a day. So it was only a matter of time before I began another one. But this time no one could halt my plans! So I got looking online for a “donor car” to convert to electric. And… I found this:
It’s a New Zealand assembled 1977 Austin Allegro in great condition. The problem was it was located in Christchurch; a thousand kilometres away! The other problem… I didn’t have the money. But after a few glasses of adult beverage, I did something I wouldn’t normally do: I asked the public for money to help me buy it. Now, I must confess, I was half joking, but you guys helped me out and I awoke to see more than $5000 NZD in my account in the morning! So I booked airfares and a trip on the car ferry and flew down to buy the car!
I arrived to the dealer to see that the Austin Allegro wasn’t the only classic vehicle they had for sale. Classic Minis, Escorts, Fords, Mercedes – you name it. The automotive bounty was rich, as was the smell. It had that unique ‘classic car smell’. You know the one I’m talking about. Anyway, long story short, I bought the car, did the paperwork, and before long I was on my way, taking one of the most unreliable cars ever made by British Leyland on an almost 1200 kilometre journey.
So, without further delay, this is the first of many interesting videos of my plan to convert this interesting vehicle to pure electric power. Grab yourself a cup of tea, get settled in and enjoy the video of my massive road trip below:
Special thanks must go to those wonderful human beings who helped me buy this vehicle. Without your help I wouldn’t have had the push to go out and start this epic project. I owe you a lot. Thank you.
I bought a Russian off-roader to convert to electricity!
Something I’ve been wanting to do ever since I converted my old Mitsubishi Tredia to run on batteries (link) back in 2007 is finally happening! I’m going to convert another car to run on electricity – but this time it’s different. It’s a 1982 Lada Niva from the Soviet Union!
After my first electric vehicle conversion I’d planned on converting another car to electricity when I moved to Slovakia to live for almost eight years. Unfortunately, the bureaucracy and bounty of restrictive laws there made it technically impossible, so it wasn’t until I moved to the USA in 2019 to be with my new wife that my dormant dream was able to come out of hibernation; buoyed by the fact that anything’s possible in America!
In 2020, after gaining US residency and finding work, I started saving for what would be my ‘donor car’ to convert to electricity. For my very first conversion I simply used whatever car I could find and it was pretty boring to say the least. So, for my next conversion I needed a car that would be fun and would turn heads all by itself. I asked the internet for suggestions and dozens of people offered all manner of cars to convert, from utterly boring 1994 Toyota hatchbacks (why?) to prohibitively expensive 1969 Corvette Stingrays (how?) but in the end I went my gut, and chose something a little more ‘out there’: a Soviet-built Lada Niva.
The problem was going to be finding one. Even though more than 2,500,000 Lada Niva off-roaders have been produced from 1977 until today, and even though they’ve been a worldwide hit and a sales success, they were never sold in the United States of America due to trade sanctions. This presented me with the enormous problem of finding one – and finding one without rust.
I scoured the online classifieds in Europe and contacted shipping companies but the difficulties, costs and bureaucratic requirements of in importing a vehicle to the USA made it very unpalatable. The largest problem was that any car I found would need to be at least 25 years old to avoid meeting emission and crash safety requirements. This meant I needed to find a really, really old Lada Niva which hadn’t yet fallen apart due to rust. They were almost impossible to find in Europe, or incredibly expensive if I did find one. Despondent, I looked into importing directly from Russia and reached out to shipping companies in the USA, Europe and even Russia directly, but only one company I spoke to was even considering helping me, and they warned me it would cost around $5000 in shipping & taxes alone. So, after many months of getting ignored or discouraged at every turn I very nearly gave up on converting a Lada Niva. Until in mid-2020 I saw this:
Someone was selling a Lada Niva 4×4 in Seattle, Washington! Not only that, but it was in very good condition. The problem was the price. At $10,995 it was well out of my budget. I contacted the seller, who was also the importer, and asked if there was any flexibility but he was firm on the price. So all I could do was save every cent and check back on the car every week or two.
Fortunately, a book I published back in early 2020 had been selling well and this allowed me to save up more than $7000 in royalties. I’d also like to take this moment to sincerely thank every single one of you who bought a copy. I priced the book as low as Amazon would allow, and many of you invested your hard-earned money into it. If you’re curious about it, here’s a link:
If your ad-blocker is preventing you from seeing the book, click here to see if it’s your kind of thing. And if you do decide to buy a copy, you’re directly helping me convert this car because every single cent goes to my EV conversion savings account which I’m not touching until I have enough for electric car parts!
After help from months of book sales and living like a monk, I was eventually able to save up $11,000 plus the extra money needed to fly from St. Augustine, Florida to Seattle, Washington; about as far as you can possibly travel within the contiguous United States. My plan, providing the car was indeed in good condition, was to buy this 1982 Soviet off-road vehicle and drive it 3,700 miles home (5954 km).
So, I packed a bag, bought airfares and on an early morning I called for an Uber to take me to the airport…
To watch the adventure begin, click on the video below!
Immediately afterwards, I arranged insurance for the car then began an epic road-trip across the entire country, from Seattle, Washington, all the way down to San Diego, California, and then across the St. Augustine in Florida.
It was an incredible adventure with joys and sorrows, so be sure to watch it by clicking ‘play’ below:
Right now, I’m still slowly saving to convert the car to run on batteries, so you’ll have to be patient. In the meantime, I’ve been driving it around St. Augustine, Florida and taking it up the beach.
It’s a real head turner and I’m regularly asked “What is that thing?” as it was never sold in the United States. The only negatives are unreliability (you never know for sure if it’s going to start each time) and terrible performance from its 1600cc engine. The vehicle struggles to keep up with even regular traffic.
But, all that will change when it’s finally running on electricity. So, stay tuned!
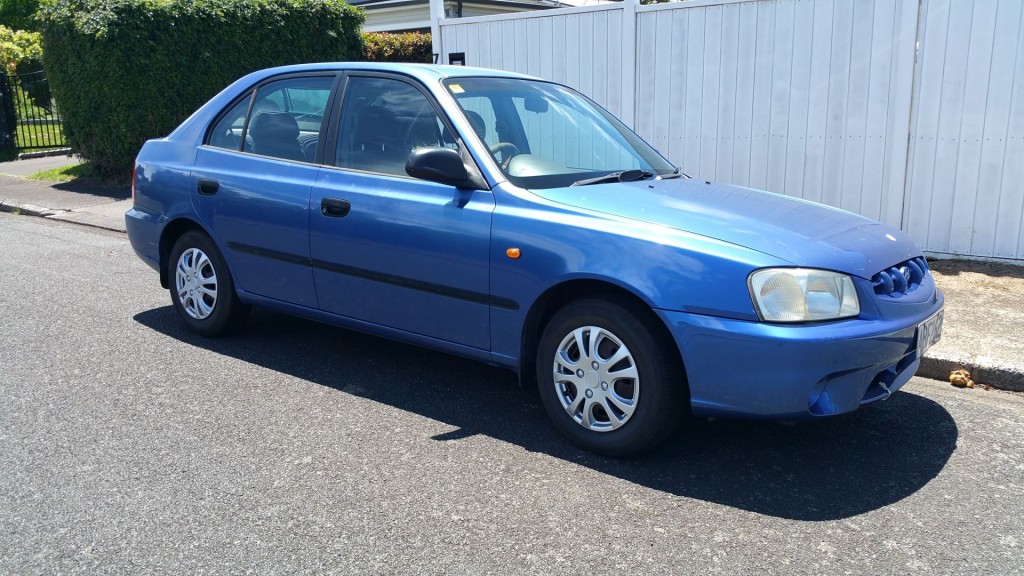
I bought a new car!
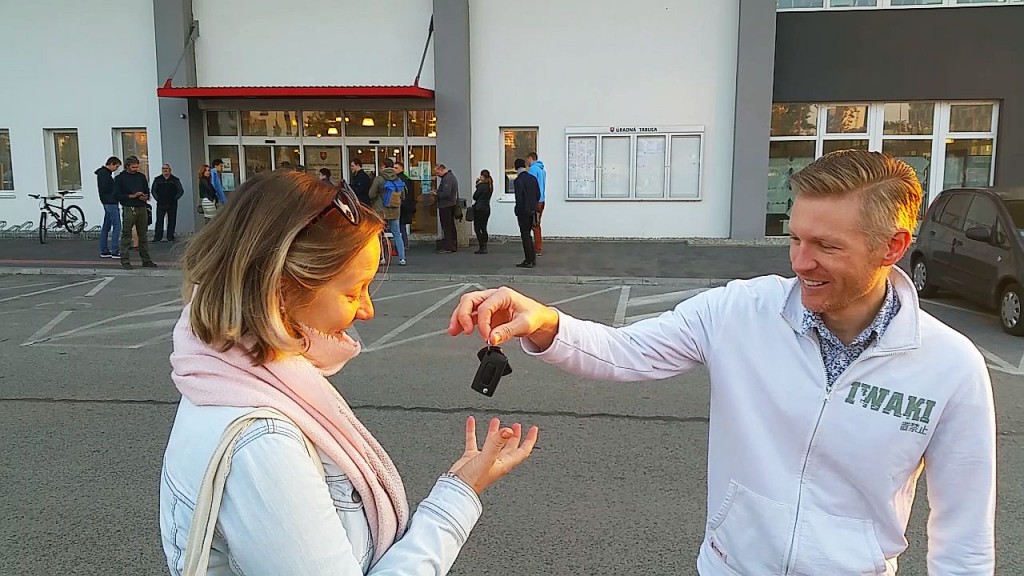
Good news! I’ve moved back to New Zealand temporarily and… wait for it… I’ve just bought a new car!
It’s sexy, stylish, sporty, and made by the same company which makes the Kona and Ioniq electric vehicles! So, without further delay, here it comes!
I know, I know, it’s just too sexy for the Internet, but before you throw your panties at the screen, let me explain some of the features of this beautiful, $2000 machine.
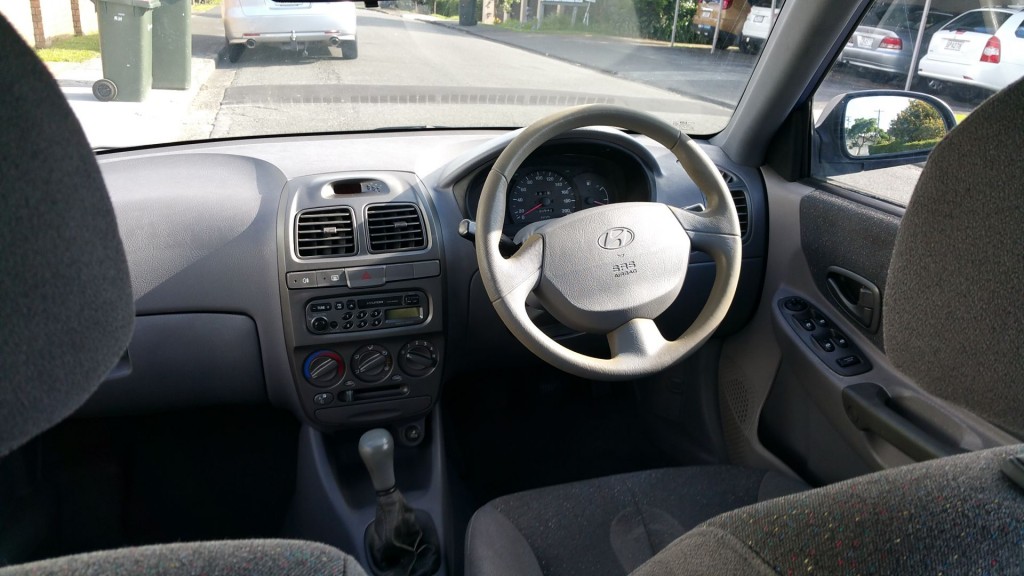
The car’s interior is tastefully appointed in a sea of grey plastic with hints of multicoloured public transport upholstery! It also features an airbag! Just one, but why would you need more?!
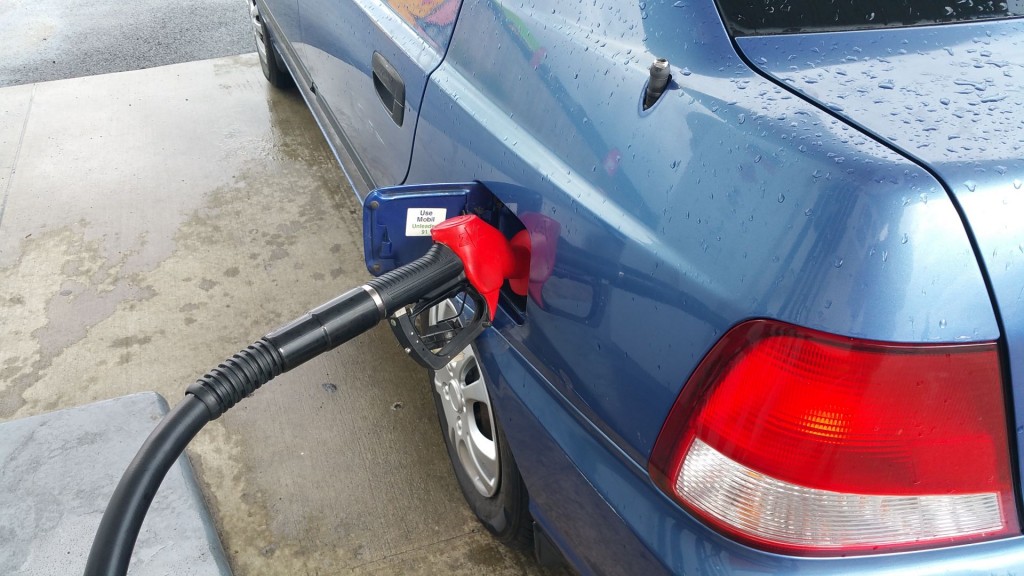
I’ll be honest: I don’t really understand the car’s recharging socket. It charges really fast, but the recharging liquid(?) smells terrible and it costs a hell of a lot to recharge. Still, the range is good: I get 460 km (285 miles) per charge. Not as good as a Tesla, but not bad!
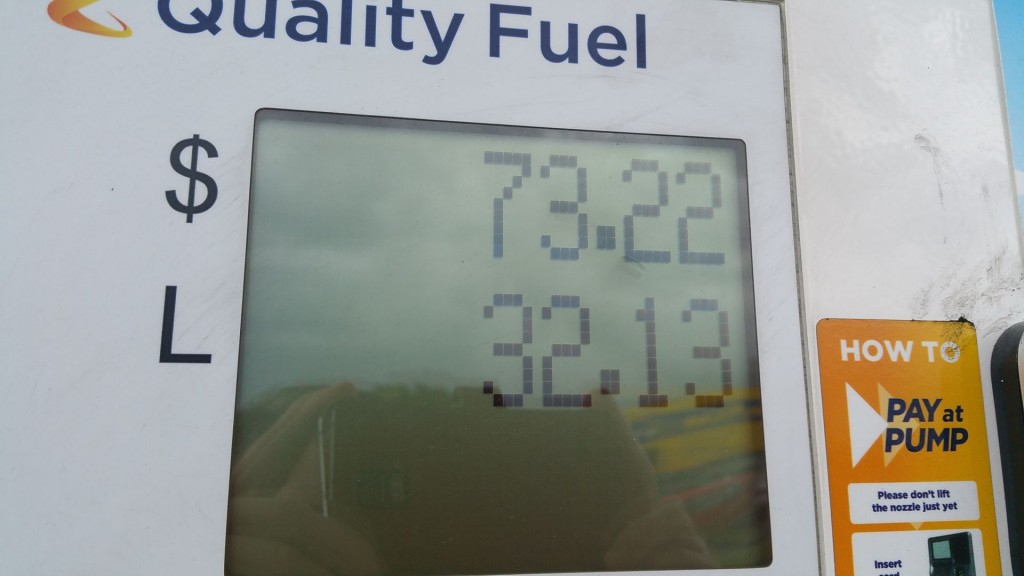
I still haven’t figured out how to recharge at home, so for now I have to recharge at these shops called “Petrol stations.” Last week I recharged the car, but it cost me $73 which is too expensive. I’ll ask other drivers to see where I can recharge for $2.50 like I did with my last electric car. Oh well, we’re still learning.
There are some things about this car which are awesome, though, and the best way to explain is to show you in a video… So, put on your seat belt and press Play below!
Stay tuned as I head to America to start a new chapter in my life!
The end of an era.
It’s the end of an era: the Kiwi EV has been sold. The obvious question now is: what car will take its place?
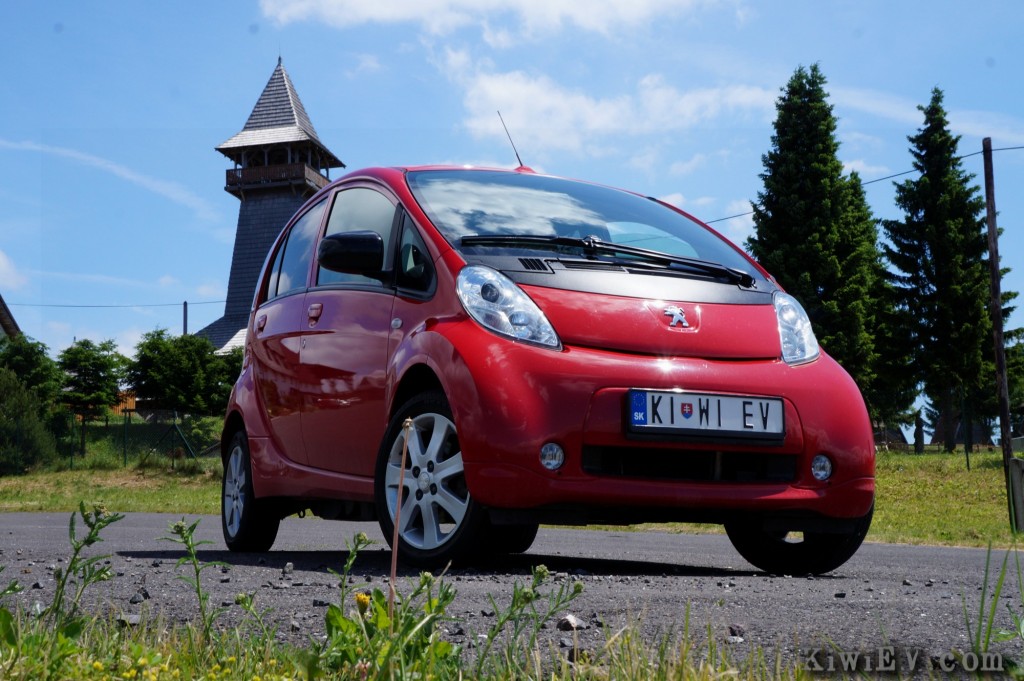
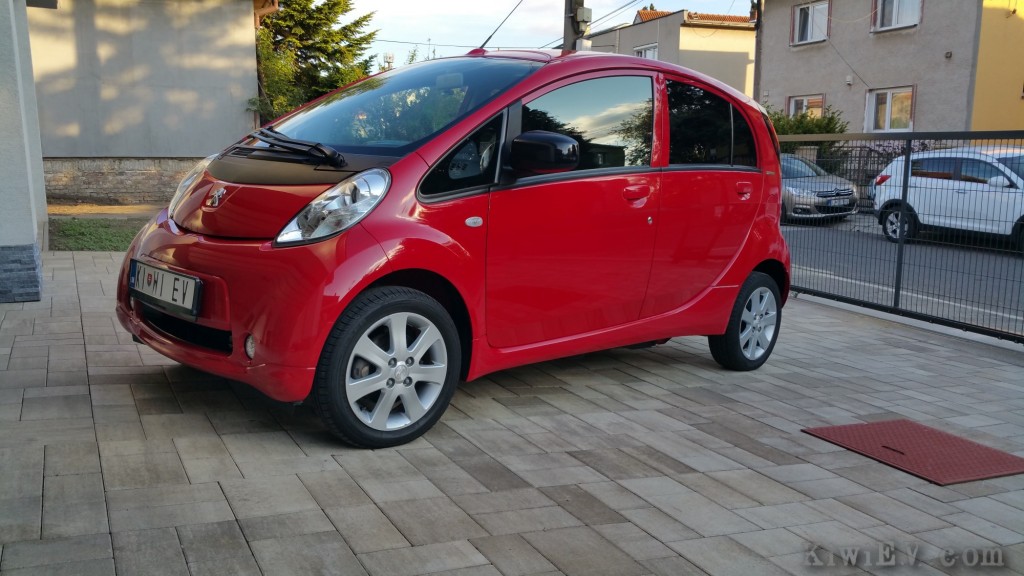
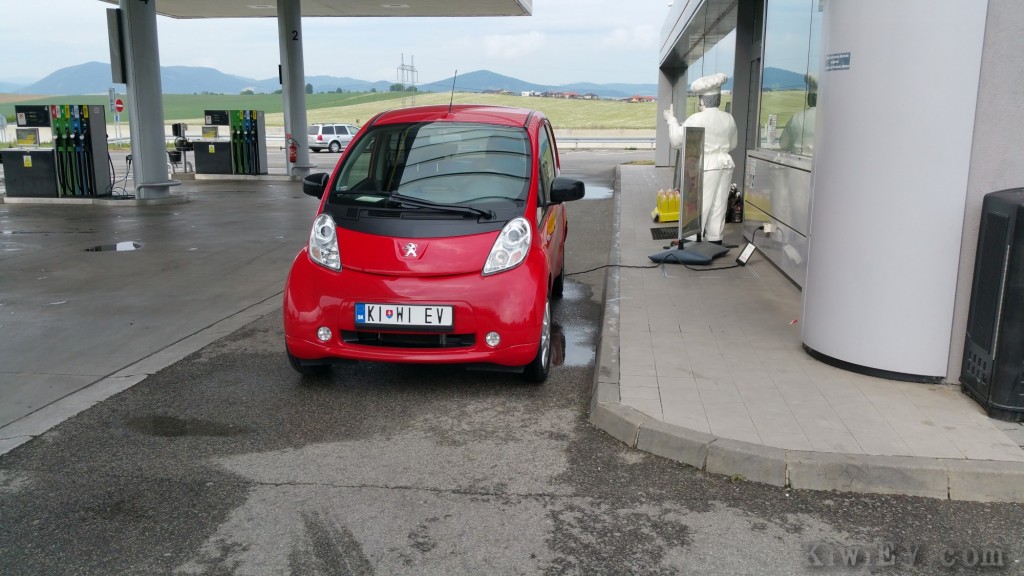
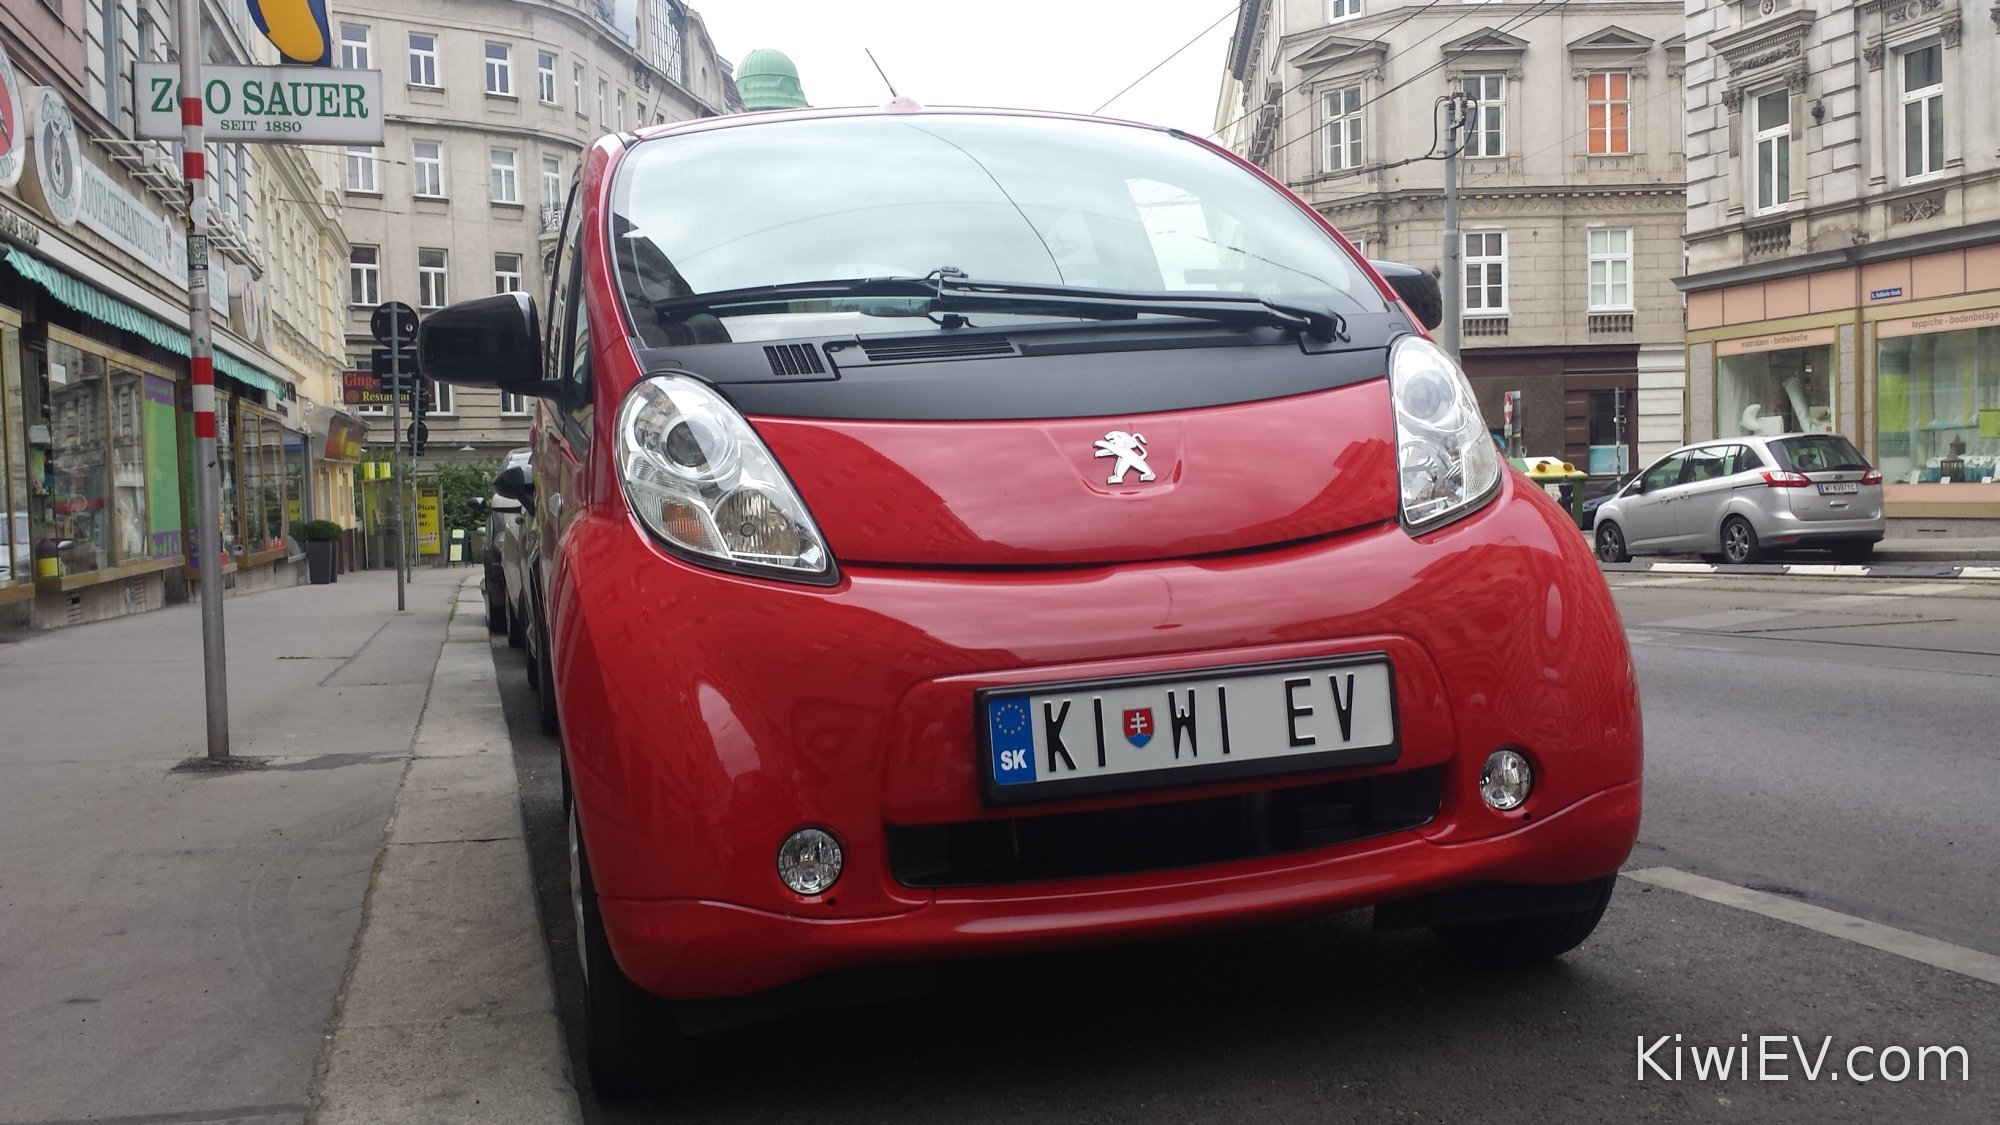
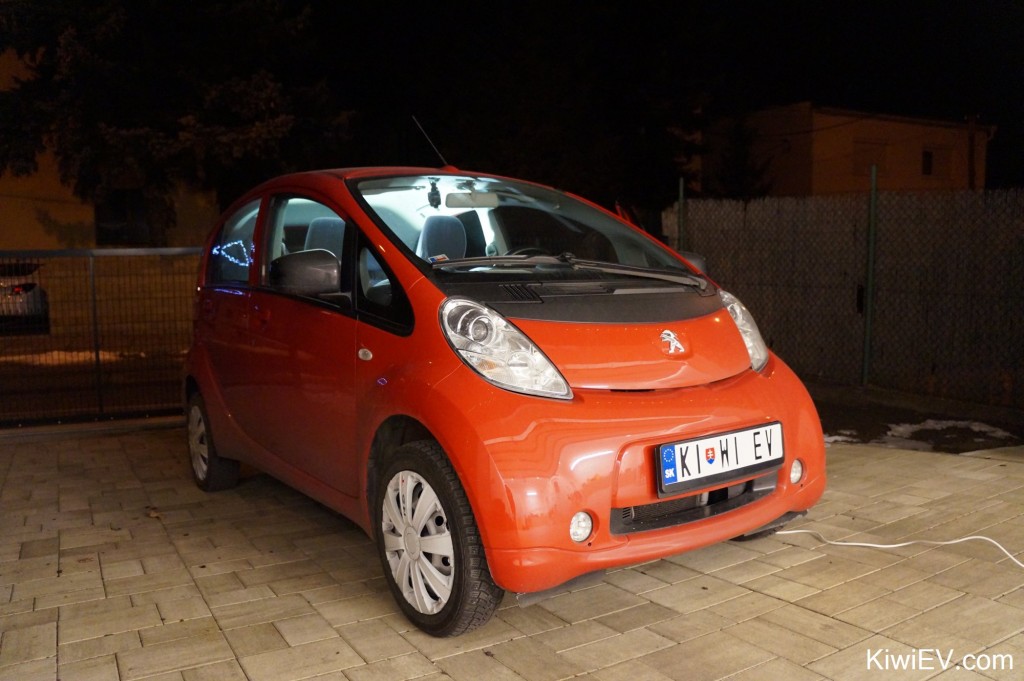
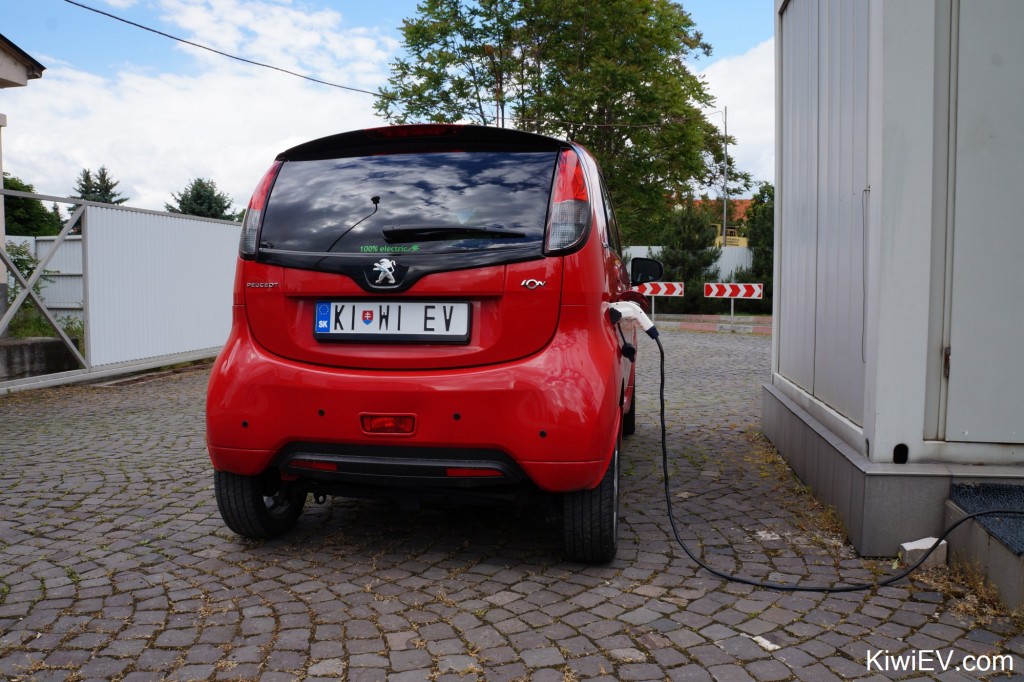
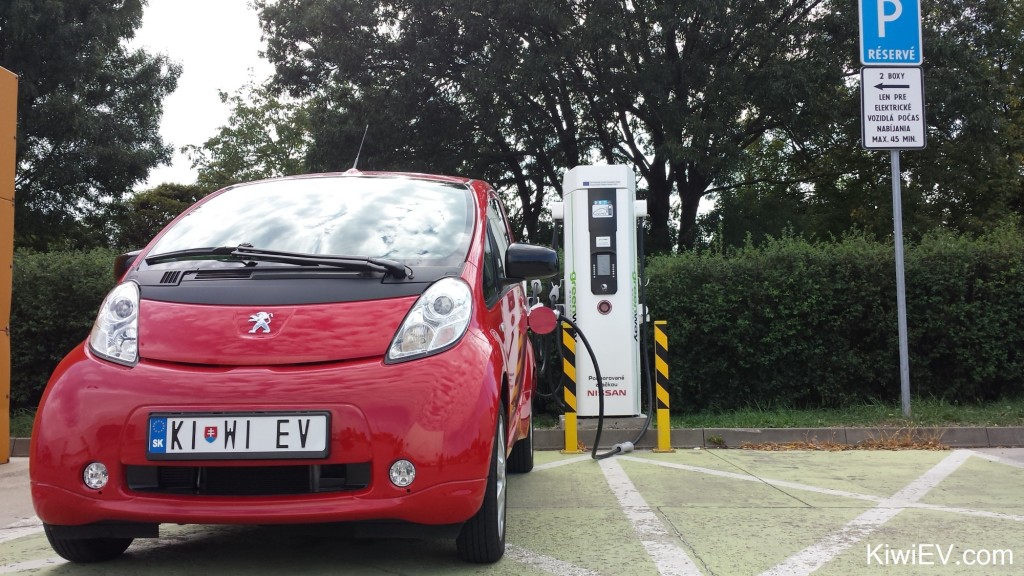
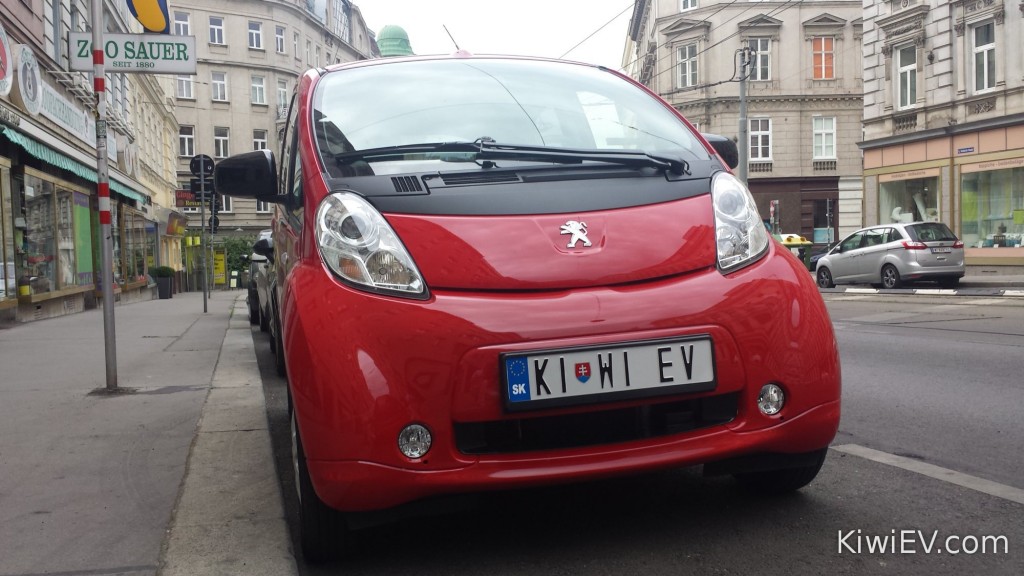
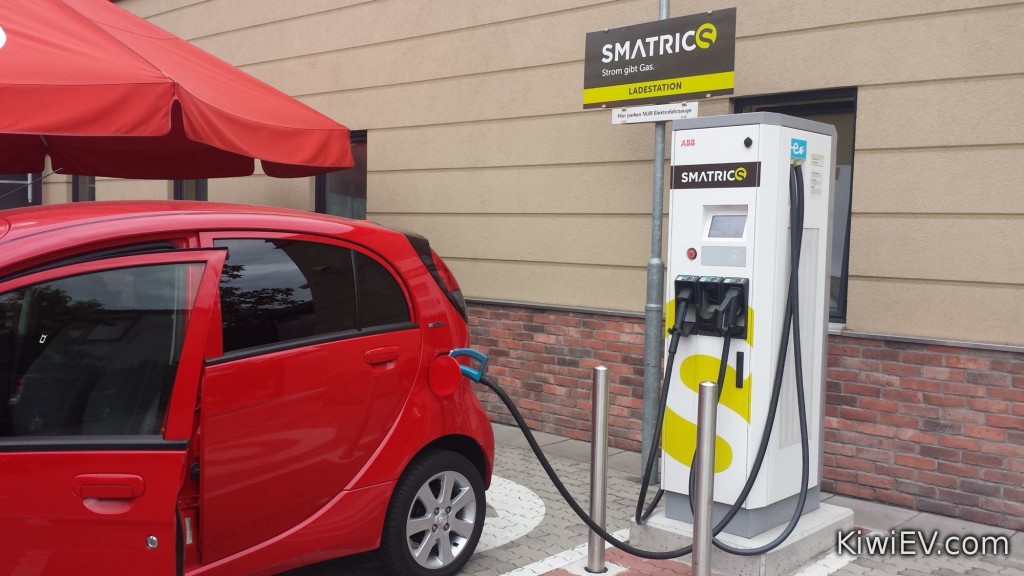
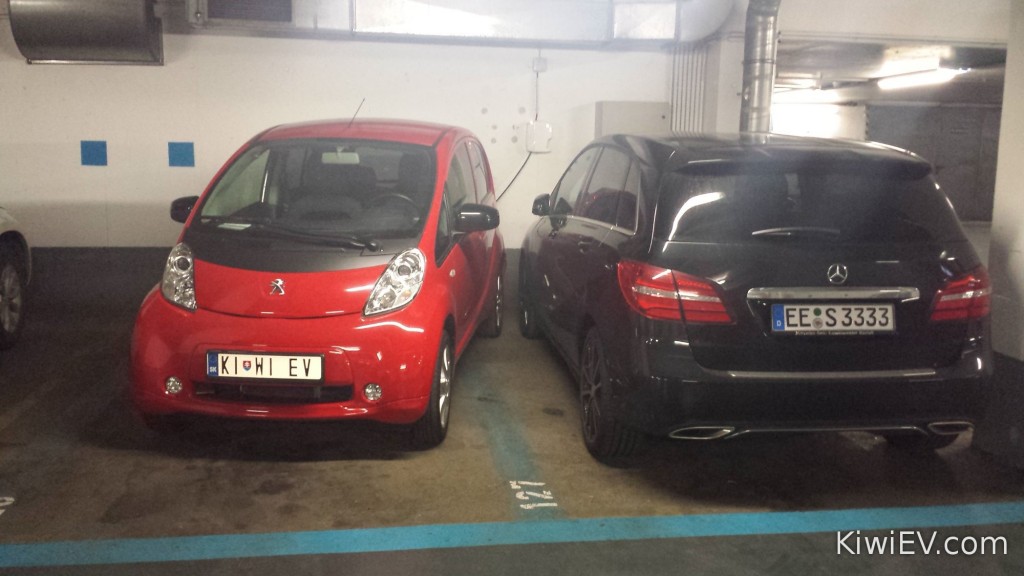
It seems like only yesterday when I brought home a shiny, red 2011 Peugeot iOn electric car. It was my second electric car, after converting an old Mitsubishi to run on batteries back in 2007, but this was by far the most refined and advanced electric vehicle I’d ever had the pleasure of owning.
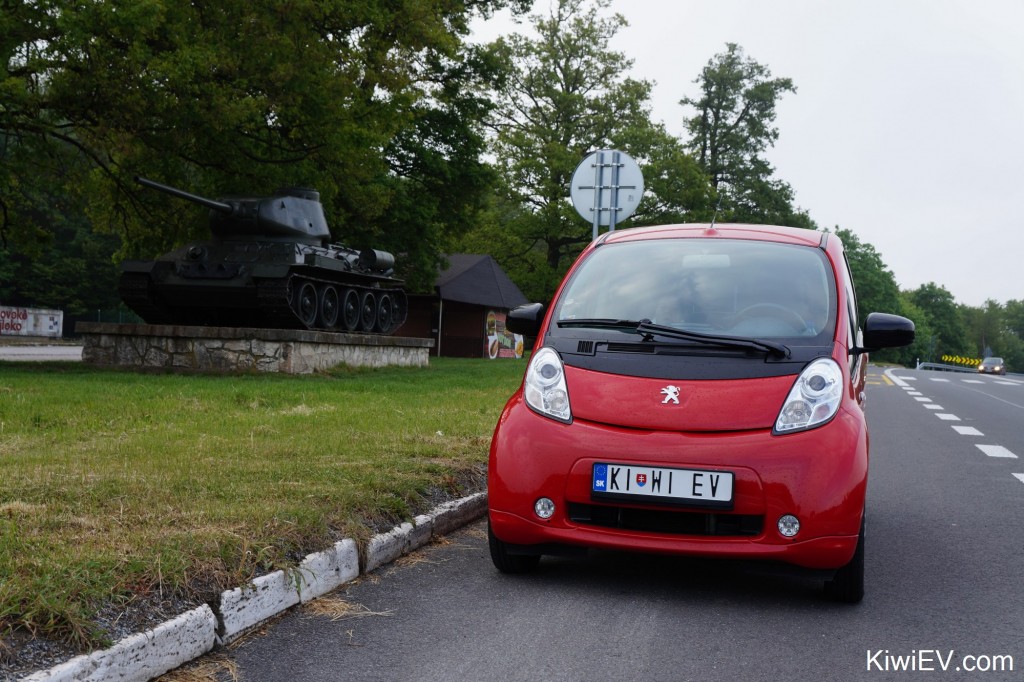
This four wheeled member of the family turned heads when it (silently) glided through parking lots and it made headlines when it became the first electric car in Slovakia to drive from the eastern border of Austria to the western border of Ukraine – and back!
I’ve had more epic adventures in this little electric city car than any of the 23 cars I’ve owned combined, but all things must come to an end. The car has served me well but it needed a new loving home. But perhaps most importantly, I need to upgrade!
It’s the end of 2018 as I write this, and electric cars have (finally) come a long way, after Big Auto dragged their heels for two decades and were eventually forced, begrudgingly, into making pure electric models, or else they’d be left behind by Tesla Motors.
So, the hunt is now on for another electric car, but something more more range; opening up a whole world of possibilities for more Kiwi EV adventures. My sights are set on a Renault Zoe ZE 40 with around 350 kilometres (217 miles) per charge and there are plenty of them in France, ripe for the picking. But Kiwi EV #3 will have to wait until next year, because I’m about to enjoy a few weeks’ holiday in New Zealand.
To everyone who joined me (virtually) over these wonderful years of adventure and discovery, I sincerely thank you and I invite you to stick around. Whatever happens next is bound to be bigger, better… and much faster!
Until then, enjoy this video trip down memory lane. See you later.
My electric car ran out of electricity!
Are you thinking of buying a used electric car? If so, the first thing you should check is the condition of the battery. My faithful electric car is almost eight years old and – let’s not beat around the bush – it has lost a fair chunk of its battery capacity since it rolled off the factory line in the Autumn of 2011.
When it was new, its 16 kWh battery pack allowed the car to travel up to 160 kilometres (99 miles) with careful driving, but that was many, many moons ago. Let’s face it, you’d be surprised if your laptop or cellphone battery lasted beyond six years, so eight years (and still going strong!) is a remarkable feat.
But how much battery capacity does my ageing electric car have? This picture tells all:
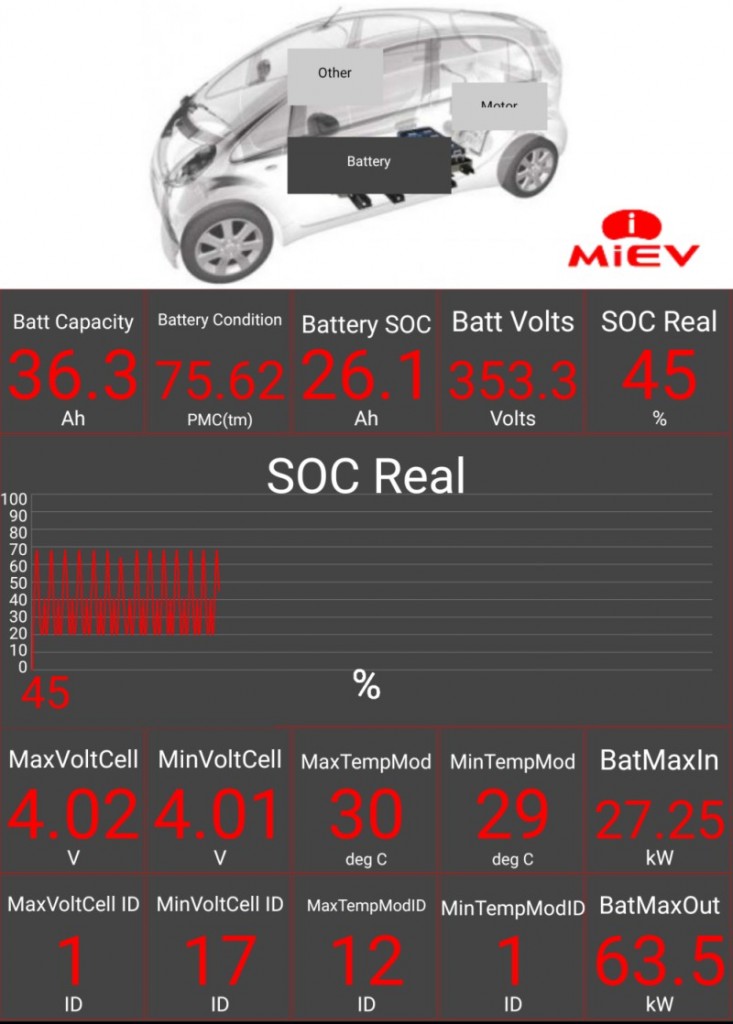
Well, according to the EVBattMon smartphone application, my car’s battery now has 36.3 Ah of capacity. When it was brand new in the factory it would have been around 46 Ah, give or take (although officially these cars were listed as 50 Ah). This means I’ve lost around 9.7 Ah in eight years, or 2 percent every year on average. Put into plain English, my eight year old battery has lost 21 percent of its total capacity over the last eight years.
But what does it mean? Is an older, used electric car still useful?
To find out, I decided to see how far I could drive my eight year old battery pack on one charge. I decided to replicate my daily commute from my house to the city and back as many times as I could before I ran out of electricity.
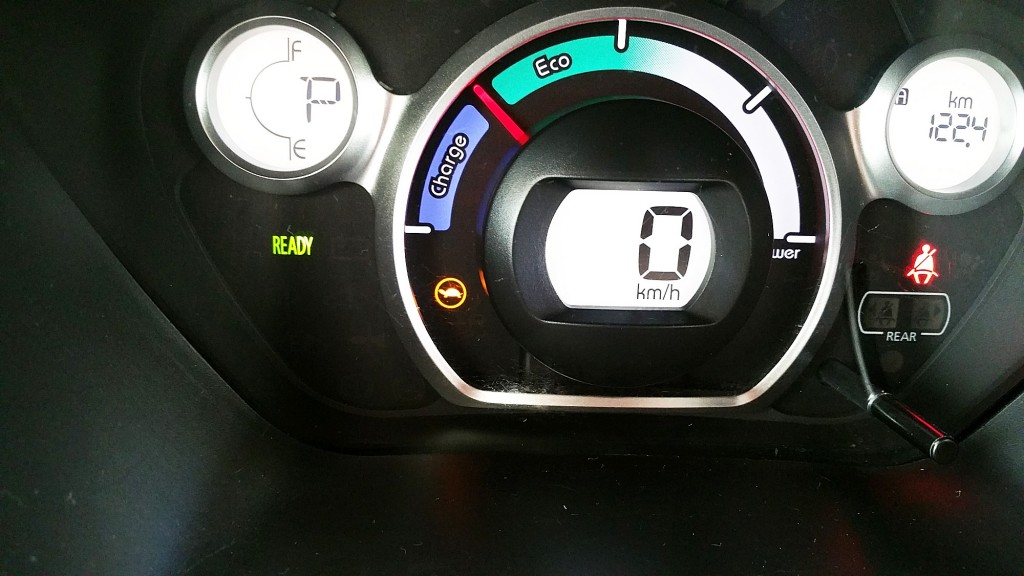
The result was 122.4 kilometres (69 miles) of relatively easy driving in warm weather. I could have achieved more if I “hypermiled” and maintained a slower, more constant speed, but I wanted to recreate normal driving conditions.
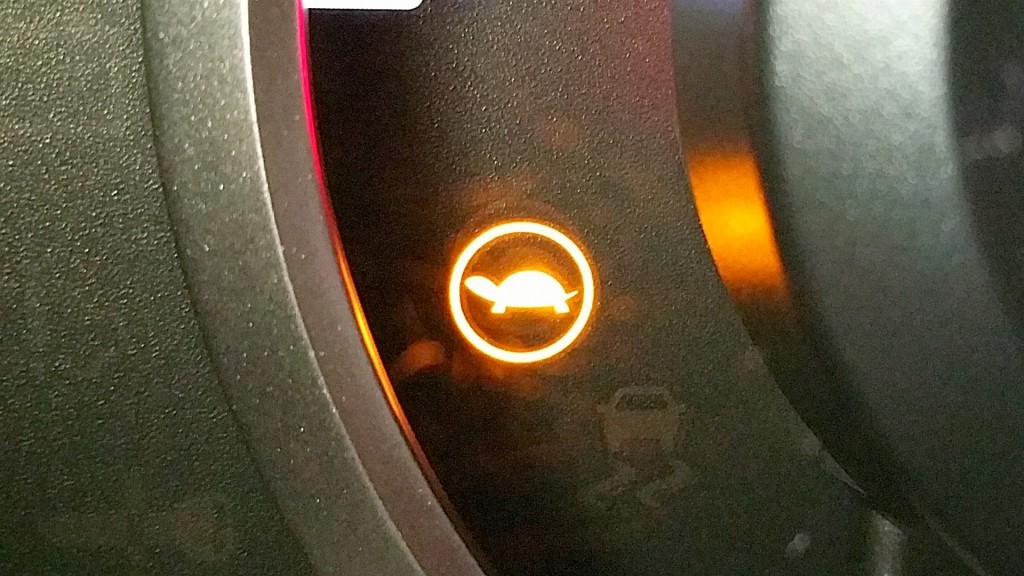
I managed three commuting trips to the city and then back to the suburbs, returning with 1 bar of battery remaining on the battery gauge. Then, I decided to really push my little city car to its true limit; driving around the neighbourhood until “Turtle mode” was activated.
With Turtle mode on, the car became more and more sluggish the further I drove. At first the power was just lowered, but as the battery capacity ran out, the car limited the power to the motor very intensely. Fortunately I was very close to home, so I turned down my street… only to have it run out of power 100 metres from the gate!
Fortunately I was able to coast down to my house and stopped within extension cable distance! I’ve run out of gas a few times over the last couple of decades, but this was the first time I’ve ever run out of electricity in more than four years of driving electric cars – and it was kind-of intentional. 🙂
To see this fascinating test of my old car’s limitations, click on the video below:
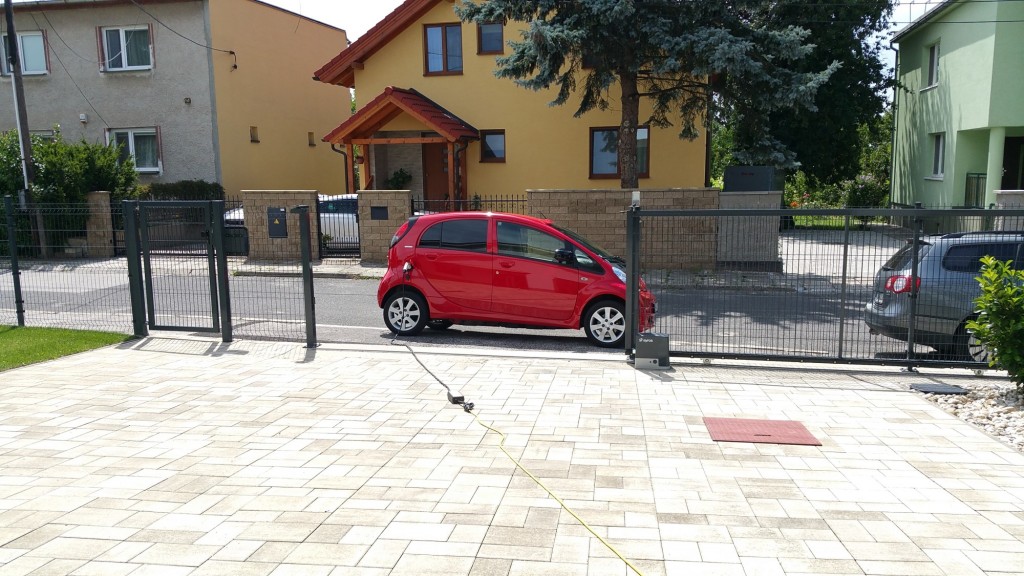
Installing a kitchen in my electric car
I love going camping, but I don’t love leaving my creature comforts behind. So, to solve this problem, I’ll be installing a kitchen in my electric car!
The problem is… where to put it.
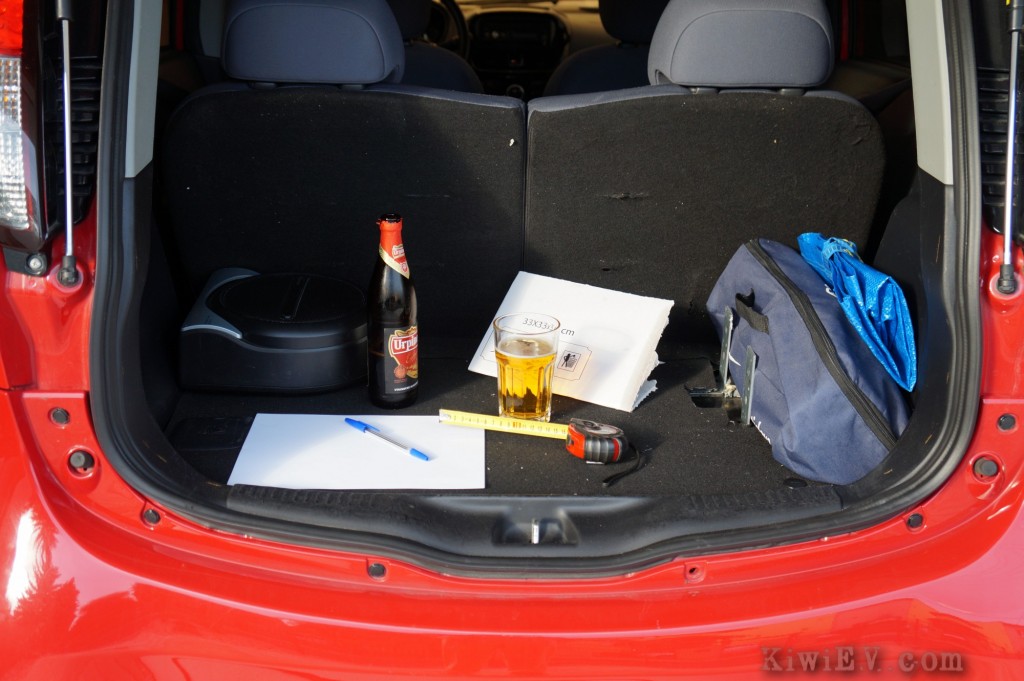
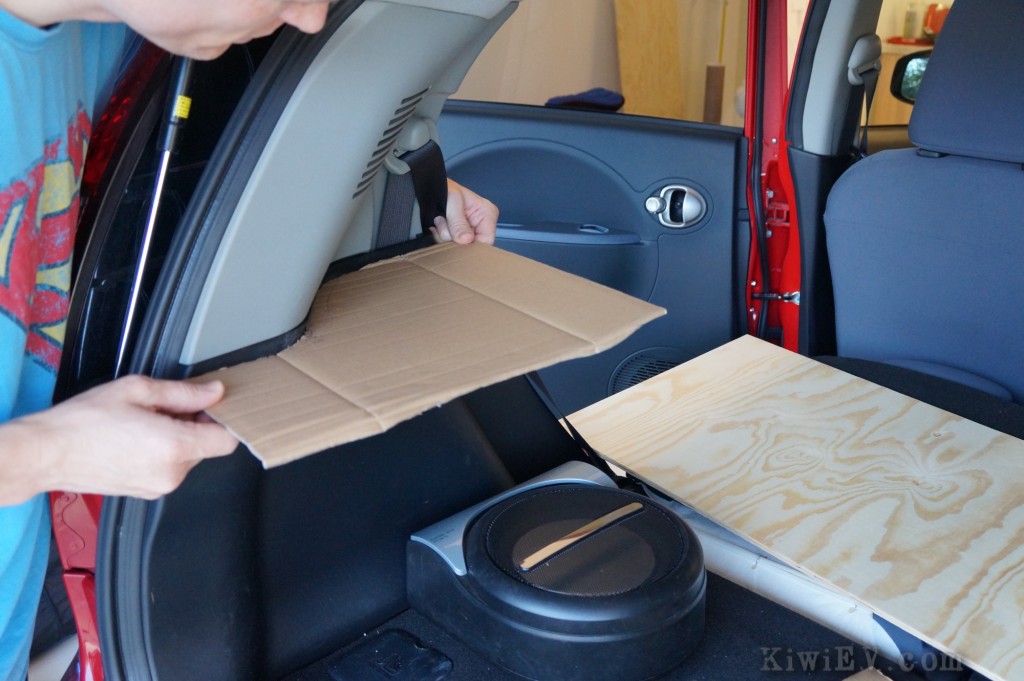
I realised that if I’m going to do this, I need to do this properly, with all the creature comforts of home. The problem is… the size of the boot in the Peugeot iOn electric car is – there’s no other word for it – tiny. The car’s inverter and electric motor are right under the car’s rear luggage area which results in a fairly high floor, and a cramped space.
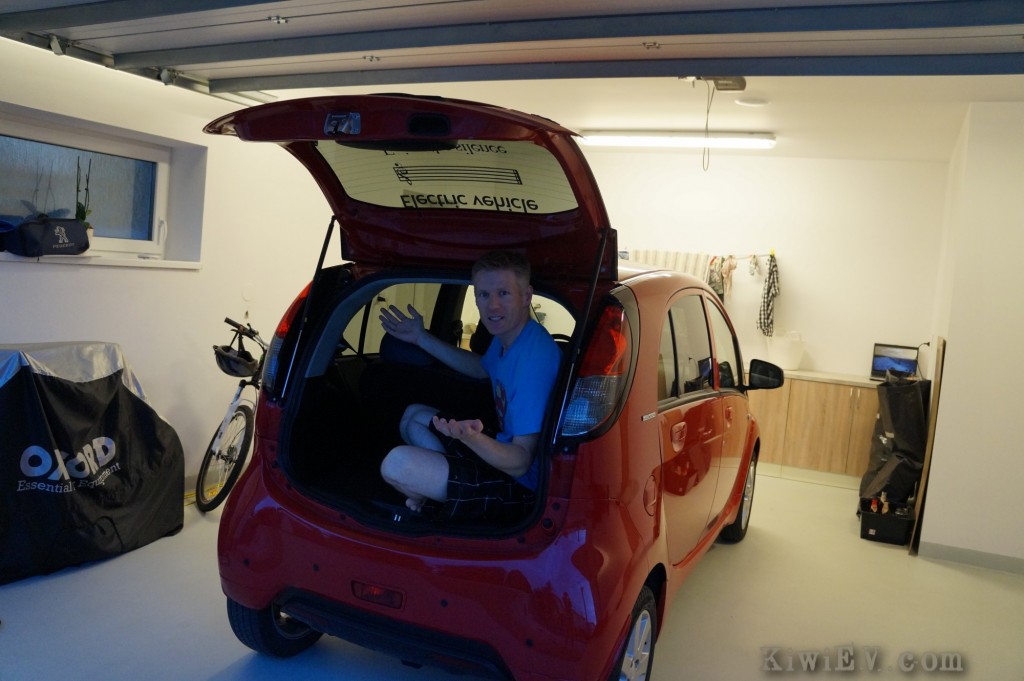
See? I wasn’t kidding. That rear luggage space is microscopic. How on earth will I fit a cooker, refrigerator, sink, faucet, fresh water and waste water tanks in there? Most importantly, how will I do it tidily?
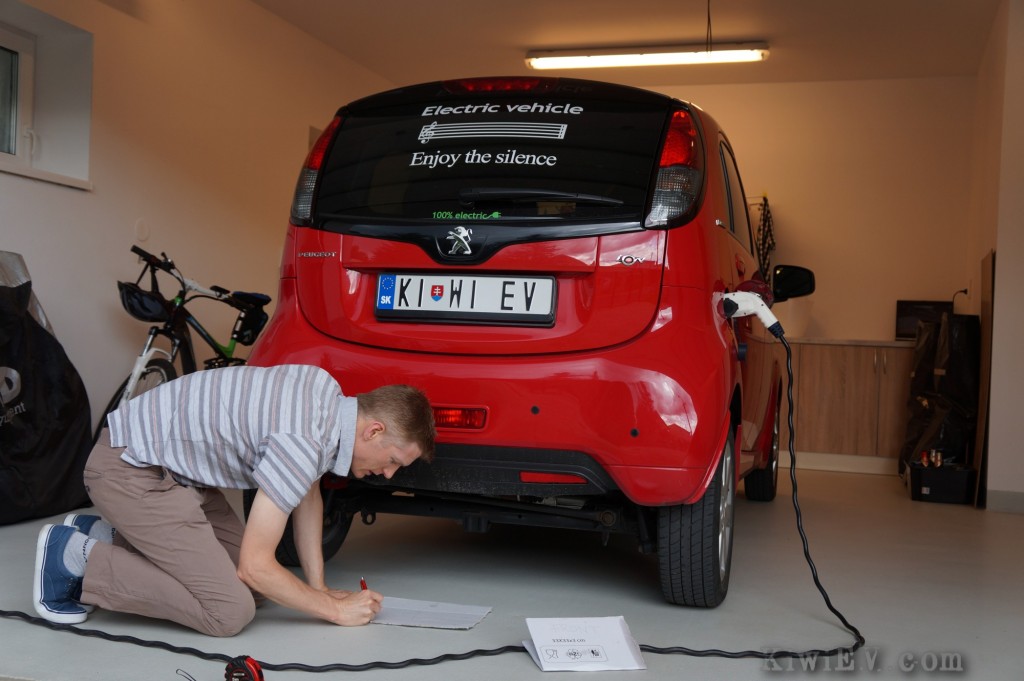
Undeterred by these challenges, I cued the A Team music and got busy in the garage, measuring and juggling, in order to make one of the smallest usable kitchens in the world.
As I mentioned, I wanted to have a fully-functional kitchen because, as embarrassing as it is to admit it, I’m a city boy who’s not a big fan of ‘camping food’: That means I don’t want to find myself crouching on the dirt, reheating baked beans on dry bread. No thank you.
I’d rather have lovingly prepared meals of freshly steamed vegetables and ravioli with grated parmesan and stewed tomato paste with capers and olives, followed by pan-fried crepes with fruit compote & cream for dessert – along with freshly brewed coffee, of course. Now, the problem with camping – and I mean real camping – is that these sorts of culinary delights are left at home.
Well, not if I get my way…
Once I’d measured out the dimensions, I started tracing the contours of the car’s boot. I’ll be honest: this was a pain in the butt because the boot (or trunk, if you’re a yank) in the Peugeot iOn (actually a Mitsubishi iMiEV in drag) is smaller than an IKEA ice cream. But, I had to get started because the first of my new toys had already arrived!
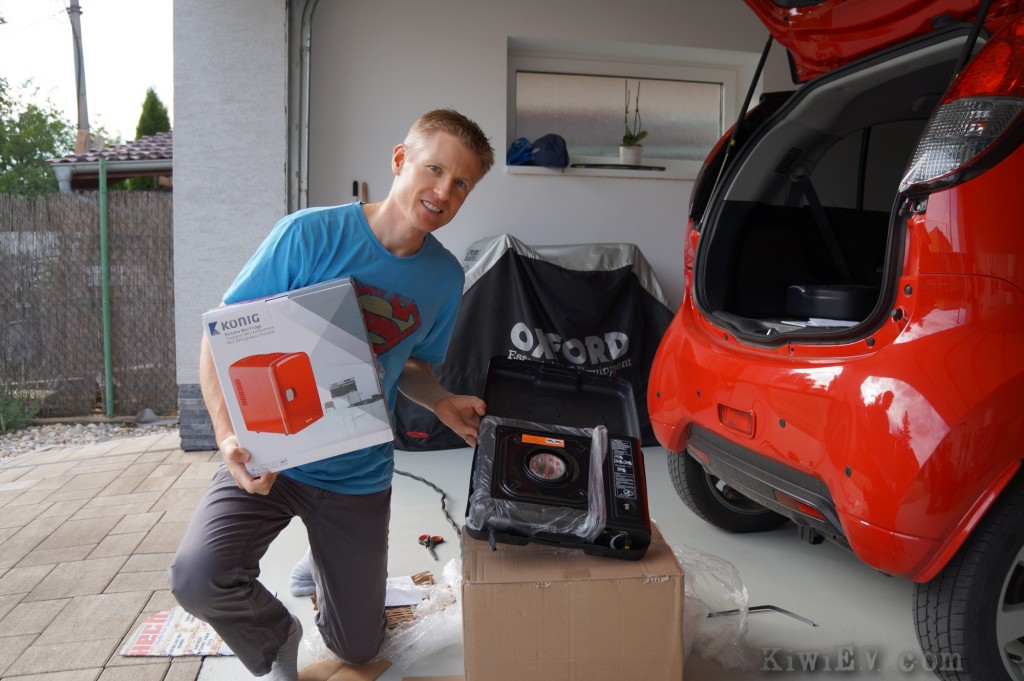
My tiny 12 volt fridge and my portable butane gas cooker were delivered by courier. This was good, because I needed them to work out their exact dimensions and how they’d fit into the car.
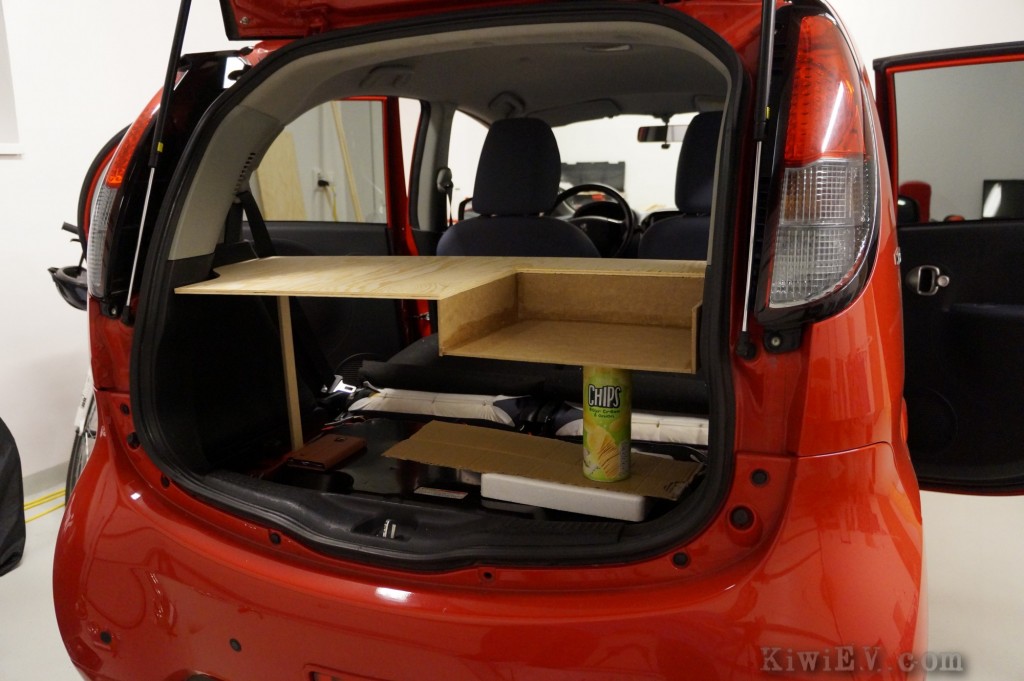
Because I wanted the car kitchen to be as close to a house kitchen as possible, I lowered the level of the gas cooker to be flush with the bench top. It was partially for aesthetics, but also for safety as I’m somewhat terrified of having open flames in the car, which is a rational, healthy fear. This means I paid a lot of attention to where the heat from the flames would be in relation to the car’s interior, and where I should position things during construction.
The result was the cooking area being lower and further away from the car’s ceiling than the rest of the kitchen area. Also, I ensured there was room for my fire extinguisher to always be nearby, though basic caution and common sense should mean I’d never need it. Anyway, enough of the doom & gloom; it’s time to install stuff!
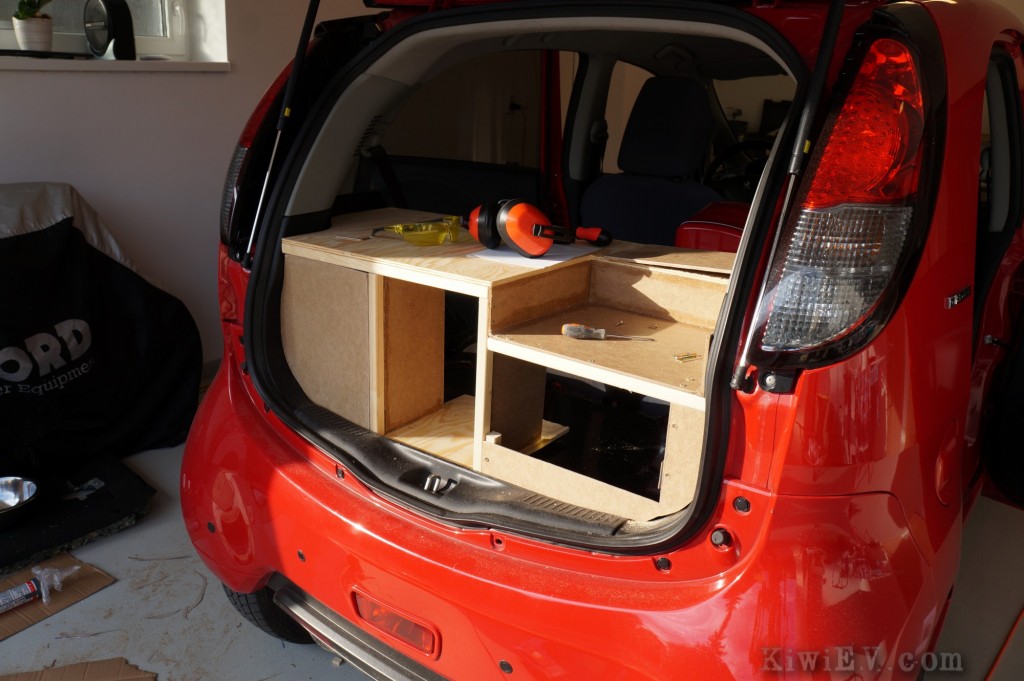
It’s actually coming along really nicely! Now, at this point I must explain that I am by no means a craftsman. None of the joinery I’ve created is perfect, but the entire structure is holding together strongly and it looks fairly acceptable (from a distance, at least).
I’ve been busy cutting out and installing the cabinetry, and in that time I’ve learned that hinges are the tool of the Devil. My god, hinges are an utter nightmare, created by the spawn of Satan. I must have spent two hours lying on the ground, trying desperately to align the damn hinges. If I never have to install a hinge again it’ll be too soon.
With the cabinetry mostly installed, I began giving the wooden frame a coat of paint. I did this to help me see where any imperfections may be, but also to give the final vinyl laminate coating something to stick to.
The thing is, I want the final bench top to look just like a real kitchen, so I bought a few metres of adhesive wood-grain laminate to adhere to the car-kitchen counter top, so that it’ll look just like it came from a modern home.
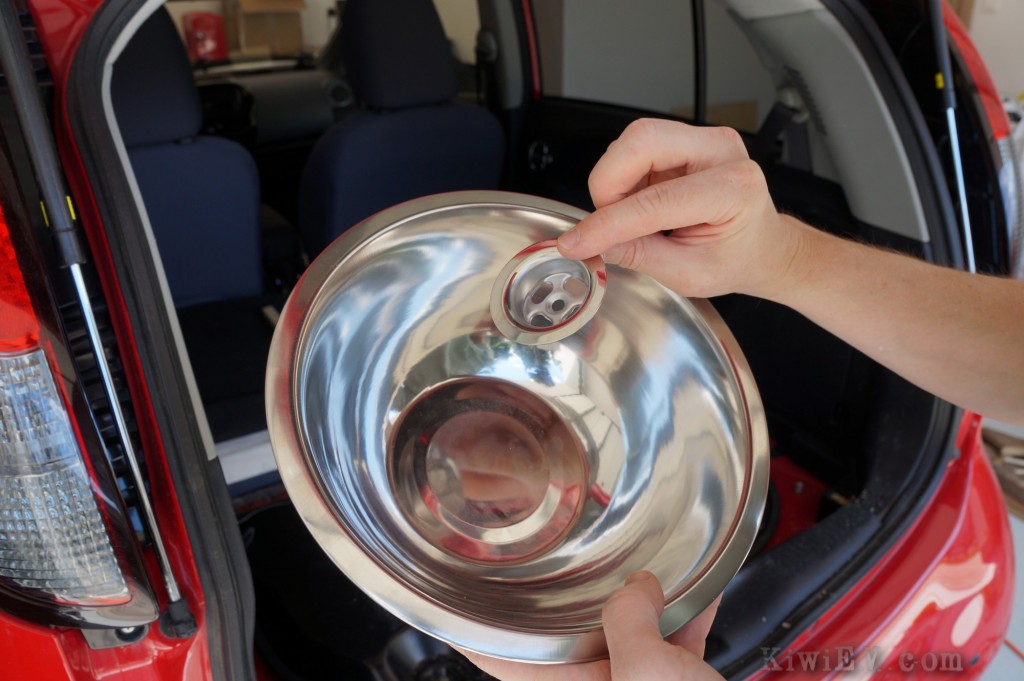
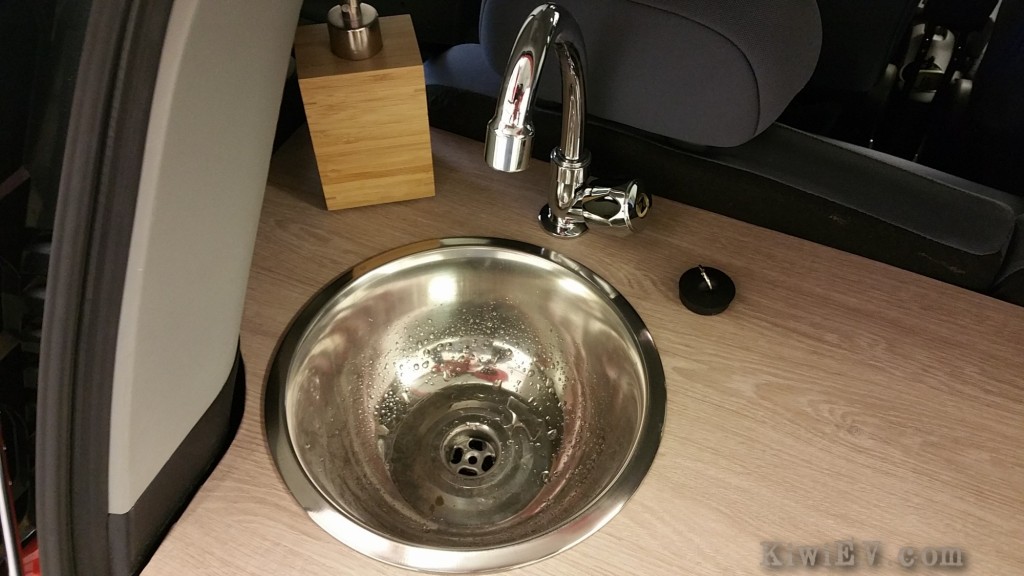
But first I need to install a sink! I bought a $3 stainless steel bowl from the supermarket and a $1 plug hole from the hardware store and joined them together with a combination of drilling and rubber sealant, as you’ll see in the video at the bottom of the page. Then, I placed everything outside in the sun to speed up the drying process.
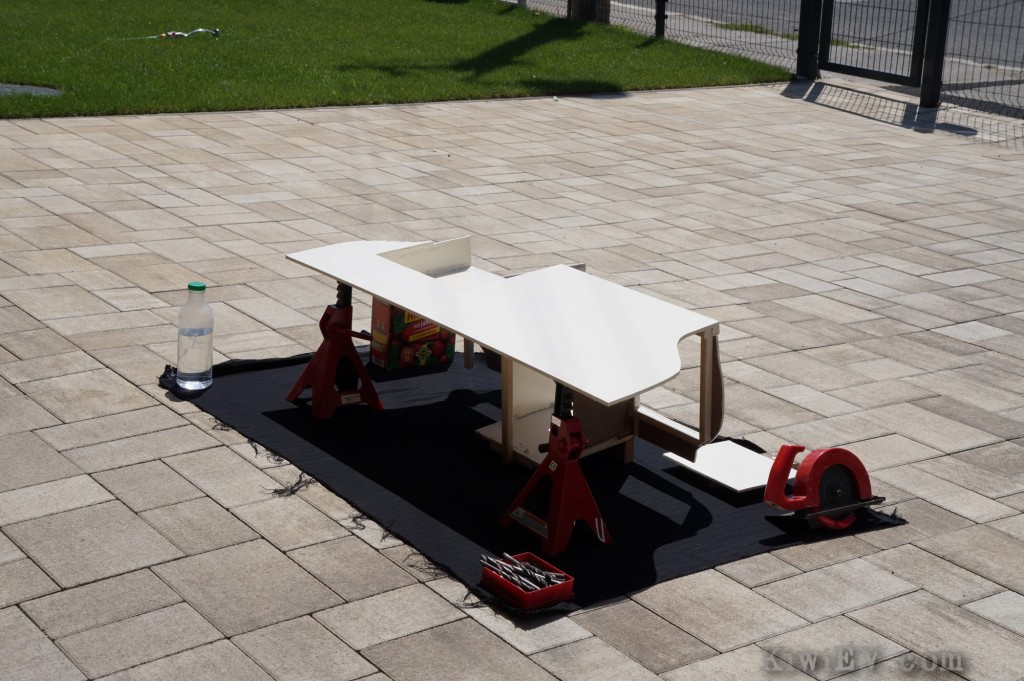
Before cutting the hole for the sink, I carried everything out of the garage and placed it on the paving stones in the hot summer sun. In the meantime, I went around the structure with a tube of silicone rubber sealant, giving it a little extra strength and flexibility.
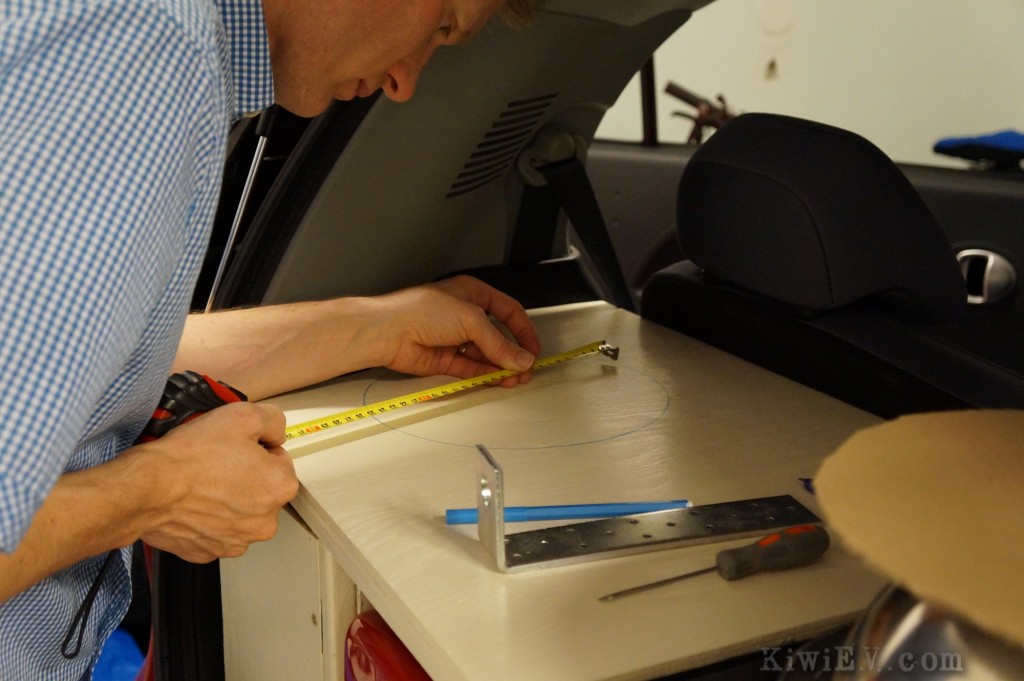
With the paint dry, it was time to measure out and install the bowl -uh, I mean the sink. This meant cutting out the right sized hole which allow the sink to fit to the left of the bench-top, while still giving me enough room between the sink and the gas cooker to cut vegetables and prepare food. Did I mention this car was small? 🙂
Unfortunately it was around this time that I caught my wife of ten years cheating. The kitchen project (and my life) ground to a halt for seven months while I gradually put my life back together. Recently, however, I’ve met someone new and wonderful. She has spurred me back into life, literally and metaphorically. Hence, I’m finishing what I started, with new enthusiasm! So, onward with the car kitchen!
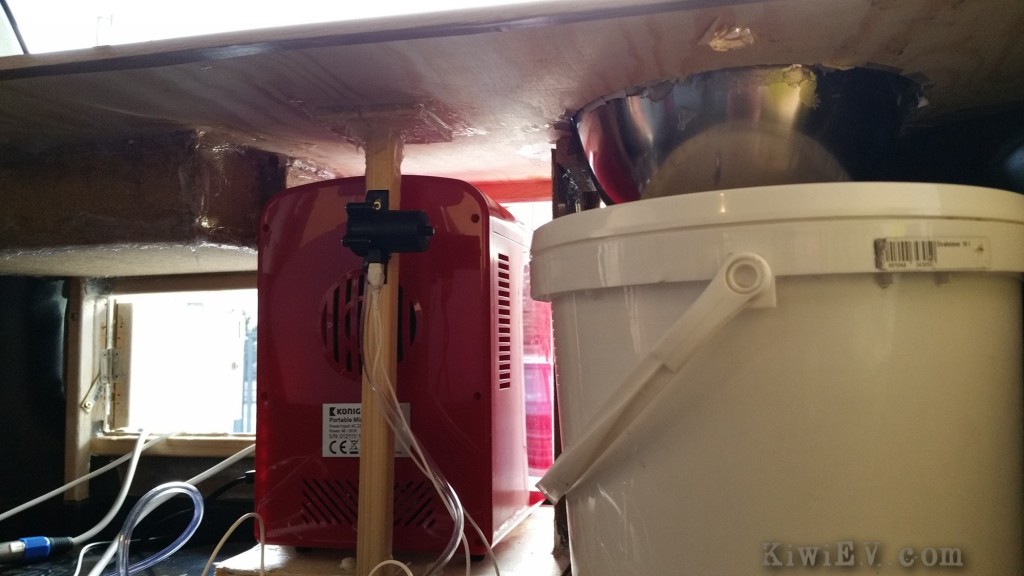
I installed the kitchen sink and a wood-grain vinyl laminate on top of the kitchen counter to give it that real “home” look and feel. I also installed the mini refrigerator and stove and wastewater container, as you can see above. One of the trickier parts was connecting running water to the kitchen. For this, I just used a 12 volt windshield washer motor and a 5 litre container of water, connected to a cheap tap I bought off eBay. The result however looks spectacular:
Having running water just makes the whole thing seem more real. It’s just brilliant. Running water takes the project from a fun talking point to an actual useful setup. I can’t wait to try it out this season, either for camping in luxury or perhaps just making a cup of tea while waiting for the electric car to recharge.
At the risk of tooting my own horn, that looks pretty damn cool! The cooker is ready to cook, the sink is ready to flow, and the fridge is really to chill. Also, being an electric car I don’t have to worry about the fridge draining the battery. With the car “running”, I reckon I could leave the fridge going for a week or two before needing to recharge the main battery!
I’m really thrilled that the kitchen is complete and working well. It’s tiny, of course, but considering the dimensions I had to work with, it was never going to be massive. The running water is a really nice touch, though. 🙂
As always, there is a video of the creation from start to finish below. I hope you enjoy it, and if you do, please feel free to share this page with your friends. In the meantime, I can’t wait for summer!
Electric cars, electric bikes, and racing the train!
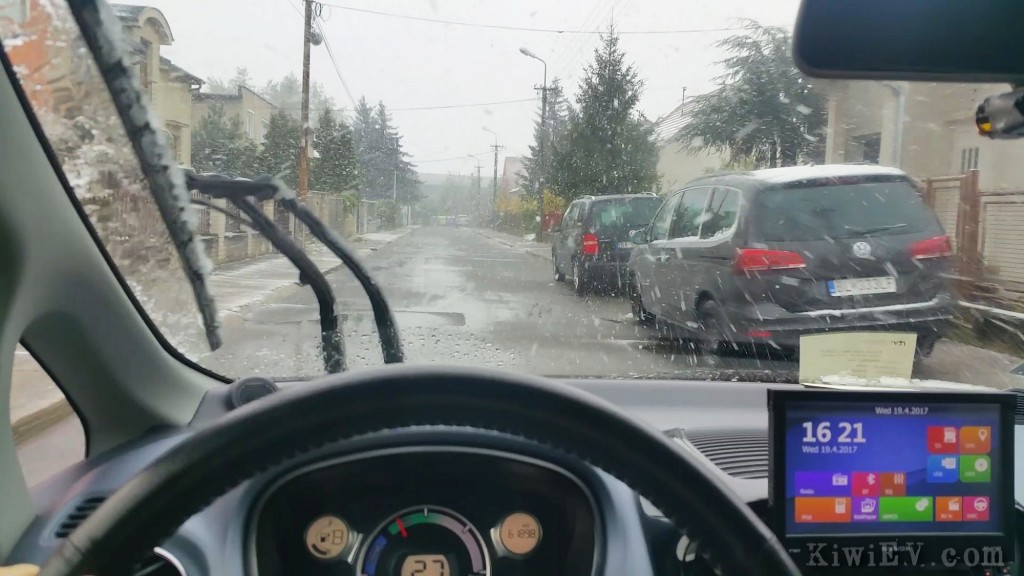
Summer’s back! This means changing back to summer tyres, removing the dieseasel air heater, and enjoying the fact that winter is long gone. Ahhh, longer days, more electric car range, and enjoying the great outdoors. All those things would be possible, if only winter hadn’t returned with a dumping of snow two weeks later…
Fortunately it was short-lived, and summer soon returned. This meant finally getting outdoors, and what better way to get outdoors than with an electric hybrid bicycle?
To be honest, I don’t use the electric mode often, because that sort-of defeats the point of biking around, but sometimes you come across those hills that just don’t end and the fun starts to drain away. That’s when I press the power button a couple of times, giving me a little power boost. Then a smile races across my face as all the agony vanishes and the joy of biking returns.
Seriously, if you’re thinking of buying a hybrid bike, do it! They’re fantastic. It’s cycling, without the ugly bits!
Now, on to the most interesting thing from this particular chapter in Kiwi EV history…
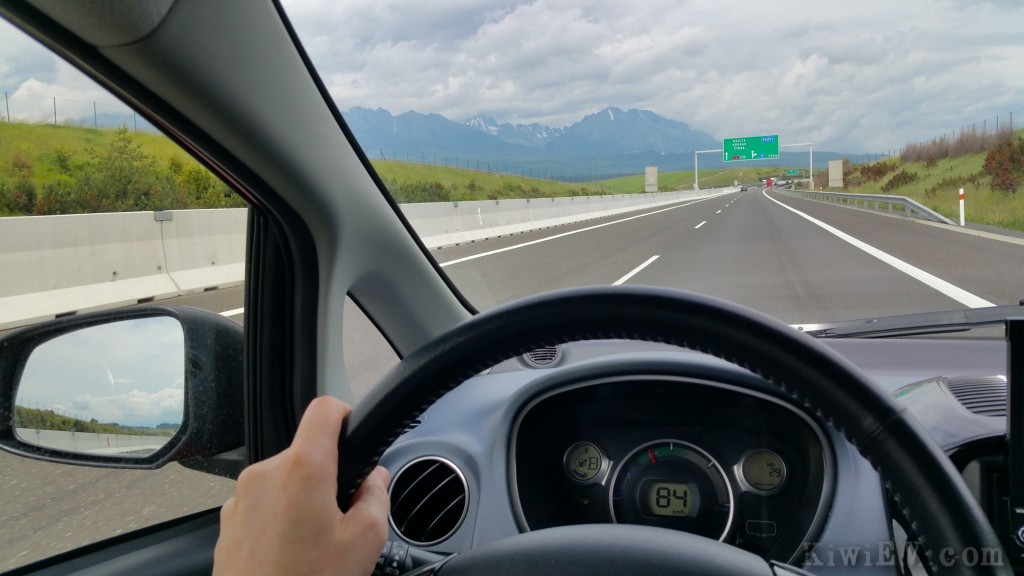
As you’ll hear me say in the entertaining video at the bottom of this page, electric car long distance road trips are so over done. Everyone (including me) has done them to the point of boredom. Enough with the road trips, already.
But what do we put in their place? How do I keep you, the discerning viewer, entertained in the hope that you’ll share my videos? Well, I came up with a brilliant idea: a race across the country.
For the 480 kilometre (300 mile) journey, I’ll be taking my zippy little electric city car while Veronika will be taking an express train! The clincher? The loser has to buy dinner!
With a three hour time advantage, I jumped behind the wheel of my little electric car and took off, racing across the country while Veronika could only sit and wait for the train.
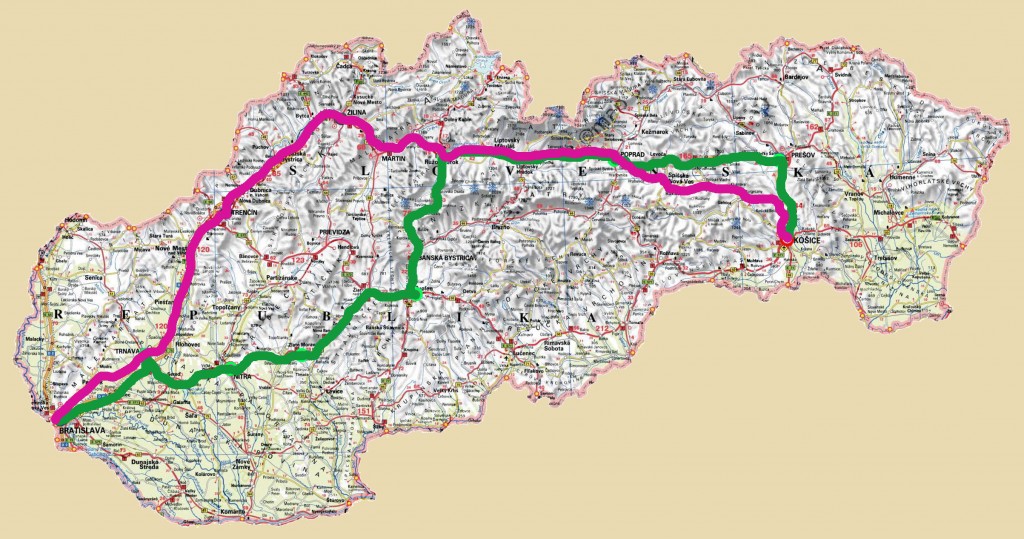
For the first half of the race, I would be cutting across the centre of the country, while Veronika would be taking an InterCity express train up and around the country. We planned to make it to Košice for dinner, sometime around 6pm.
The race was mine to win, providing nothing went wrong or no chargers were blocked or out of order. In fact, I’d already made it to Zvolen in central Slovakia before Veronika had even made it onto the first train, which would take her to Bratislava Main Station. From there, she would be catching up as she didn’t need to stop and recharge, but I still had a 200 kilometre (124 mile) lead at this point!
Despite the lead, it would be easy for Veronika to catch up. This is because my electric car is only designed to travel within the city. It has a small 16 kWh battery pack and it’s not very aerodynamic at high speed.
Now I have a bold claim: in the city, my car is king. I would argue it’s better than any Tesla model in that area due to its nimble, narrow size and low power consumption. I can park anywhere in the city and squeeze through gaps in traffic that other cars struggle with. It’s unbeatable in the concrete jungle.
But on the highways a Tesla, or any long-range electric car, eats it for breakfast. It’s simply not designed for long distance driving. This does make such journeys more fun, however! So, as I raced along the top of the country, Veronika began catching up. At this point I still had a massive lead. Although just before my final quick-charge in the eastern city of Prešov, tragedy struck…
I found myself stuck in incredibly thick traffic in Prešov for 40 minutes which meant I couldn’t get to the charger. This, coupled with a failed shortcut to circumnavigate the lines of cars, then missing a crucial off-ramp meant I had no choice but to attempt the journey all the way to Košice without that desperately needed quick charge.
With just 14 kilometres to go until the restaurant, I was forced to stop and refill for 30 minutes at a gas station. It was either that or run out on the highway. With Veronika’s train right on my tail, I grabbed as much power as I could in the short time available and carried on my way to Košice city…
We made it to beautiful Košice in time for dinner… but who won? Did the traffic and slow charging cost me the race, or was Veronika doomed to fail because of her having to wait three hours for her train to leave?
Well, this turned out to be one of the most exciting and turbulent Kiwi EV video adventures yet, so enjoy it by pressing play on the video below.
Just a friendly reminder: I make no money from these videos; they’re purely to inform and entertain. All I ask, is that if you think your friends might enjoy this video, please share it with them. Thank you! 🙂
Battery costs, stickers, and a winter road trip.
“You’ll have to replace your battery every three years in an electric car,” screamed the naysayers. “The batteries will be thrown in a landfill,” they yelled, pretending to care about the environment in an attempt help their pro-coal, pro-oil arguments.
Fast forward a few years and we’re all laughing at how crazy those anti-electric car guys sounded, now that electric cars have won. But the thing is, we still don’t know how long electric car batteries should really last.
New electric cars like the Hyundai Ioniq have “Lifetime” guarantees on their battery packs (covering battery failure, not normal battery degradation) but my 2011 Peugeot Ion is quite a bit older, with an older battery chemistry.
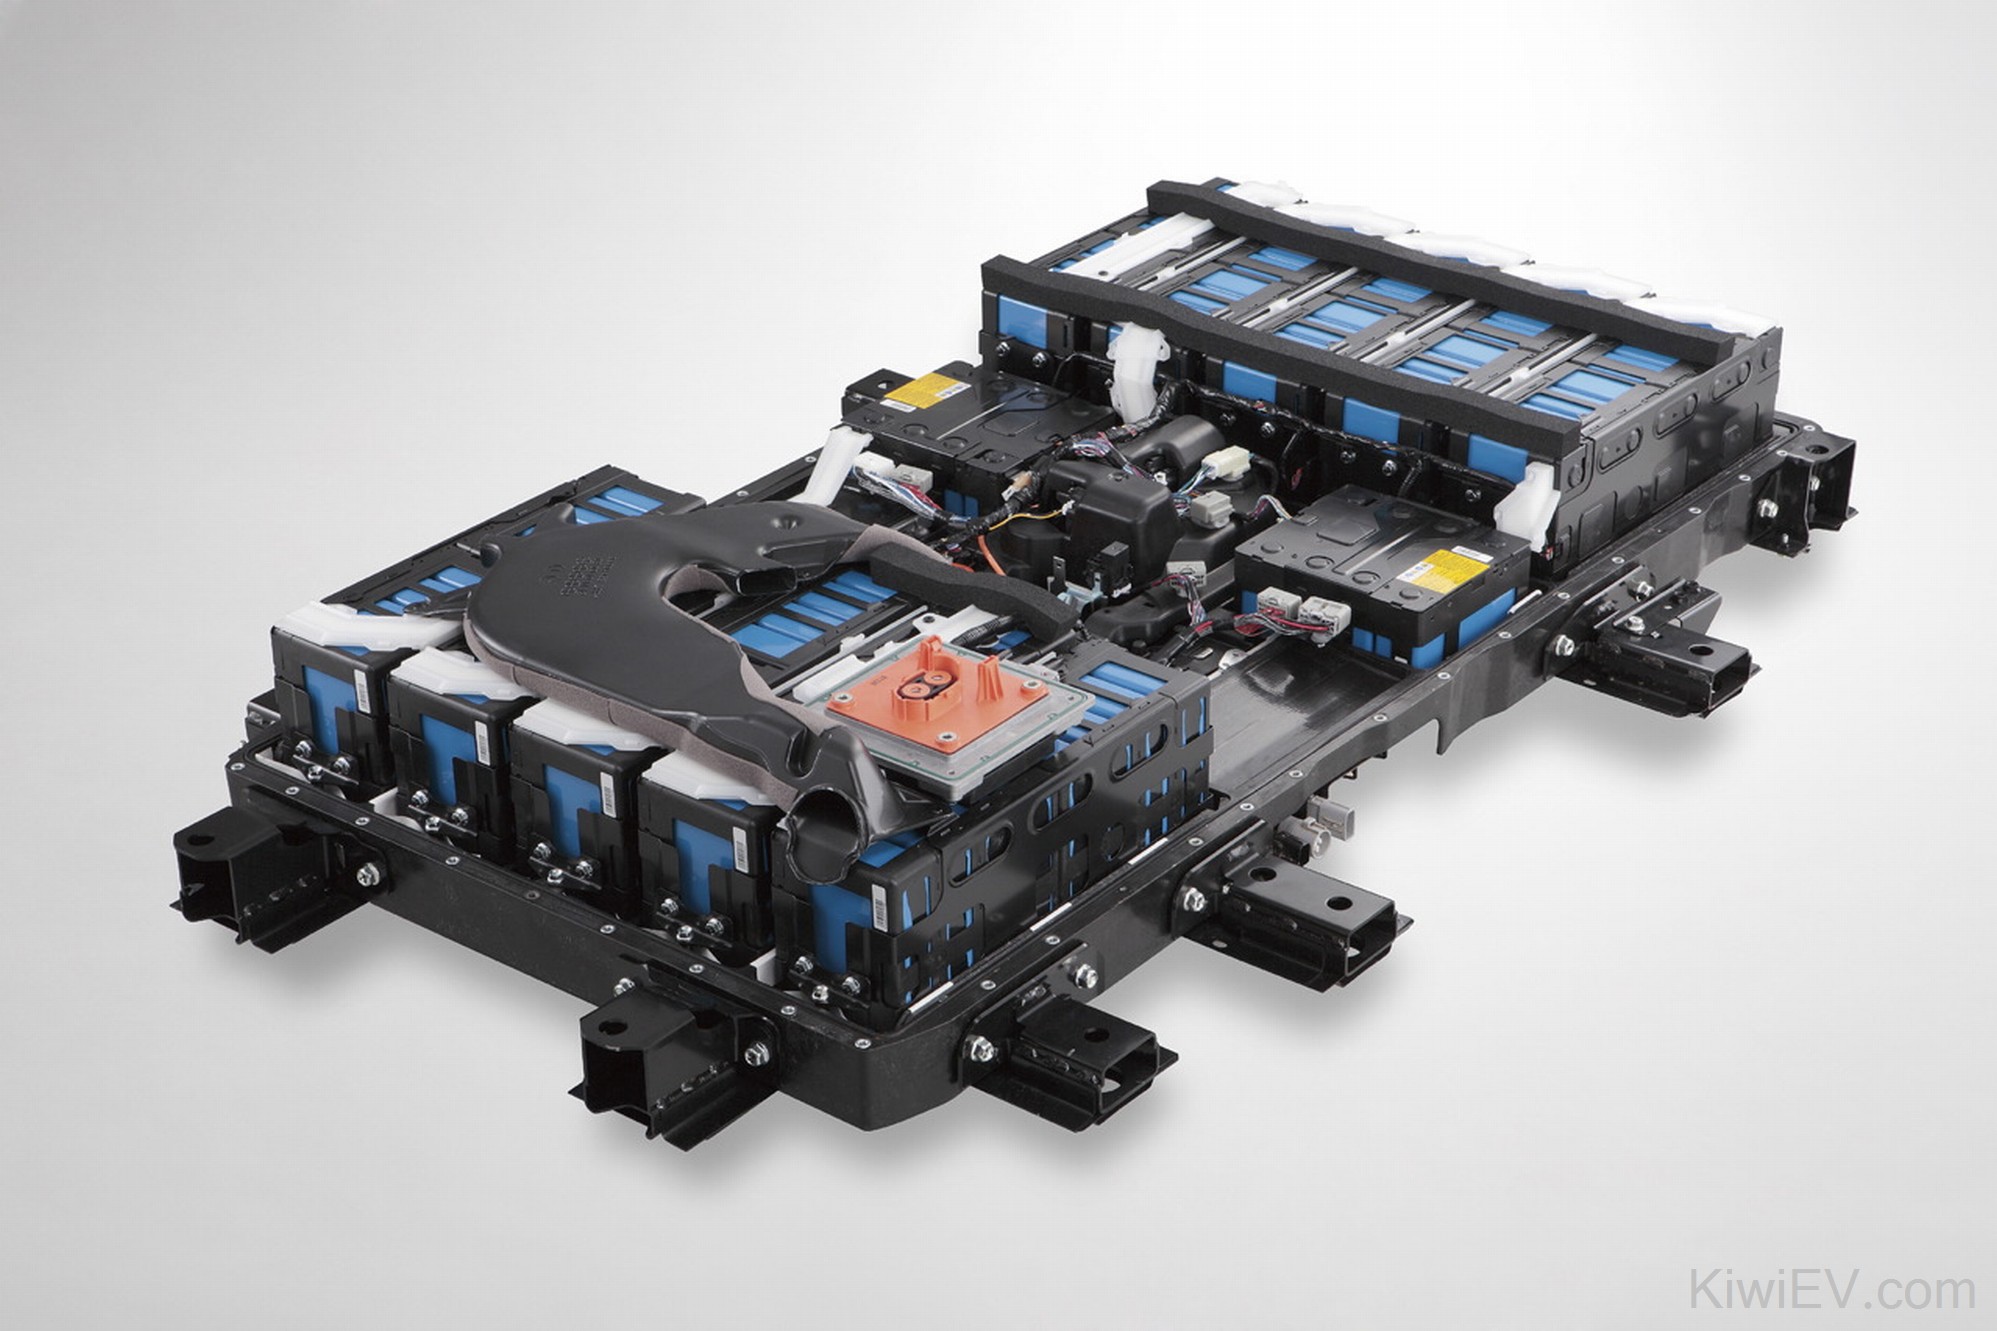
When new, my electric car was given a 5 year/50 000 km battery warranty. Obviously that has expired now, which means if I have any battery problems, I’m on my own. This made me wonder: how much is a replacement battery pack for a Mitsubishi iMiEV / Peugeot iOn / Citreon C-Zero?
My 2011 car cost me €7000 back in the summer of 2015. For a modern, nimble electric car with all the options, that was a bargain price. Actually, it’s still a good price. But there’s always been the curious question in the back of my mind: how much does a replacement battery pack really cost?
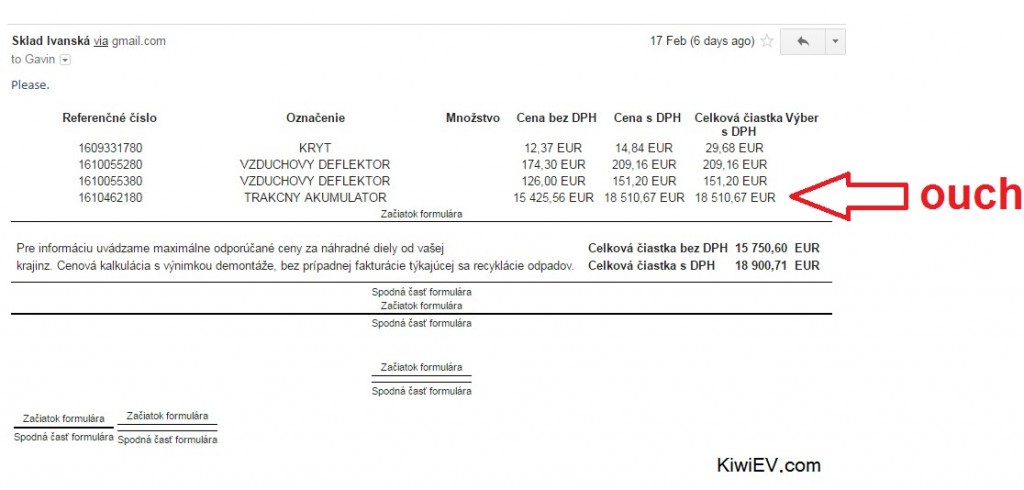
To find out, I emailed my local Peugeot dealer. Now, keep in mind they quoted me €600 for a replacement carpet, so I was expecting the worst!
Naturally, when the email came back with the answer, I held my breath…
Crikey. That’s ridiculous. Peugeot say that a replacement battery pack for my electric car would cost me €18,510 ($19,577 US). A massive sum for a small car. Of course there are other options, such as trying other dealers or buying straight from Mitsubishi, or buying a used/wrecked car and taking out its battery, so I’m not too worried.
But this ordeal led me to my next question: what is the real condition of my electric car’s battery?
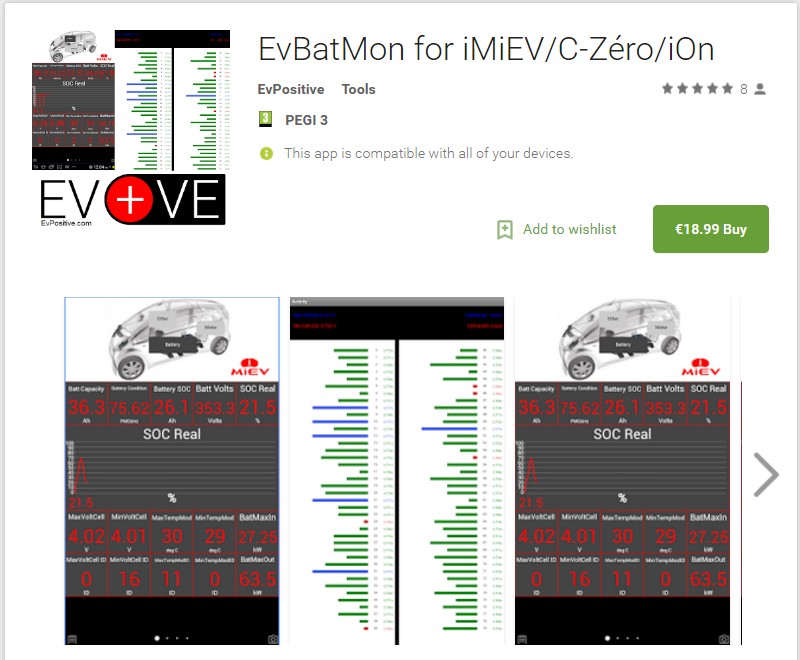
The best way to find this out is to download the mobile phone application EVBattMon and connect it to your car’s OBDII socket under the dashboard.
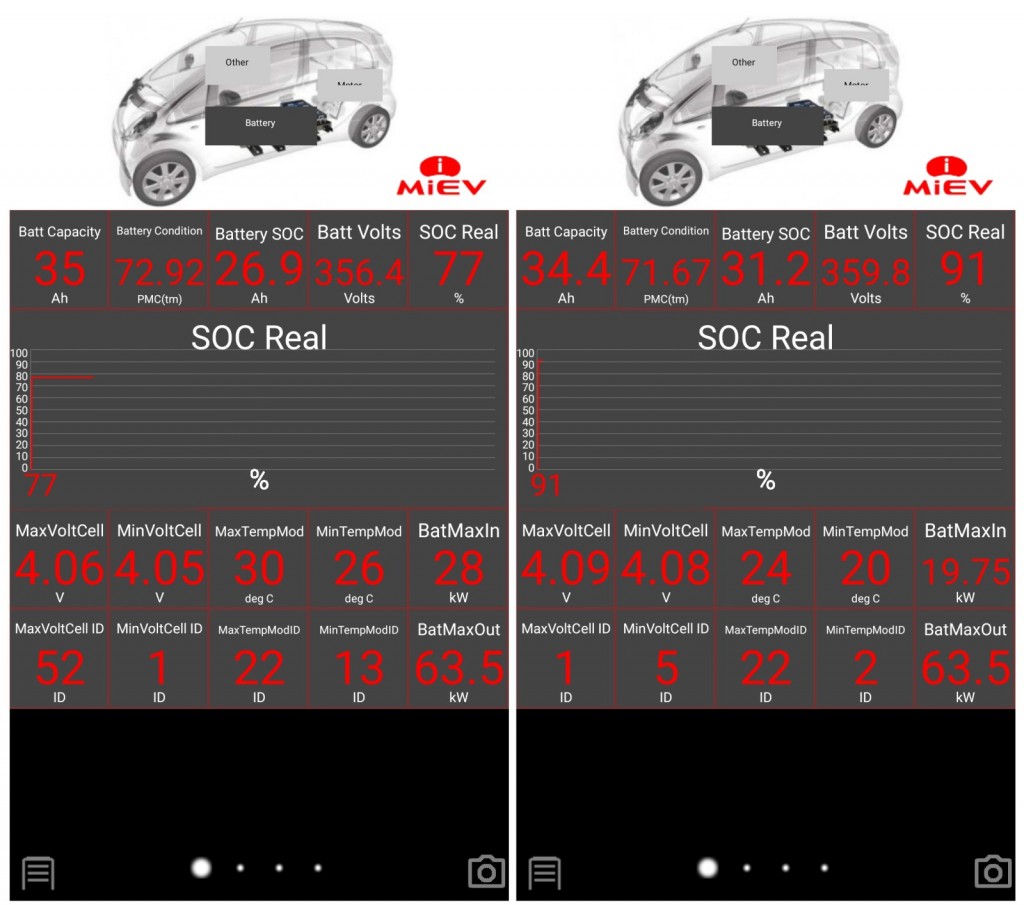
In the above picture there are two screenshots of the battery. The left picture is the condition of my battery in August 2016. On the right is now, February 2017. If you look at the Amp hours (Ah) rating of the pack (top left) of each screenshot, you can see the real condition of the battery.
When new, the battery pack would have shown somewhere around 46 Ah on the application. In those five and a half years, it’s therefore lost about a fifth of it’s capacity. In six months you can actually see the battery has reduced a tiny fraction, comparing the two charts.
Personally I haven’t noticed any loss of battery capacity because I received the car when it already four years old. Also, its range is still much more than what I need for my daily driving, so I have no range anxiety in my daily life, and thanks to the installation of a diesel heater, no “heat anxiety” either!
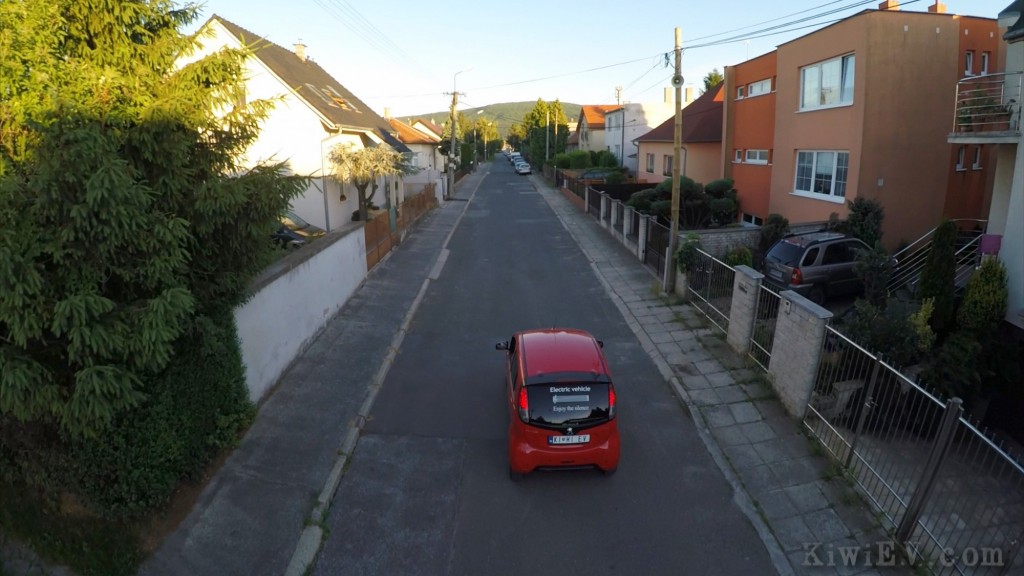
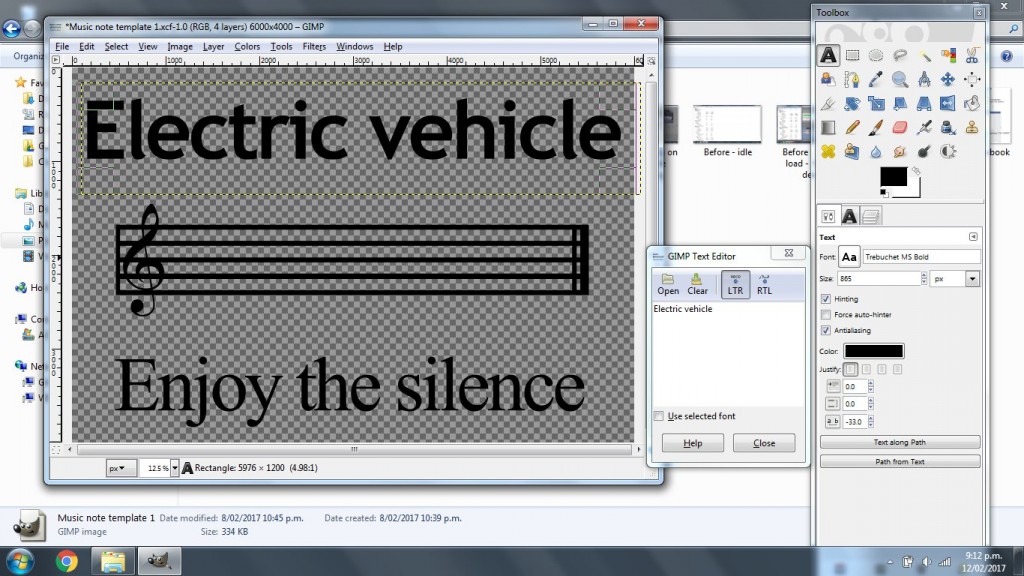
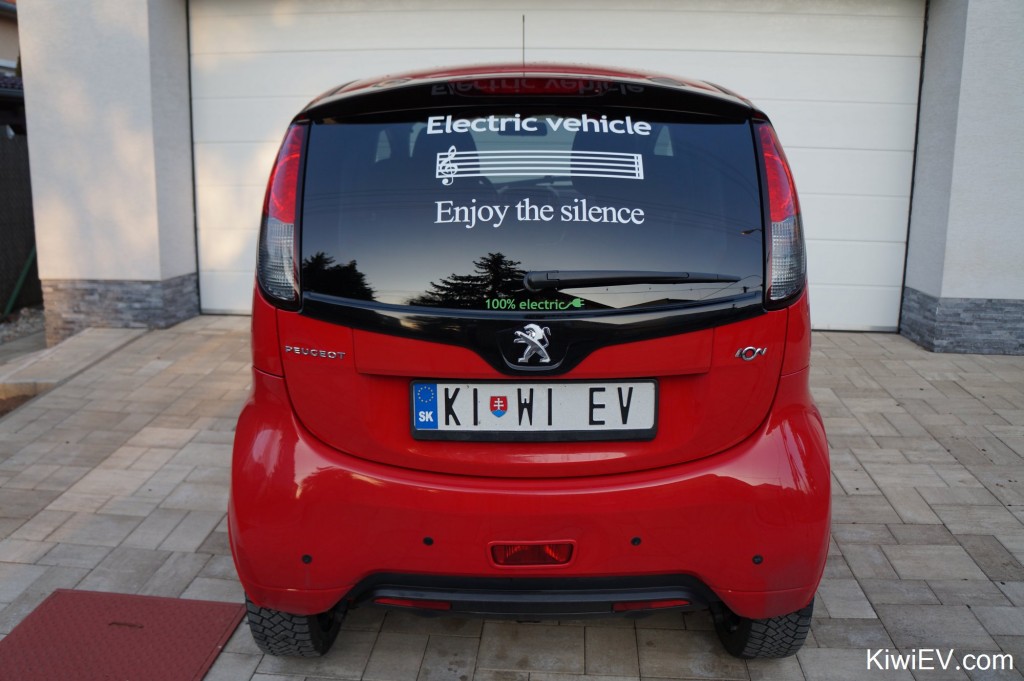
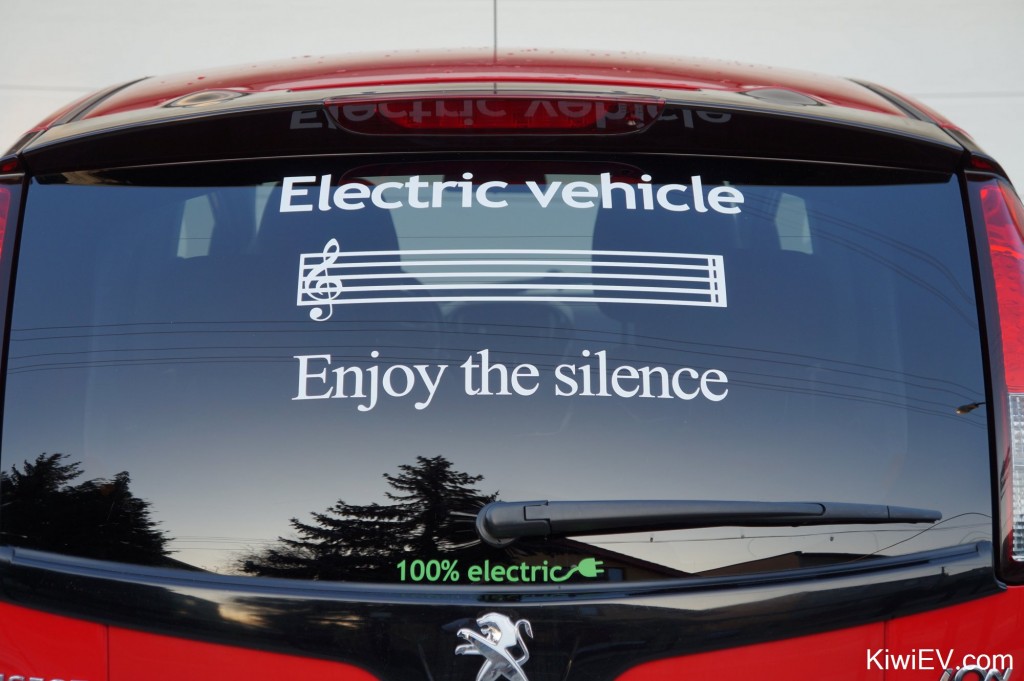
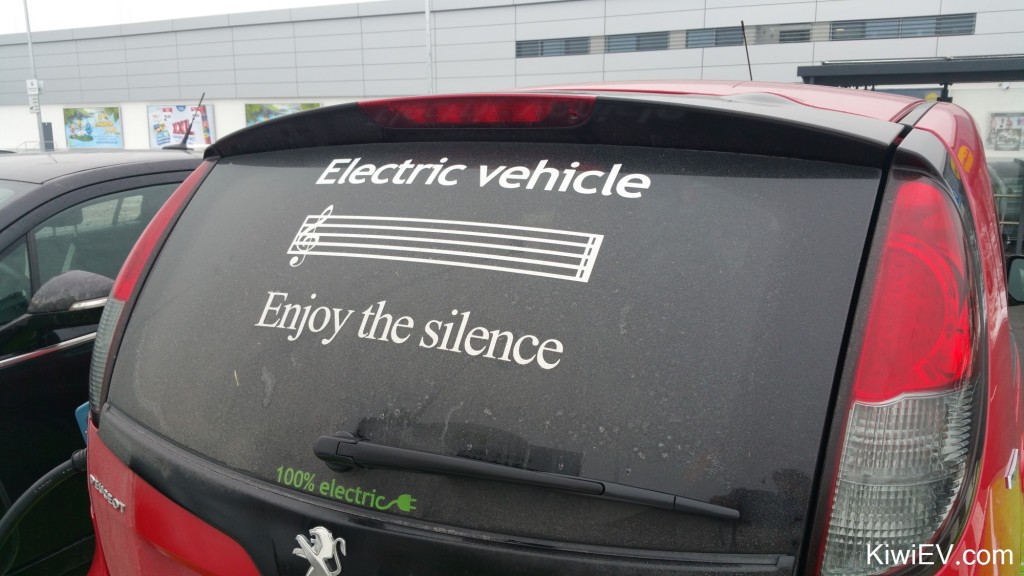
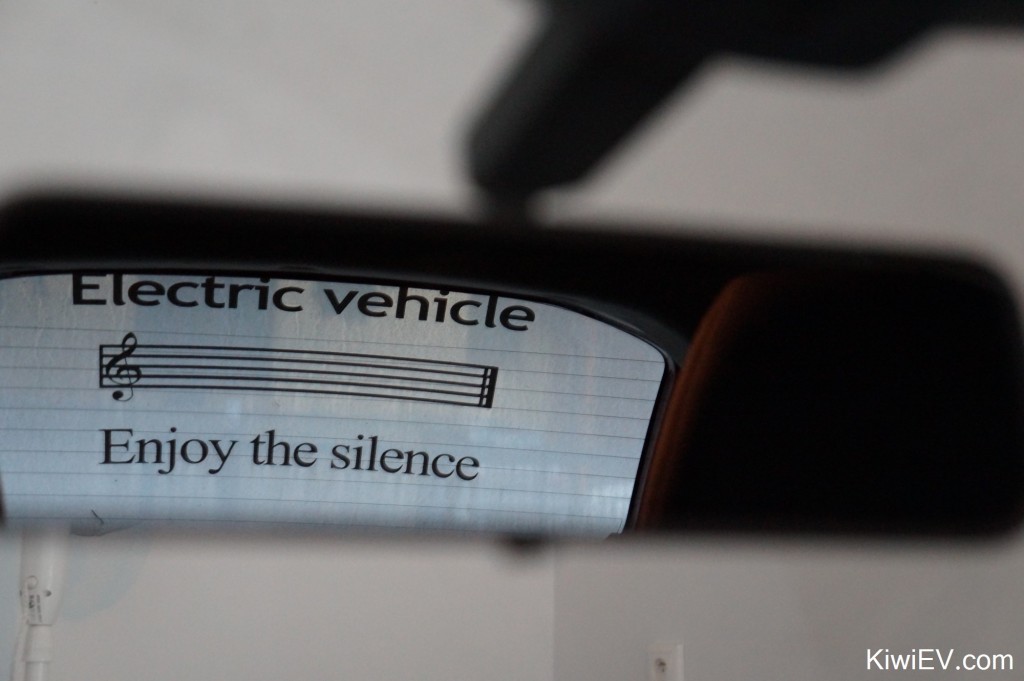
Despite its age, my electric car is doing just fine. It’s just a better form of transport in any city. It’s clean, cheap, and in our noisy world, wonderfully quiet. And this got me thinking of a cool new design for a rear window sticker, saying Electric vehicle – Enjoy the silence. 🙂
So I got busy creating it on my computer and sent it to my trusty screen-printer in the city to be made into a self-adhesive vinyl cut-out. Less than a day later, it was ready to pick up and chuck on the car!
I don’t like blowing my own trumpet, but that looks freaking awesome.
If you want to download the sticker design, you can do so by right-clicking this picture below, and selecting “Save as”. Save it to your computer and then email it to a local print shop.
The image is a .png file which has a transparent background, so your local print shop will have no problem reproducing it.
Mine cost €6 each and I had two made, just in case I screwed one up during the application. I recommend you make two for this reason. The size of mine is 50 cm wide x 30 cm high (20 x 12 inches).
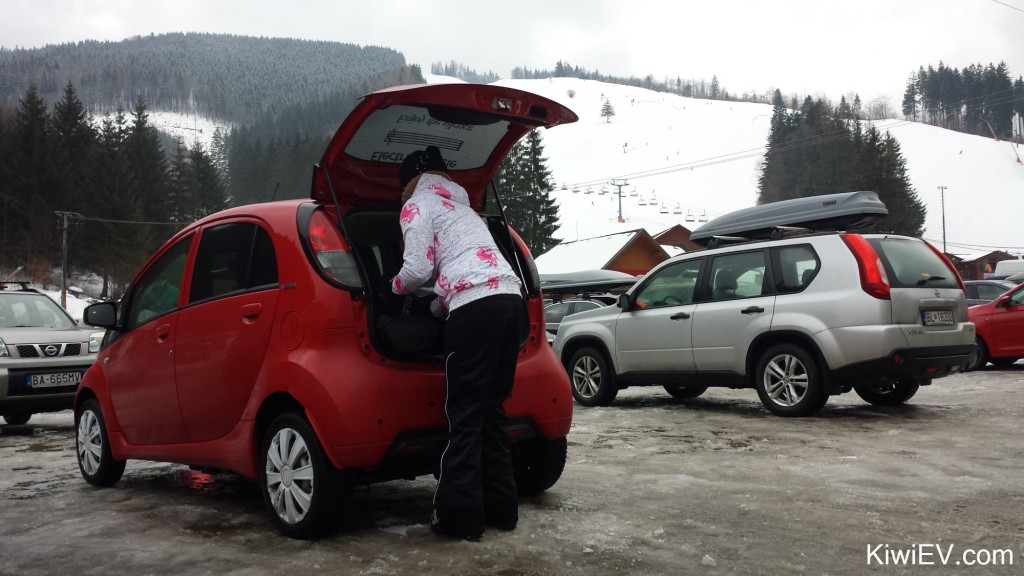
So, armed with my new window sticker, and knowing all too well about my battery’s natural degradation, we did the illogical thing: we jumped in the car for winter road trip and headed to the mountains.
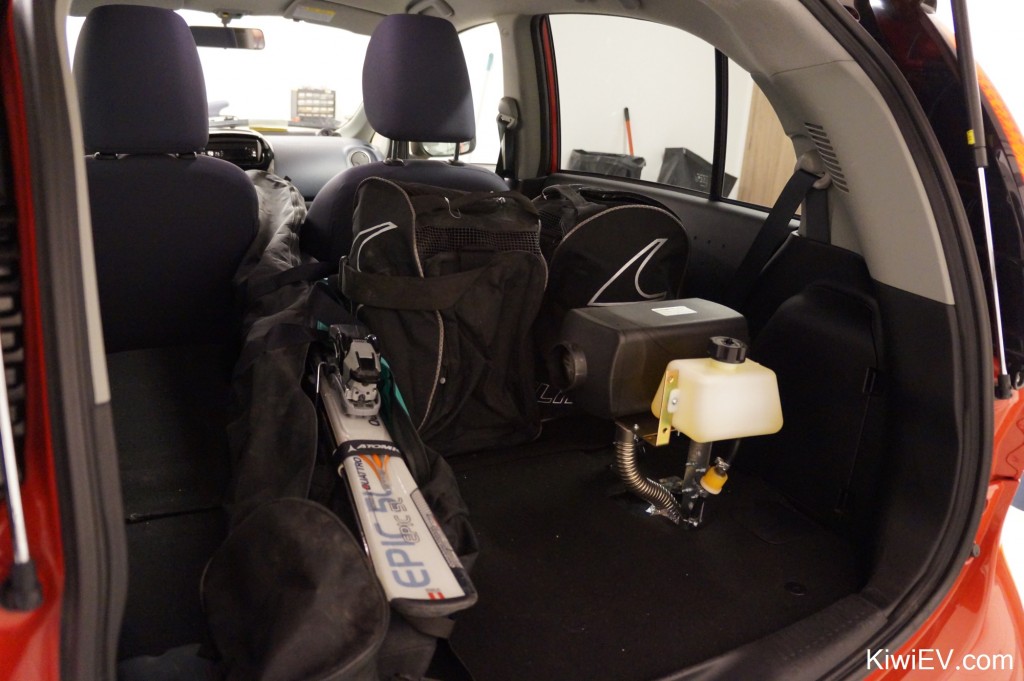
We loaded up the car with skis and hit the road early on a Saturday morning, departing at 5:30 AM. The reason we left so early is because we decided to play the day on “hard mode”. Getting to the ski field in the mid-morning, doing a day’s worth of skiing, then driving home in the evening.
This meant it was going to be a very long and tiring day, but we wanted to see if it was possible. With money as tight as ever, we also wanted to save money by not having to pay for accommodation!
Our first stop of many was in the city of Trnava, 69 kilometres (48 miles) away. Now, normally this stretch of highway leaves me with with a little bit of charge left in the battery, maybe 3 or 4 bars.
In winter however, we arrived to the charger with only 1 bar remaining. A troubling sign of things to come.
We recharged with coffee while the car recharged with electrons, all while the sun began to rise behind the grey clouds. Meanwhile, my little diesel heater was still running in the car, keeping it toasty for when we returned – all without making a dent in the car’s range.
The next stop in the journey was in the town of Piešťany. In summer we probably could have skipped this stop, but in winter I quickly learned that we had about 20% less range at our disposal.
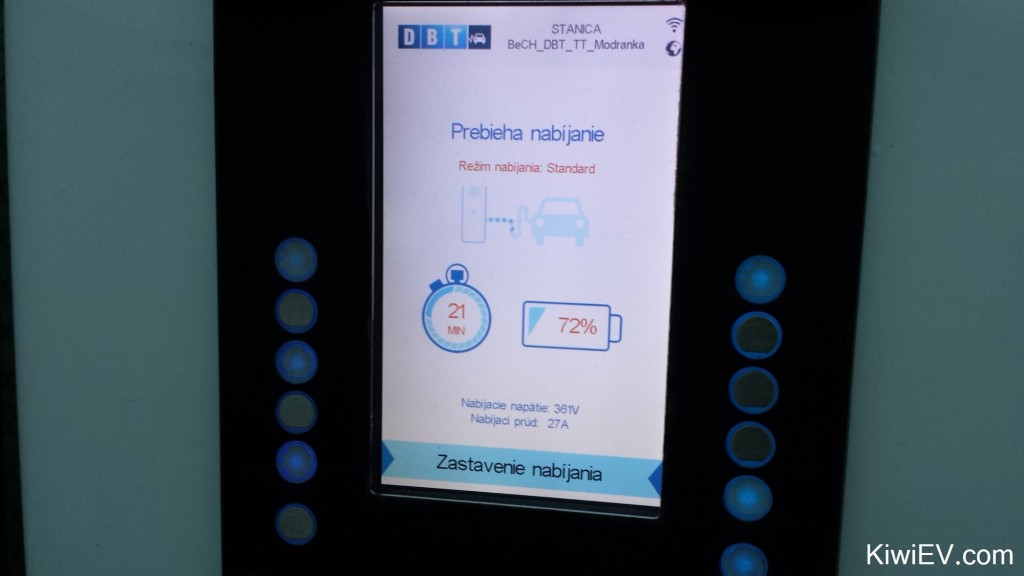
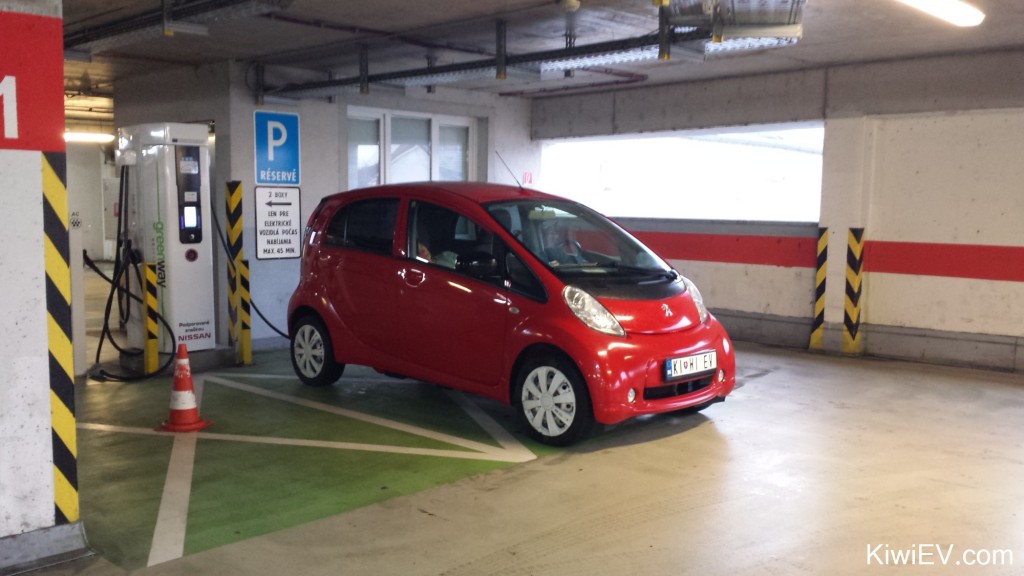
After stopping at a quick-charger located in a truck stop, we made use of a charger in a town called Nová Dubnica. Now, technically we didn’t need to stop here, but because this was really uncharted territory and because the charger was listed as free to use (and because I was curious) we pulled off the highway and hunted for the charger.
From here on, things were pretty routine. We drove, we recharged, we drove, we recharged, and after many, many hours we made it to Žilina, 218 kilometres (135 miles) from home.
Unfortunately… from this point on, things didn’t go so well. In fact, our GPS caused us another hour of delays, our diesel heater ran out of fuel and we grew more grey hair. The video at the bottom of the page gives you a better sense of what happened more than I could ever describe with words.
But… after (too) many hours we eventually climbed up the mountain road to the skifield in Vrátna dolina, northern Slovakia, and we squeezed in some skiing.
In a long-range EV this particular journey would have taken a couple of hours, instead of the six it took us. But I knew it would be harder so I was prepared for more effort.
There’s also a pioneering enjoyment factor to such a journey, that many motorists may not be able to understand. I mean, it’s so much more satisfying to drive a city EV a long way than it is to drive a long-range EV or internal combustion car the same distance, in exactly the same way that it’s more fun to drive a slow car fast than it is to drive a fast car fast!
We only managed to squeeze in two hours of skiing because of our unplanned GPS problem and overly conservative charging schedule, but it was still a great adventure. We arrived home late at night, exhausted but happy.
Now, of course this car wasn’t suitable for this journey, but I already knew that before I left. Also, some may think that this journey paints a negative light on our lower-range electric cars, but it’s not true. I think it shows how much is actually possible in an older EV, even in the worst possible conditions.
We covered 564 kilometres (350 miles) of the harshest, heaviest, coldest driving we’ve ever put the poor car through and it came out shining. I’m immensely proud of my little city EV for allowing us another awesome journey.
Now, what I’m really looking forward to is that increased summer range because I have some (much more fun) trips planned. Most importantly, trips that don’t involve diesel heaters! 🙂
Watch this space.
Click the play button below to watch the entire saga on video!
Making the diesel heater remote controlled
I did it! I made my diesel heater remote controlled! It was actually pretty easy, too!
I like my little diesel heater. It works well and costs essentially nothing to operate, using around 500ml of diesel every week. The only downside is that it takes about 15 minutes to warm the car up when it’s below freezing outside.
As you’ve probably figured out by now, I like comfort. I like having my immediate climate temperature warm and toasty in the winter, and cool and crisp in the summer. So, back in autumn I decided to find a way to make my diesel heater remote controlled.
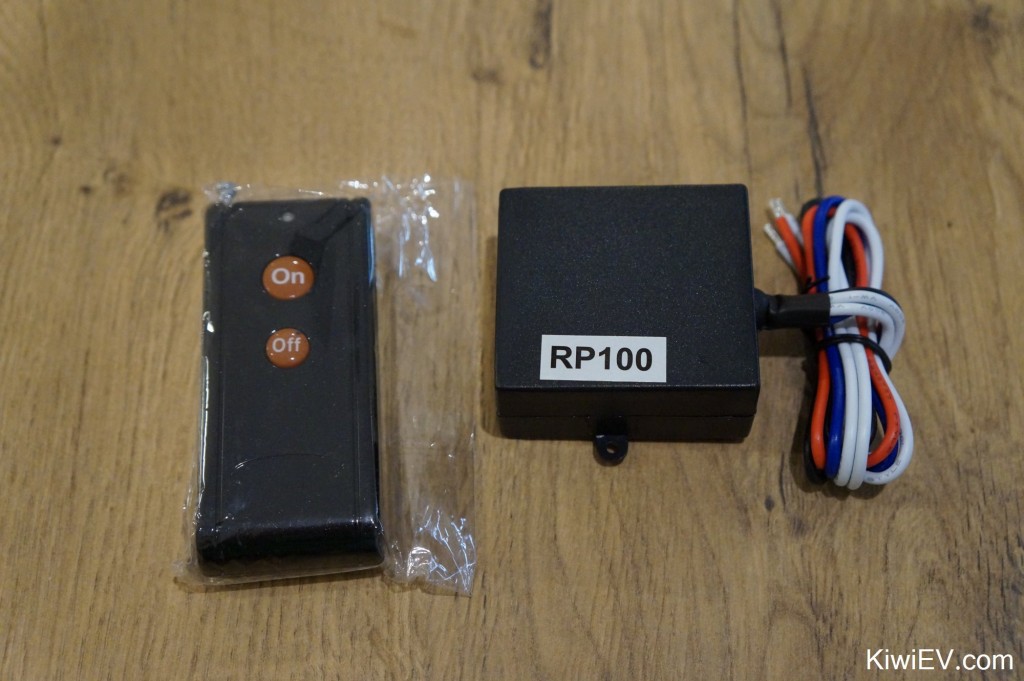
I bought the above 12 remote controlled relay and remote control from eBay, but I soon realised I don’t have the technical skill to tap into the circuit board on the diesel heater, and it cost so much money that I’m too scared to break it. This means I needed a more… physical method of turning on my heater.
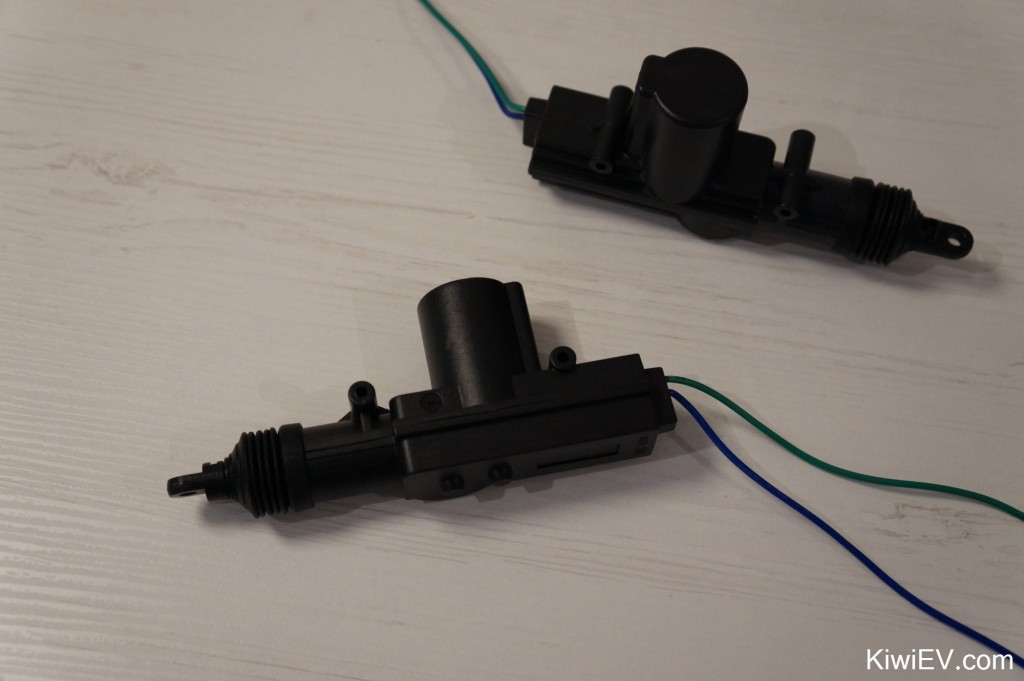
So I bought a couple of 12 volt door actuators (above). I only need one, but they were so cheap I decided to buy a couple in case I need one for a future project or perhaps one breaks.
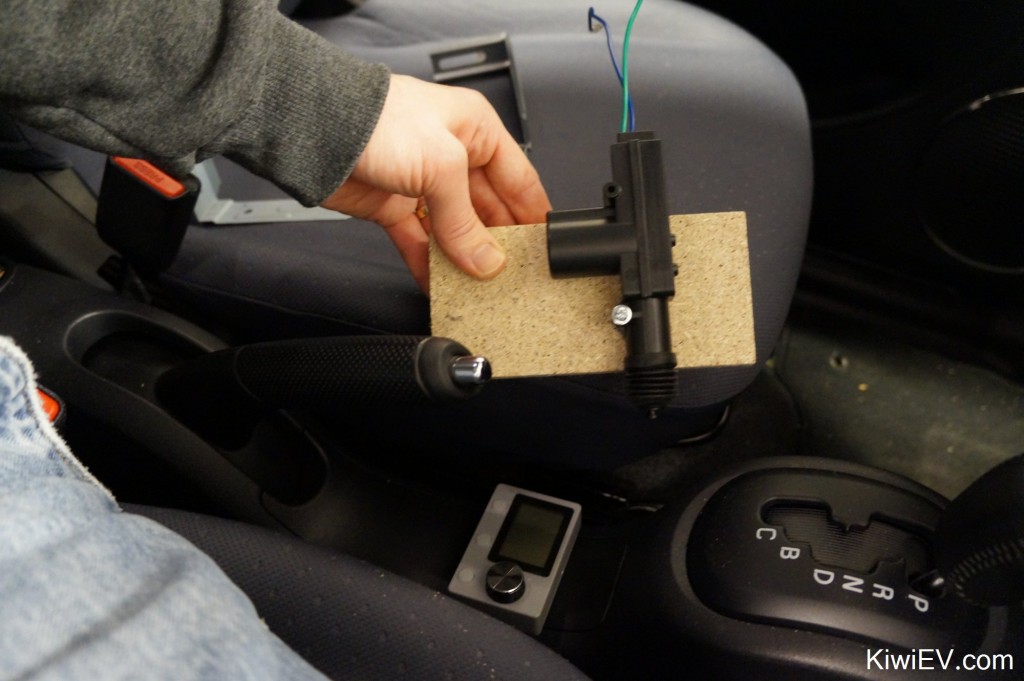
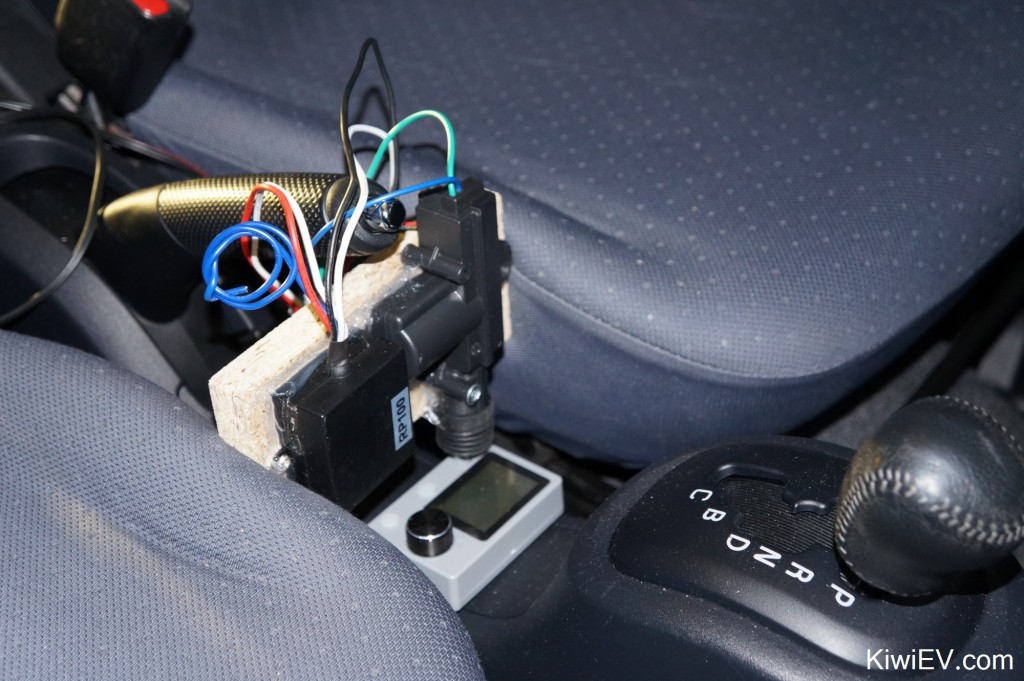
Now, you can probably guess where this is going. I wanted to make a simple on-off circuit, whereby pressing the “on” remote button would push the actuator outwards, onto the heater’s “Power” button.
From this point on it was a simple matter of connecting wires together and then aiming the button pusher above the button.
Once I had the button presser in position, I moved the car onto the driveway so the fumes from the diesel heater don’t stink up the garage, then set up a camera inside the car to record whether it worked or not.
With the car in position, I closed the garage door so I could test it from inside the house. I did this so it’s as realistic as possible, because if I ever use it, I’m not likely to actually be standing next to the car!
So, with a worried look on my face, and the diesel heater remote controlled (hopefully) I pressed the button.
Woohoo! The radio controlled heater activator works!
The car heated up nicely in the cold evening air, but I wanted to know if I could actually use it for something really useful: heating the car up from completely frozen. So I put the car outside for the night.
The next morning the car was well and truly frozen, with the temperatures slipping to -6°C (21°F) during the night. This was unusual for my poor car, as it normally sits inside a nice, warm garage.
So, I poured myself a cup of coffee, sat in front of the computer and pressed the On button on the remote control…
I heard the pusher make a beeping noise through a mobile phone which was sitting inside the car. I added the beeping function so I could tell if it was pushing the button. It pushed the button just fine, but I couldn’t tell if it had started the heater. I think I need to set up a mobile phone with a camera inside the car.
I had nothing to worry about though. With the diesel heater remote controlled, the heater burst into life and began warming up a seriously frozen little car. Good job.
After twenty minutes I jumped inside the car to discover it was toasty and warm, and all the ice on the windows had melted away. Mission accomplished.
For all of the above compacted into a short video, click the play button below:
Installing a diesel parking heater
Say what you will about internal combustion engines, but they produce a lot of heat for beating those winter chills. This means that I’ve mostly been warm for my 20+ years of driving and when I adopted my current electric car I just wasn’t prepared to give up comfort for the sake of extra range.
As you’ll know from my most recent Kiwi EV adventure, where I tried all manner of alternative car heating methods, nothing was quite as good as simply cranking up the car’s heater. But, boy, the car’s heater absolutely murders the car’s range. For example, as shown in the photo at the top of the page, a few days ago I needed to drive 87 km (54 miles) which is fine; my car can manage such a distance effortlessly… if I don’t use the car’s power-sucking heater, that is. So I made the snowy journey and subsequently froze.
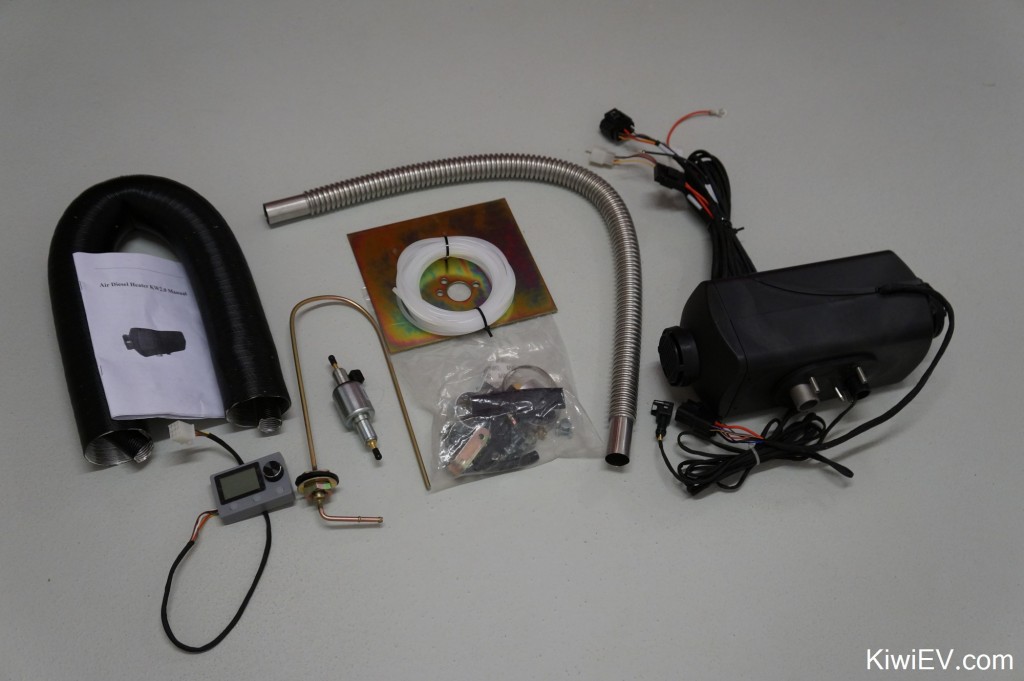
So imagine my joy when my new diesel parking heater arrived all the way from China! It’s a clone of an Eberspacher Airtronic D2 which I bought online for €350 ($380 USD).
It burns diesel to blow hot air. I would have bought the diesel water heater, like many other Mitsubishi iMiEV / Citroen C-Zero / Peugeot iOn drivers, but the much higher cost (coupled with my modest income) simply wouldn’t allow it. The problem, however, is that no one’s installed a diesel air heater in an electric car yet, as far as I know. Being a pioneer is sometimes frightening!
First thing’s first: I needed diesel. Over the past three weeks I tried very hard to source biodiesel, because it’s less harmful to our fragile environment, however I hit a brick wall time and time again. I contacted three individual manufacturers of biodiesel, both in Slovakia and in Austria, and despite almost a dozen emails and three phone calls I was given the same answer: “no”.
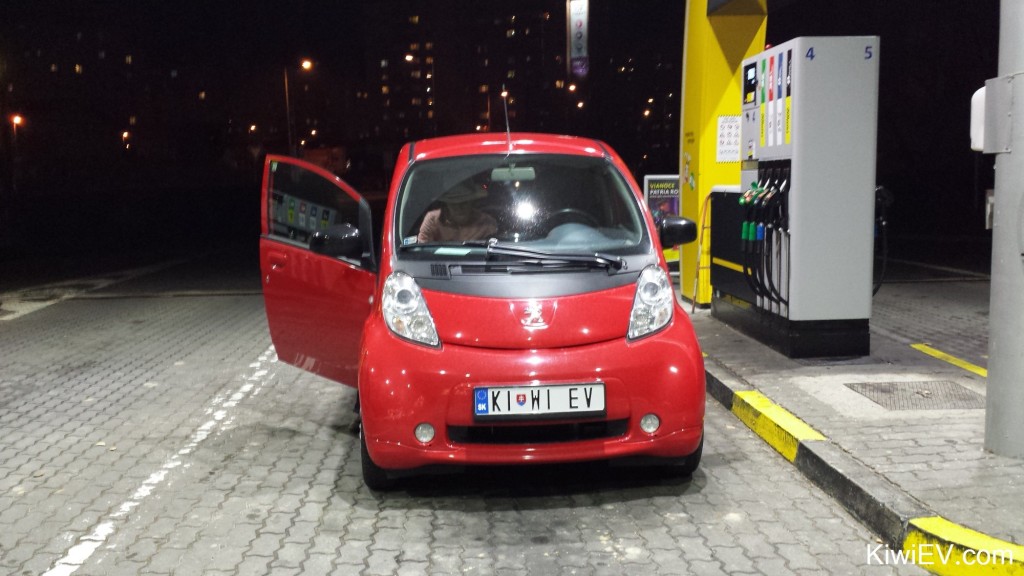
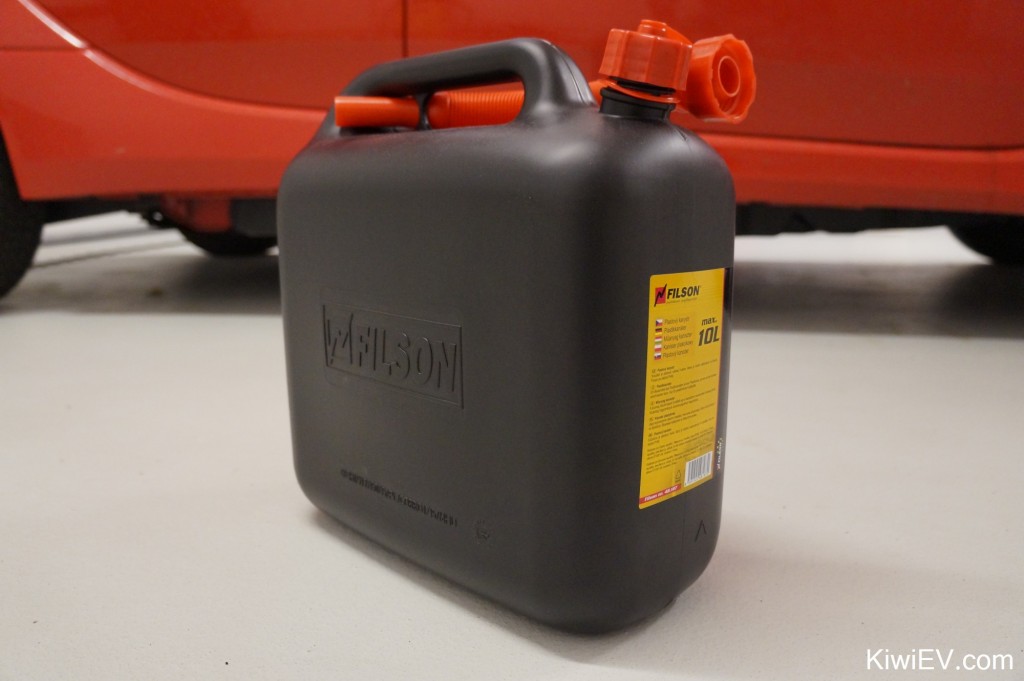
Actually, to be honest, a couple of manufacturers demanded to know why I wanted their product before telling me they couldn’t help me. Two firms said they only sell to other suppliers, the third firm told me he’d get back to me “after checking with management”. He soon stopped responding to my emails. Honestly, I tried to do the right thing, but none of the biofuel companies would help me. So, I very reluctantly took my electric car to the local gas station and filled up a container with dirty, carcinogenic petrodiesel.
After not buying any gas or diesel for 16 months (and counting), my lovely wife Veronika took pity on me. She saw that I didn’t want to buy any fossil fuel, so she did a wonderful thing: she bought me the container of diesel as a gift. Now that’s true love. 🙂
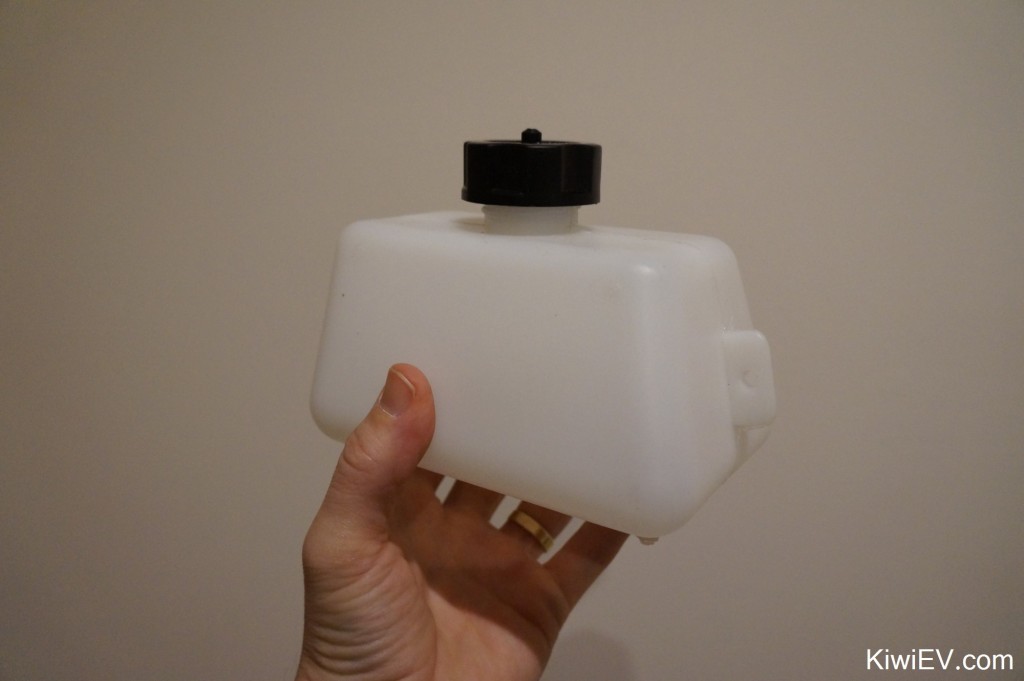
In the meantime, my little fuel container also arrived. It holds around 1.5 litres (0.4 gallons) of fuel and I reckon it should offer enough juice to operate the heater for at least 3 hours.
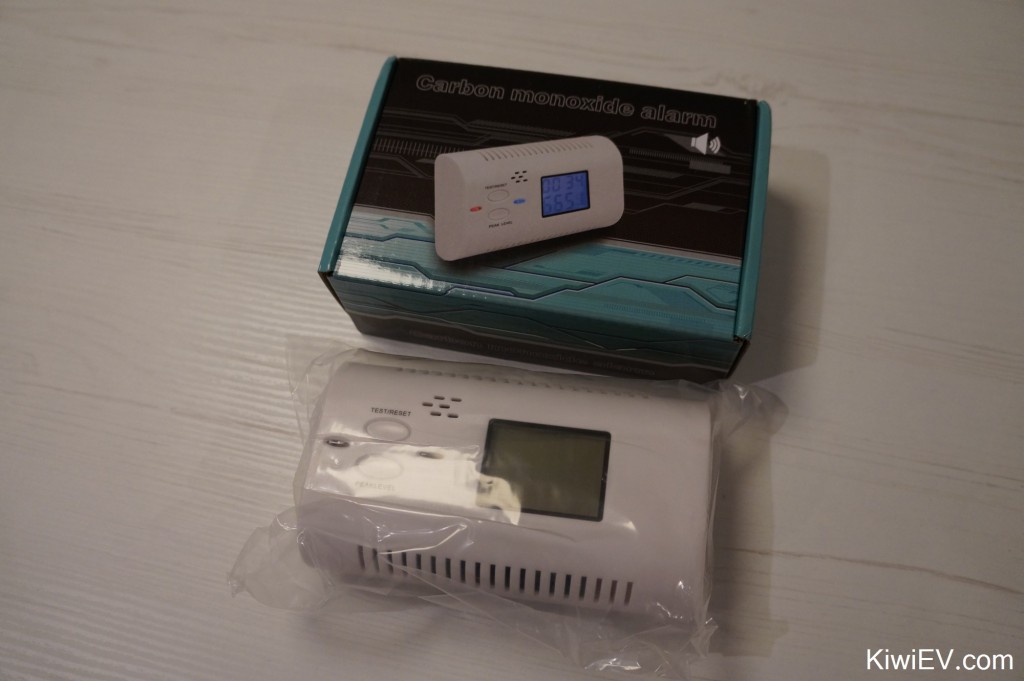
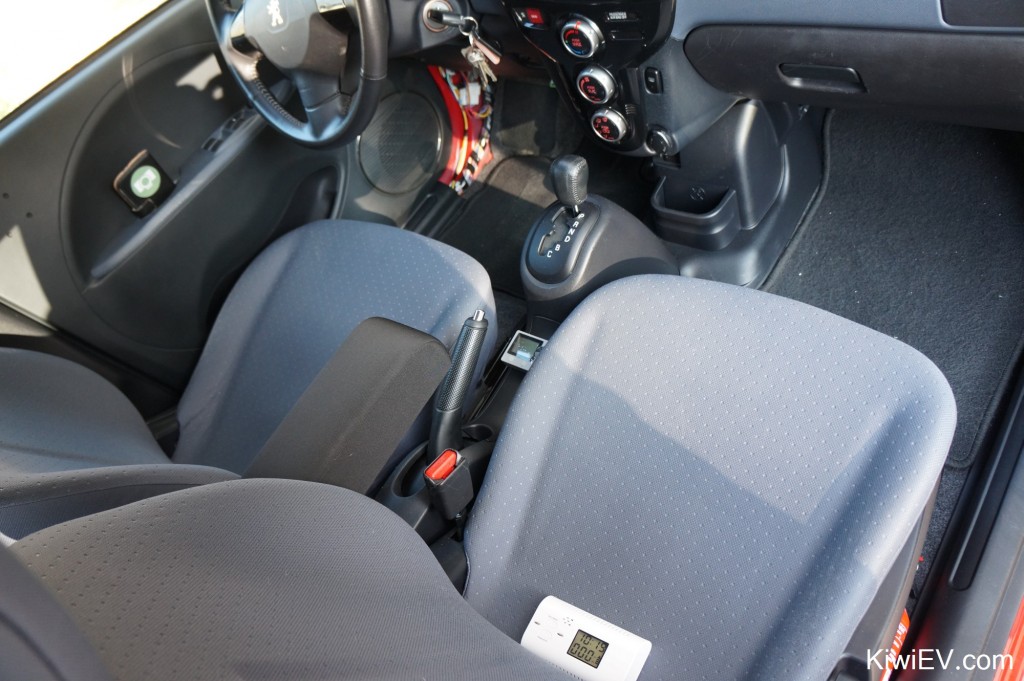
I also bought a carbon monoxide detector, just in case. After nitrogen oxide (NOx), carbon monoxide is the second greatest pollutant from burning diesel, so if any enters the cabin due to an exhaust problem, I’d like to know about it.
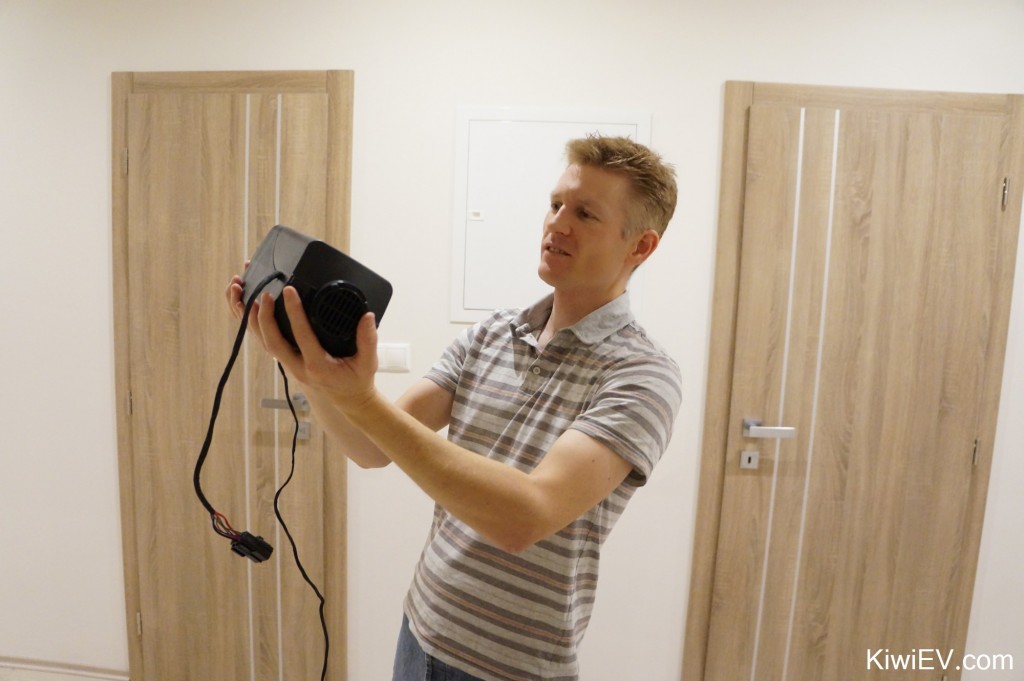
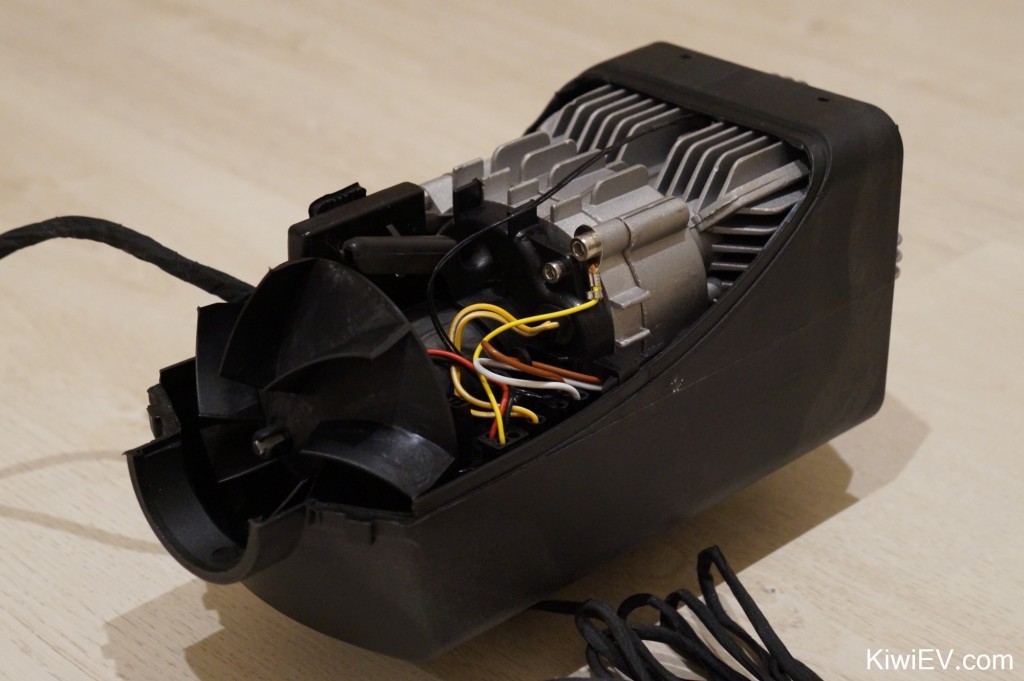
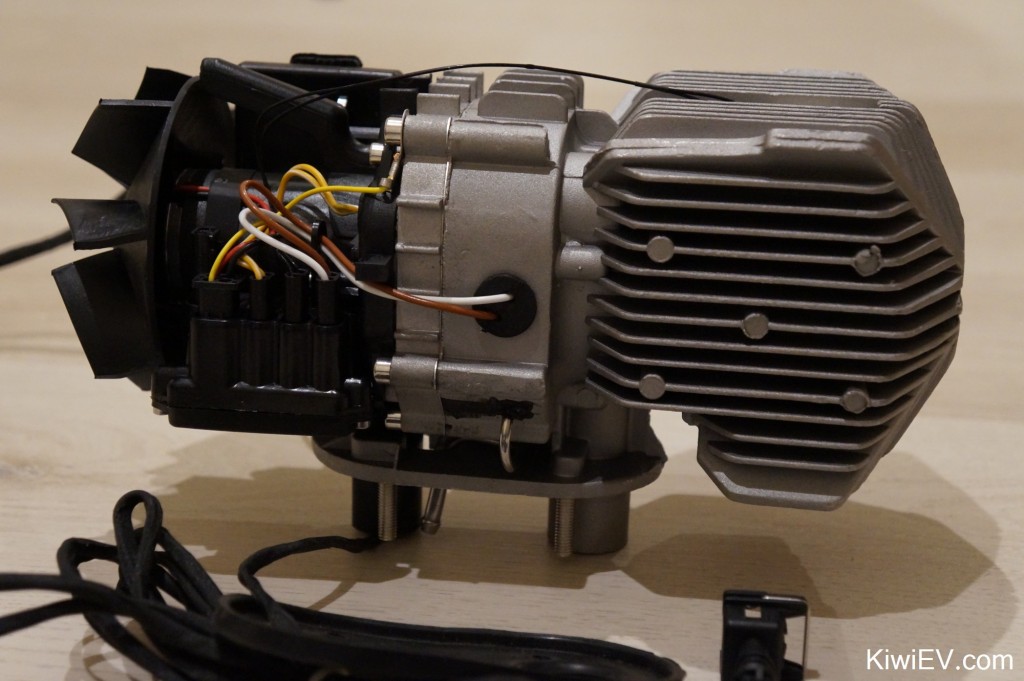
Before attempting to install the parking heater, I took the plastic cover off to figure out how it all works. Upon doing so I realised how incredibly simple it turned out to be.
Looking at the unit close-up, you can get a feel for how non-complex the system really is. Basically, how it works is this: the fuel enters the unit and is burned, making the finned part at the back get hot, then the exhaust is spat out through the exhaust pipe underneath the unit. Meanwhile, a fan pushes air over the finned parts, which gets nice and warm and heats up the cabin.
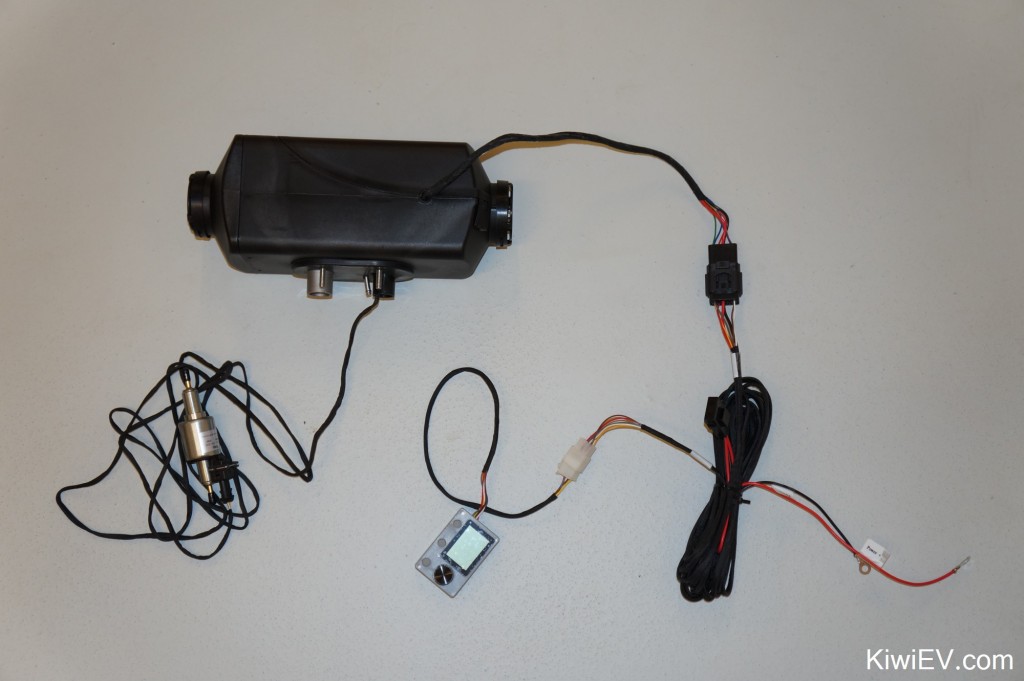
I connected all the cables together and, as you can see in the above picture, there’s really not much to it. The electrical side is just a matter of connecting the positive and the negative to the car’s battery, then connecting the fuel bottle, then extracting the exhaust. It sounds so simple even I could do it!
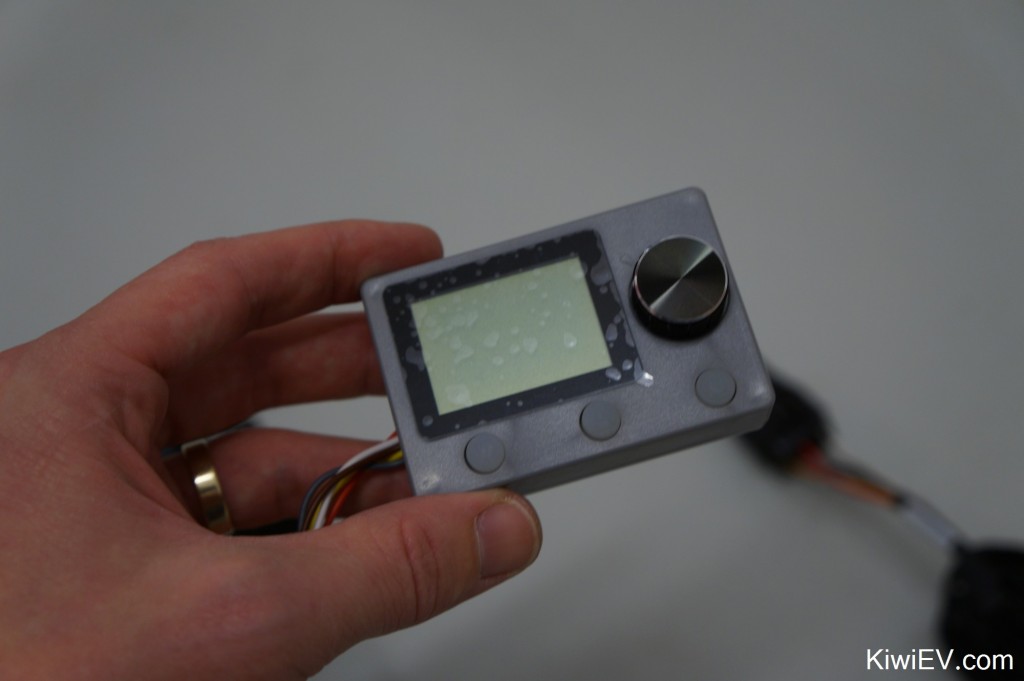
The controller which came with the unit it quite basic. It has three buttons on the bottom (Manual mode, Automatic mode, Off) and a turning knob to adjust the heating temperature.
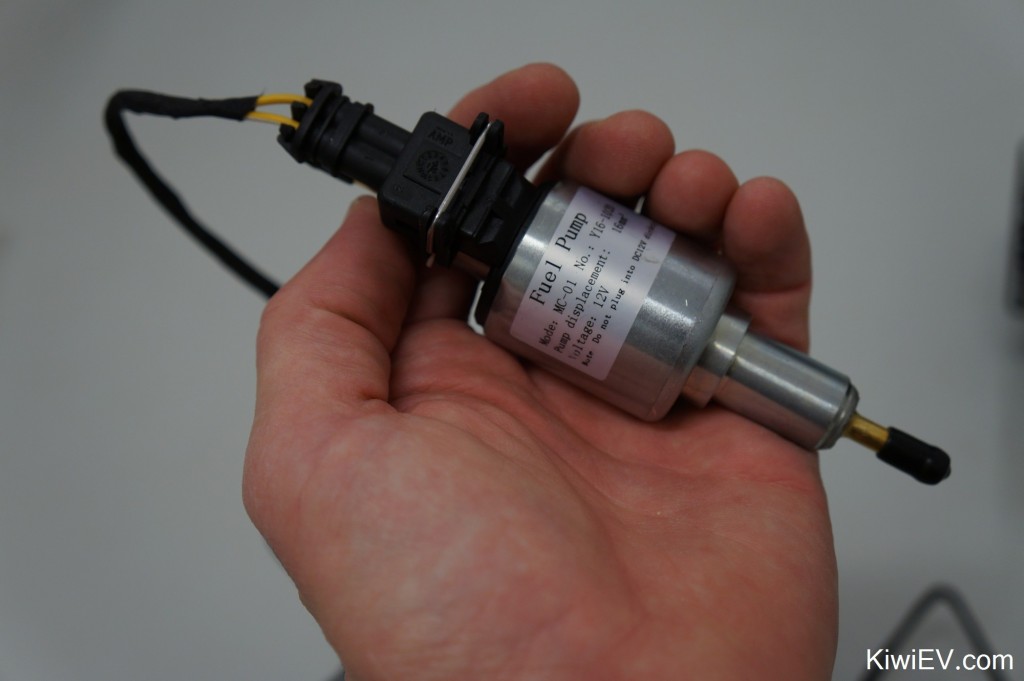
The other major component is the little fuel pump above. I don’t know if anyone’s ever said this about a fuel pump before, but it’s actually kinda adorable.
Though be warned: it’s not immediately clear in which direction the fuel pumps. There should be an arrow signalling the fuel flow direction but I couldn’t find it. I discovered upon testing it (and getting a splatter of diesel on my trousers) that the fuel comes out towards the power socket (to the left in the photo above).
So, time to connect it up and test it out!
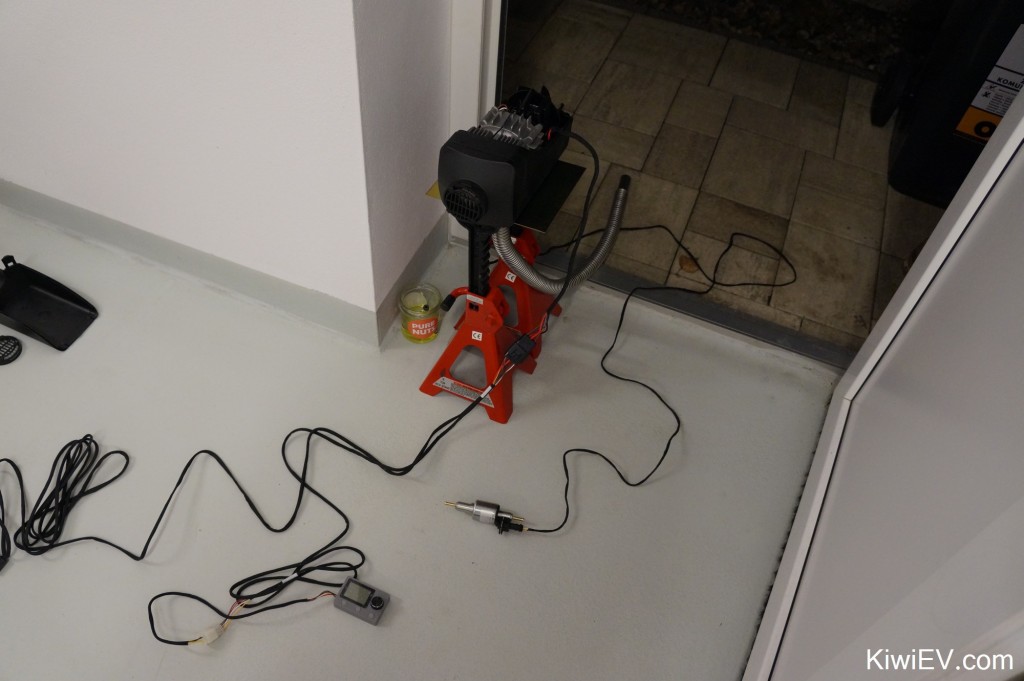
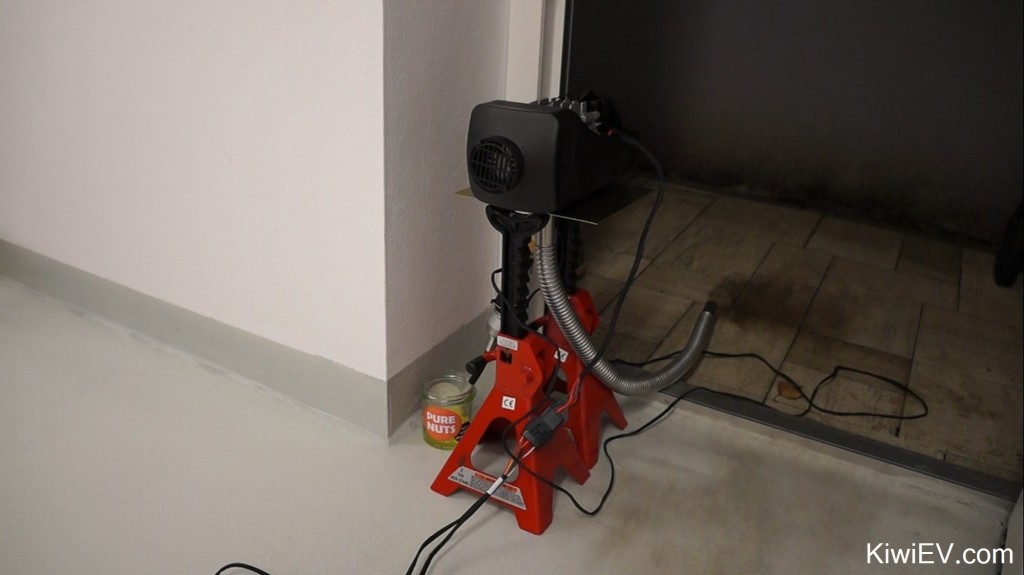
I put a little diesel into a jar and rested the heater on axle stands, with the exhaust aimed outside. I connected the system up to the car’s battery and pressed the “on” button…
And nothing happened. Well, it made a couple of whirring noises, then beeped “Error 1” at me, which means a power issue. That was odd. Also, why didn’t I hear the fuel pump clicking? Surely it’s not absolutely silent?
I dug around in the manual and found a special mode which forces fuel into the unit. I assumed that was the problem, so I pressed a button combo on the controller and… the pump started clicking quickly. The pump was quieter than I thought, but I guess that’s a good problem on an electric car.
After about 30 seconds of pumping, I could see the little fuel filter had filled up and fuel was entering the heater, so turned off the unit, took a deep breath, and then turned it onto manual mode…
Nothing happened for a few seconds. Then a whirring noise. Then a noise like a furnace starting up. Then a pile of black smoke started billowing from the exhaust pipe, before coming swiftly inside. Gah.
I quickly opened up the main garage door to let the cancer out, but at that moment it burned off all the diesel and oil inside (from the factory, I assume) and started to run quite clean, with no visible smoke. I put the cover back on the top of the unit and the air was channelled over the finned area at the back of the heater, and out of the vent facing me.
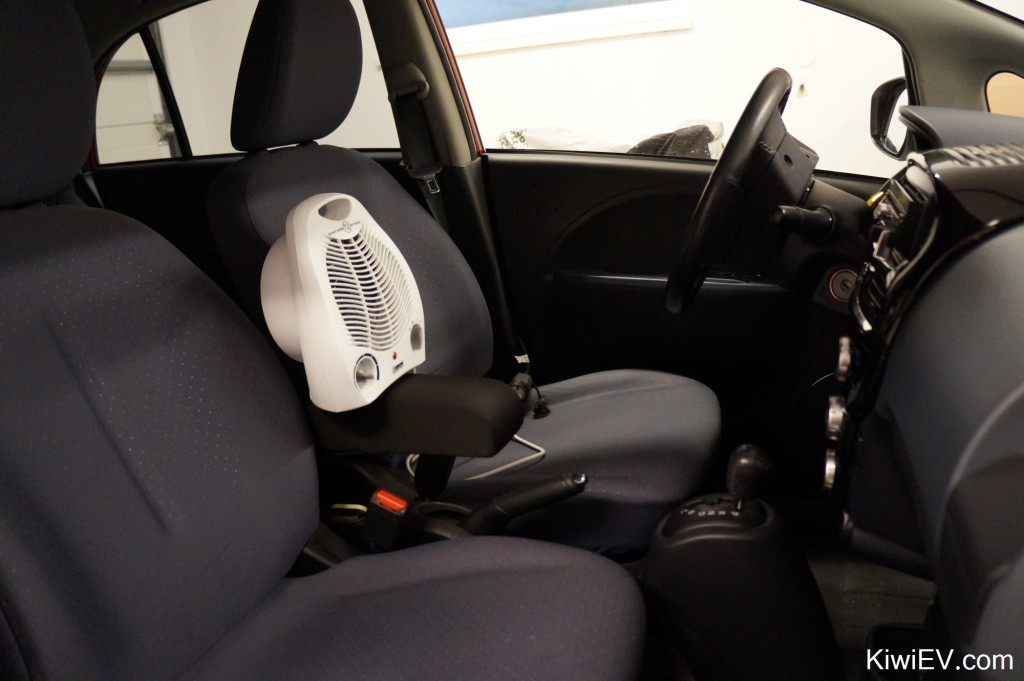
The heat coming out of the unit was nice and hot. Hotter and faster than the same heat from the standard 2 kW fan heater I used to preheat the car.
This is good. It means it works. That was also the easy part. Now comes the really really hard part: deciding on where to install it in the car.
According to the brochure, this unit it designed to go inside cars, vans, boats and trucks – but will it fit in my electric car?
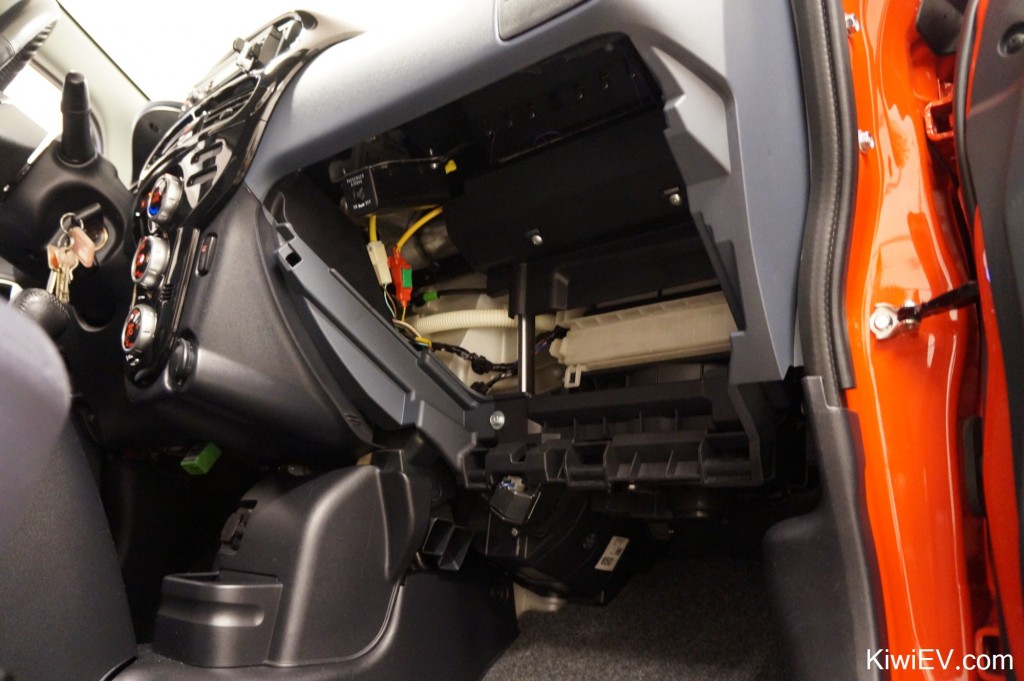
The first place I wanted to attempt was in place of the glove box, however it was doomed from the start. While the unit could physically fit inside the glove box, there were too many other problems – the largest being the routing of the hot exhaust.
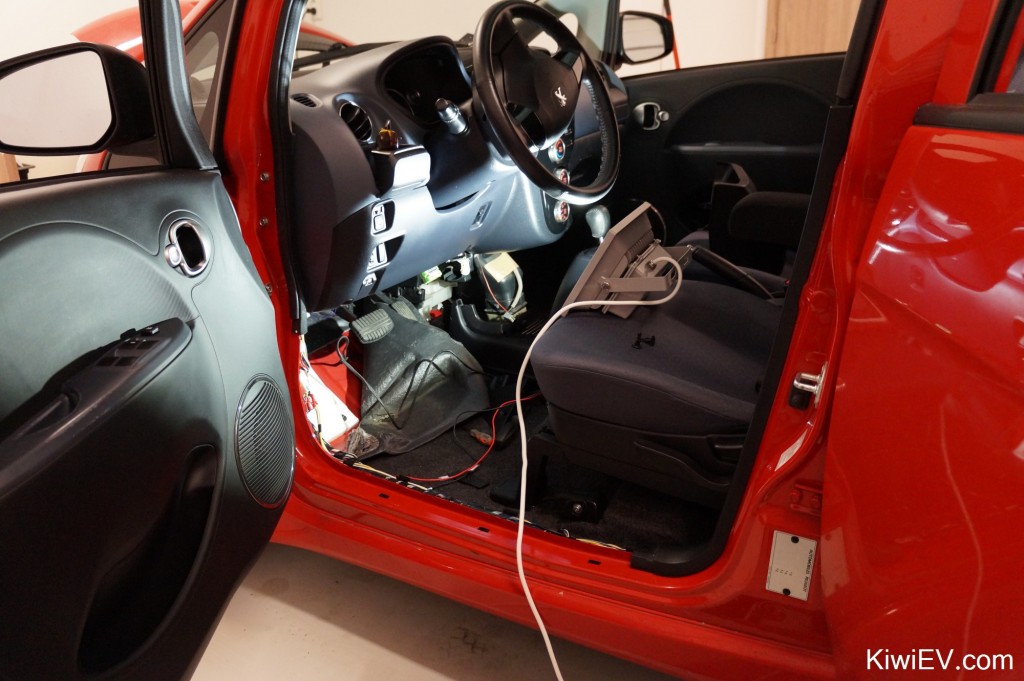
As you can see in the photo above, the dashboards of the iMiEV are absolutely full. This meant that even if I could safely route the exhaust outside and away from melting passengers shoes, I’d still have the problem of installing ducting to channel the air towards me or the windscreen, and there’s simply not enough room to install a pipe anywhere in that jam-packed dashboard.
Another thing to remember, is that wherever I install this system, it has to be easily removable. In around 12 weeks I’m going to be taking it out again because it’ll be spring, so it has to be somewhere logical and safe.
The floor of the car’s cabin was also out of the question because 1: it’d intrude on passenger comfort, and 2: because of the battery under the centre of the car, I’d have to drill into/near the frame of the car to route the exhaust out.
It would be too dangerous to mount this indoor heating unit outside the car due to the risk of short circuit from water splashes and road salt, but I soon found a winner. Yes, crawling all over the car and trying numerous locations, I found the ideal place.
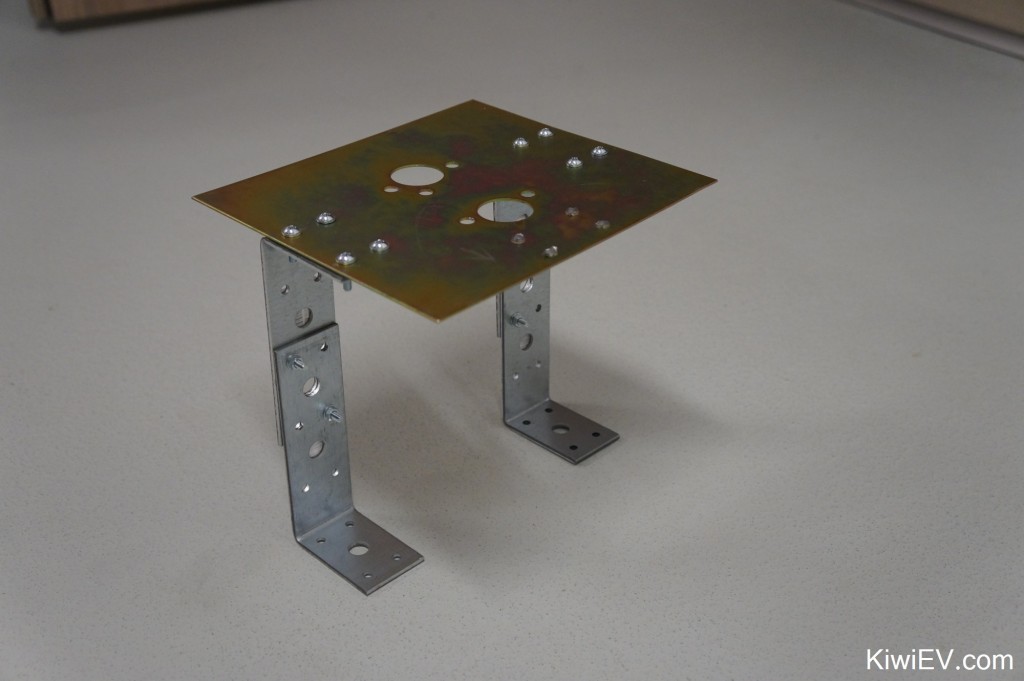
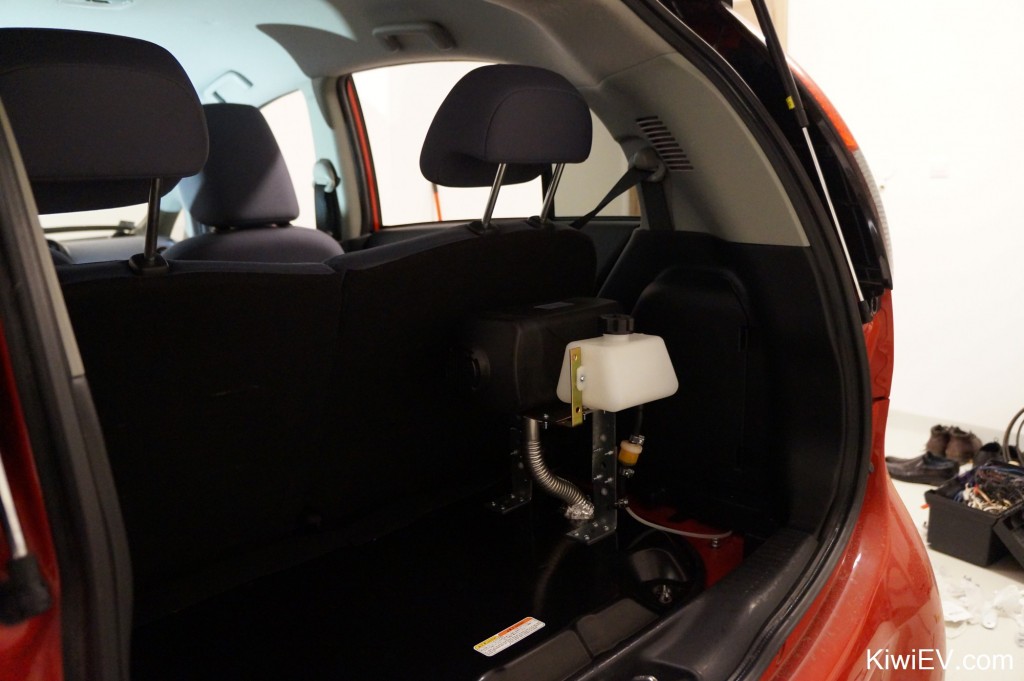
I popped up to the hardware store and bought a bunch of strong, adjustable L-brackets so I could fashion a sturdy yet simple stand to hold the heater. The image above shows the unit incomplete, but you get the idea.
Then, after checking and rechecking, I grabbed the heater and the drill and started making holes!
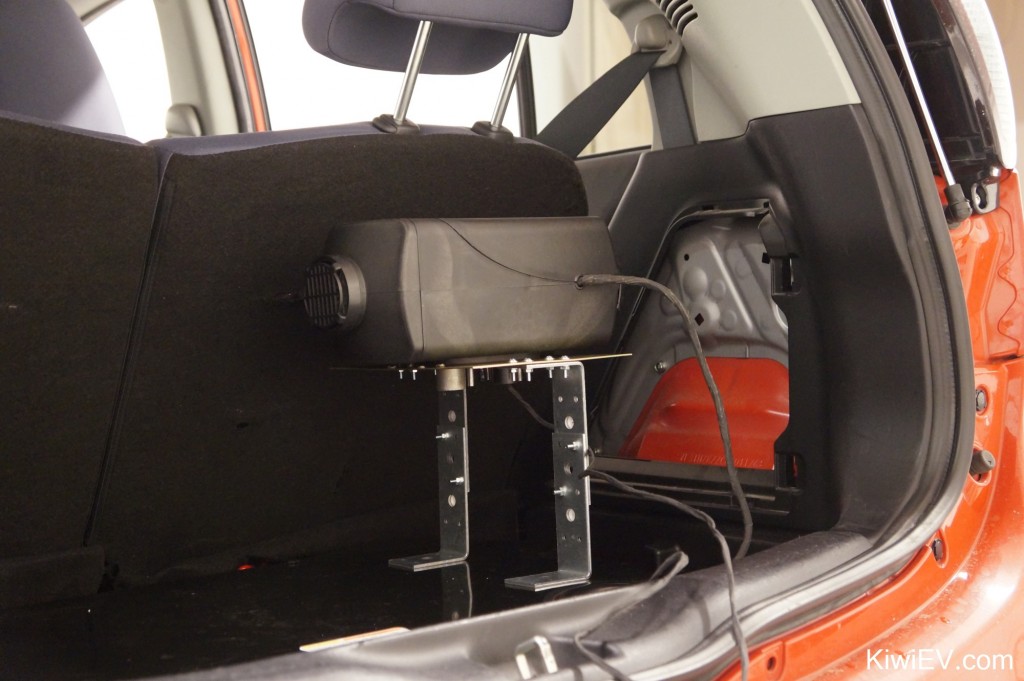
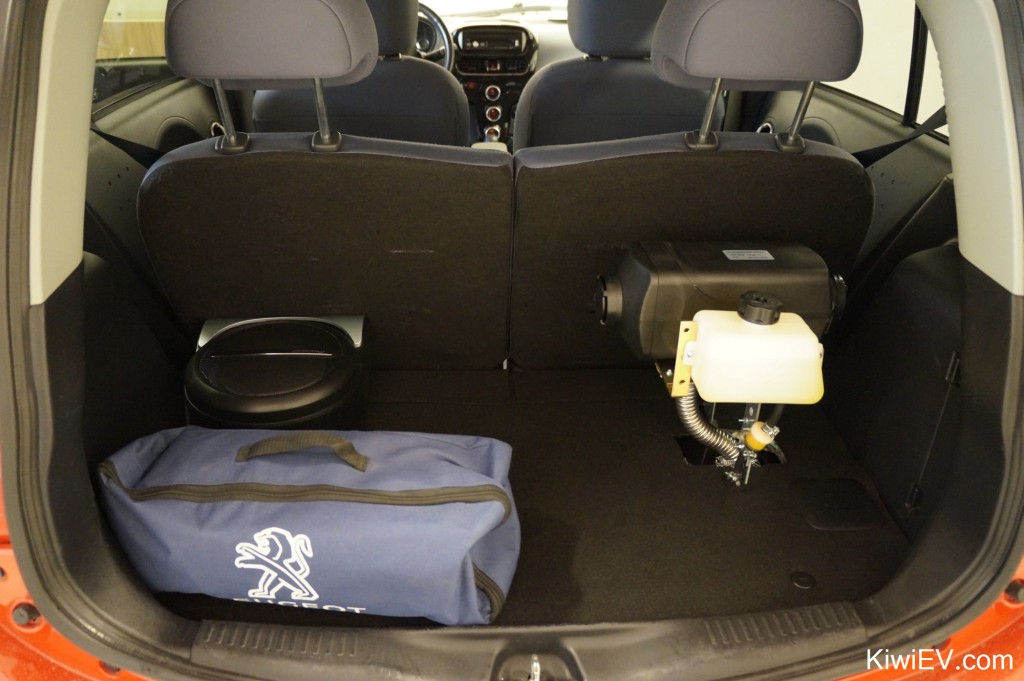
Installing the parking heater in the boot (trunk) of the car was the logical choice for many reasons, from concerns about moisture, road salt, safety, convenience, comfort, removability, easy access in an emergency, ease of re-installation etc etc etc, you get the idea.
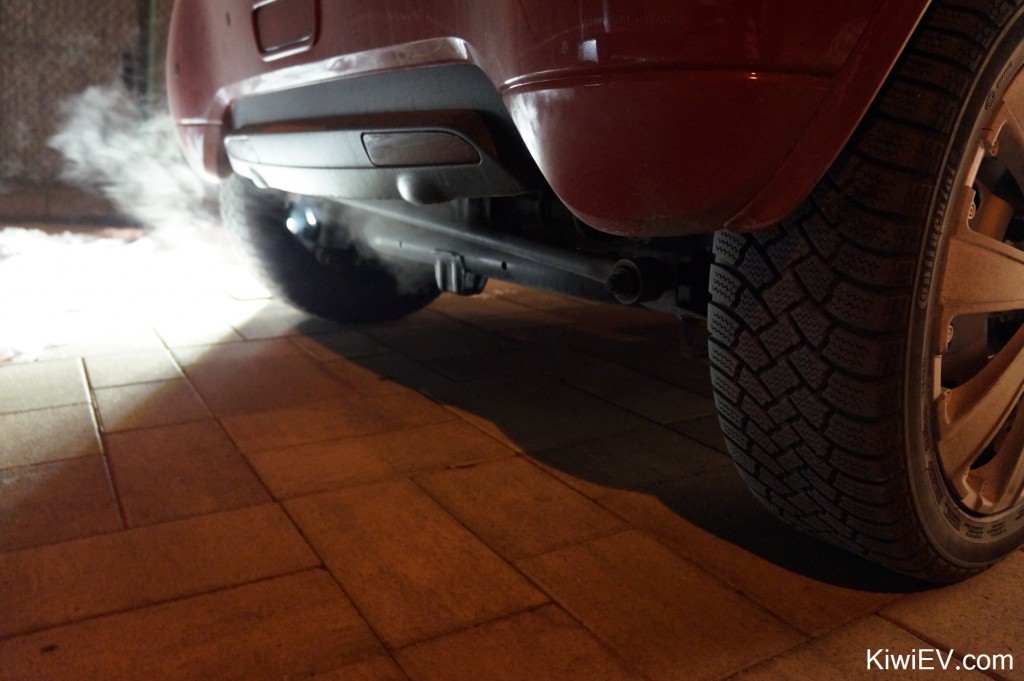
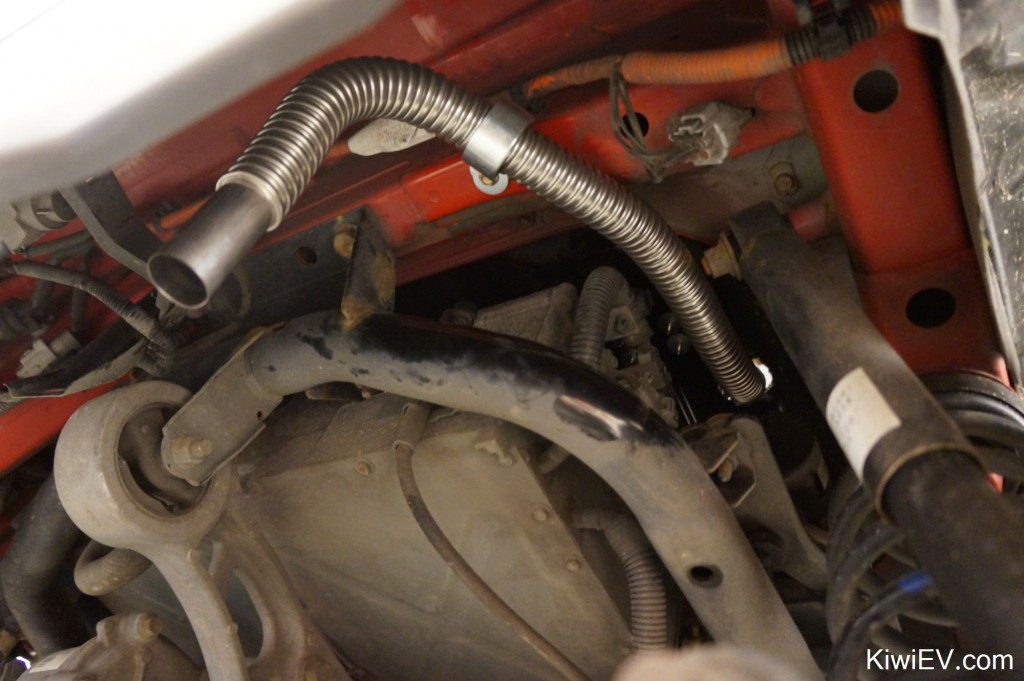
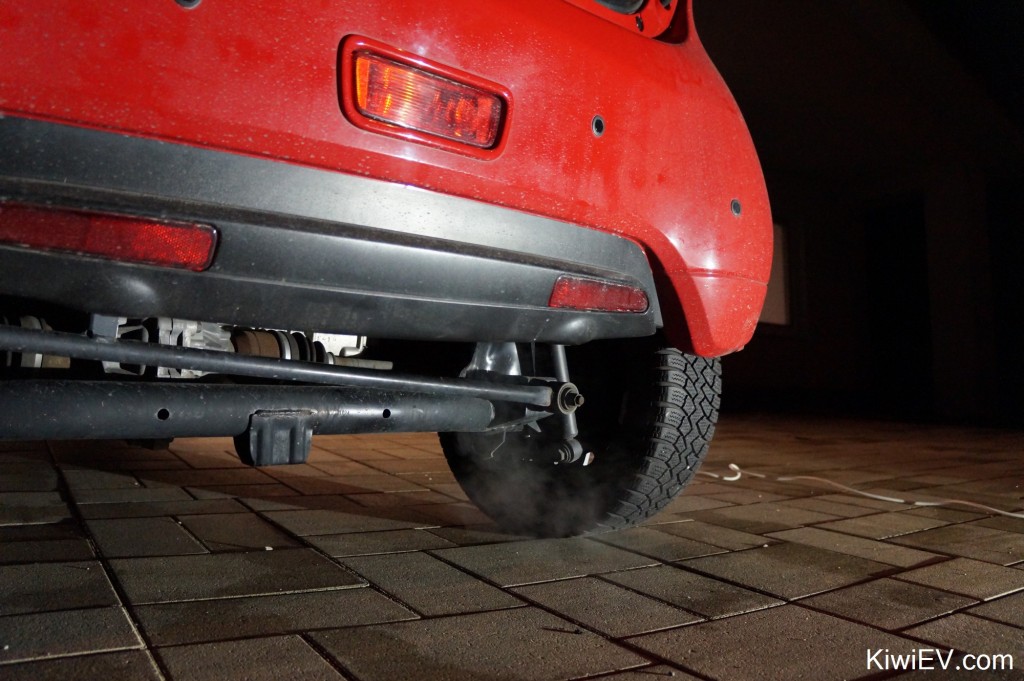
Doing it this way also allowed the fumes from the unit to be safely dispersed under the rear of the vehicle away from the passenger air intake. This was coincidentally the exact same place as where the exhaust pipe goes on the gas version of this car. It was a no-brainer, so I got busy installing it.
Installing the parking heater onto the motor cover was also a smart move in terms of motor and controller access, because you simply disconnect the exhaust pipe from the heater, and the entire cover (with heater bolted on) simply lifts upwards.
With the heater installed, I got busy wiring it up.
The next issue was where to put the fuel tank. I decided to go with convenience, so I mounted the fuel tank next to the heater unit, paying close attention to the exhaust pipe in the case of a diesel spill. Although diesel may not be as combustible as petrol or ethanol, I want it to be safe for the short time I have it in the car.
With the wiring connected and the fuel tank connected securely to the frame of the heater stand, I clamped and triple-checked all the fuel pipe connections.
Next comes the fuel, followed by outdoor testing. I added around a litre of diesel to the little tank and primed the system using the hidden fuel-pump only mode. Then, after many hours of careful work… I turned the unit on.
It works! It actually works!
I ran the unit on high mode for a good 30 minutes to burn off any residue and to monitor the effects of the hot exhaust in the two places where it has contact with metal. I was also paying close attention to the fuel tubing and its connections, ensuring no air was leaking in – and no fuel was leaking out.
There was a faint “cooking” smell (like an old engine) in the air inside the car, but it soon dispersed. I assume there was a thin film of oil or diesel on the exhaust.
After everything was running hot and clean, I let the unit power down and switched it off, then put the car back in the garage to check once again for fumes, heat induction and condensation. You might think I’m being pedantic, but flammable liquids in cars genuinely freak me out. You can’t be too careful.
The next day I continued testing in the daylight. Now I was able to experiment more, playing with the unit’s speed controller and thermostat. I ran the unit hard once again, but this time also let it idle at a constant temperature.
Once I was satisfied it was safe, I closed the doors and ran it as it’s intended, checking to see how well it heats up the interior. I’ll be honest: I was expecting the worst, considering it’s all the way down the back of the car. I expected it to be weak and… well, a waste of money.
But I was pleasantly surprised. After only about 15 minutes of the unit operating during a windy, chilly morning, the car’s interior had reached more than 35°C (95°F) which was completely unexpected – especially considering how far away it was from me. One thing that was noticeable however, is that the floor of the driver’s foot-well was colder than the rest of the car. This is something I’ll play with over the coming days, as the heater comes with a long heating extension pipe. I might try and run it under the driver’s seat to the foot-well.
And there you have it! I measured and cut out a hole into the car’s carpet and foam insulation, making sure it’s big enough for heat safety or in the event of shifting during bumpy roads. It’s also, just like the heater, easily removable.
At present the unit is consuming air from the cabin which seems to be fine as it’s a very small amount and I drive with the vents open anyhow. Having said that, I’m ready to install a vent hole below the unit if I find it necessary.
The verdict? So far so good. I’ve already driven around a fair amount with the unit running, stopping to check it regularly. Of course I have my nose checking the air constantly, along with the carbon monoxide detector, but I’m also carrying a smoke alarm for added safety and a dry-powder fire extinguisher.
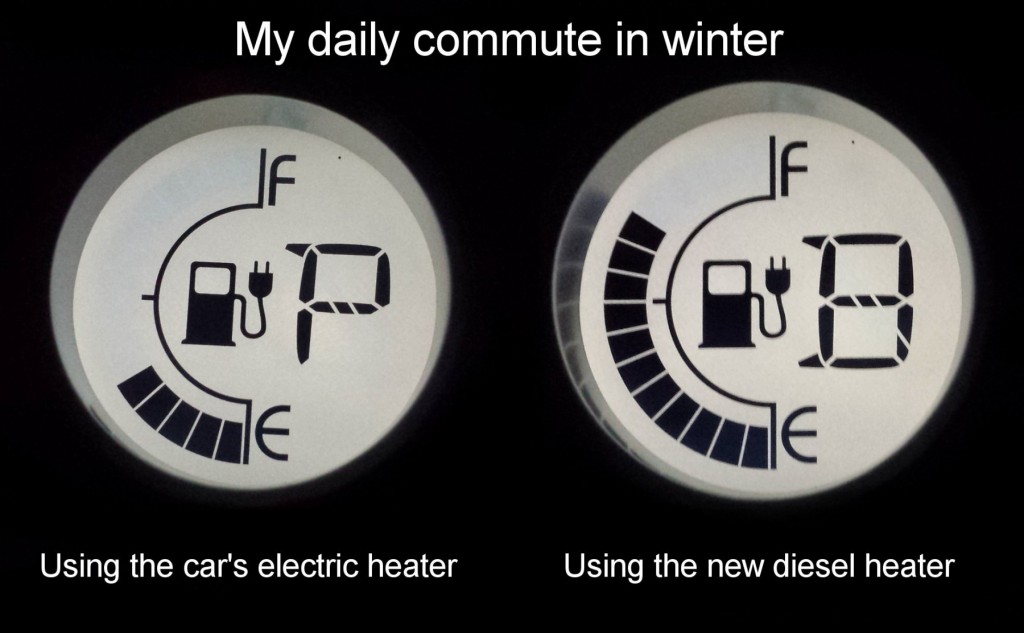
After only four days of testing, I can tell you honestly that this diesel heater is like a range extender of sorts. My daily commute is around 35 kilometres (22 miles) with regular extra driving and errands, and seeing as I like to be warm, it means I regularly have the car’s heater going – if I know I’m not going to be driving outside of my normal circuit, that is. Unfortunately, the heater takes its toll on the battery. However, since installing the diesel heater, I can now be warm without range anxiety:
The above picture shows my daily commute in cold weather, using the heater from a full charge (from home to work to home again). As you can see, the diesel heater means I can truly use my car in winter. No more gloves. No more woolly hats. No more shivering. I have an electric car, without any downsides. All thanks to a €330 Chinese heater.
After four days of thorough testing there are no issues to report as yet. I found a screw that had loosened itself after my twice-daily inspections, but other than that, its been smooth sailing. Testing will continue over the next few days and weeks as I learn more about the unit and the fuel system so watch this space. Oh, and remember, safety first!
As always, you can watch a video version of the entire saga below:
Note: For those interested, the heater I bought is available on the Chinese shopping site Aliexpress by clicking here. It was the cheapest example (including shipping) of any other diesel air heating option.
Also, I scanned the instruction manual for the Chinese-made diesel parking heater. If you wish to view or download it, click here.
Cats, carpet and heating ideas
In this latest chapter of my electric car adventures, I dive into the world of heating
In this latest chapter of my electric car adventures, I dive into the world of winter heating… without using electricity.
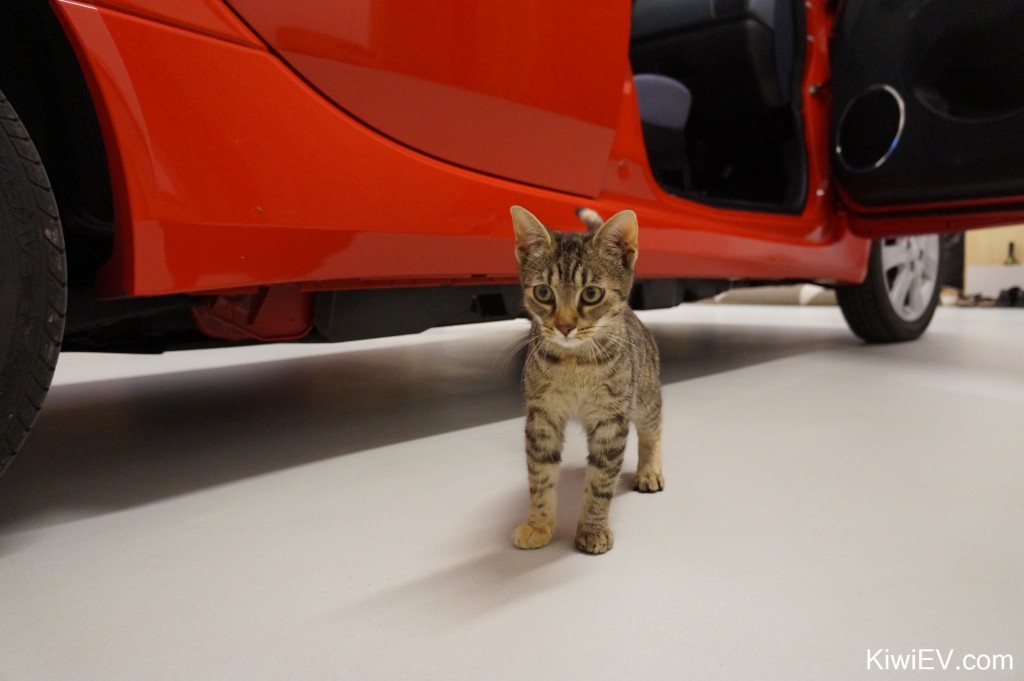
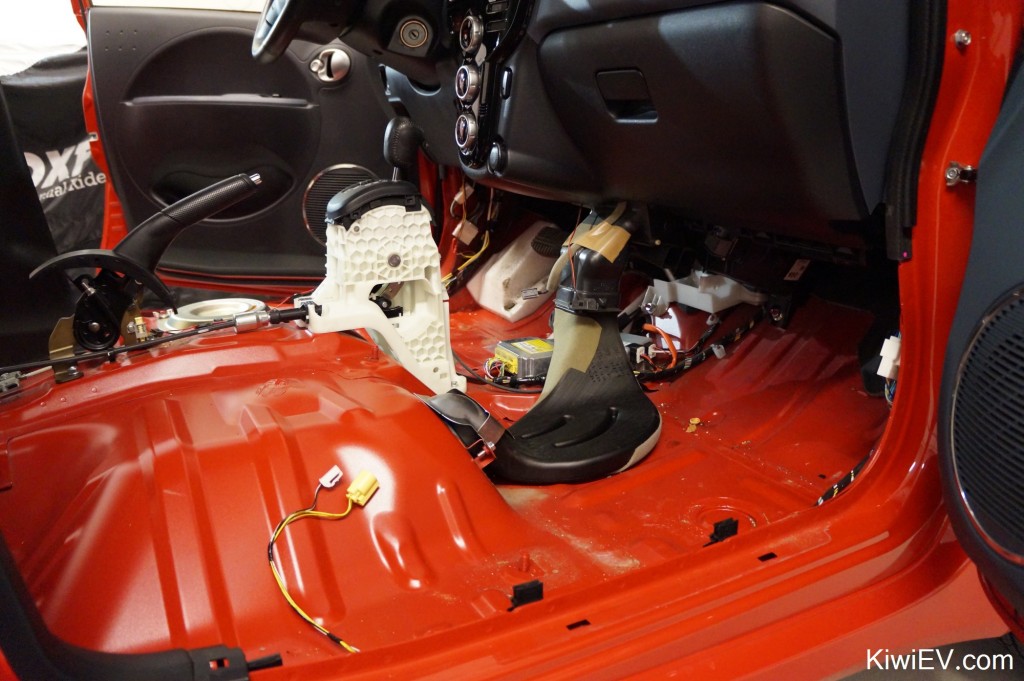
But first, I needed to remove some “apple juice” that this adorable stowaway had installed into the carpet.
Yes, to my surprise, this cute little cat found itself trapped in my car for several hours and refused to come out. It tucked itself up under the dashboard, only stepping down to urinate on the carpet! So, I had to disassemble half the car to take the carpet out.
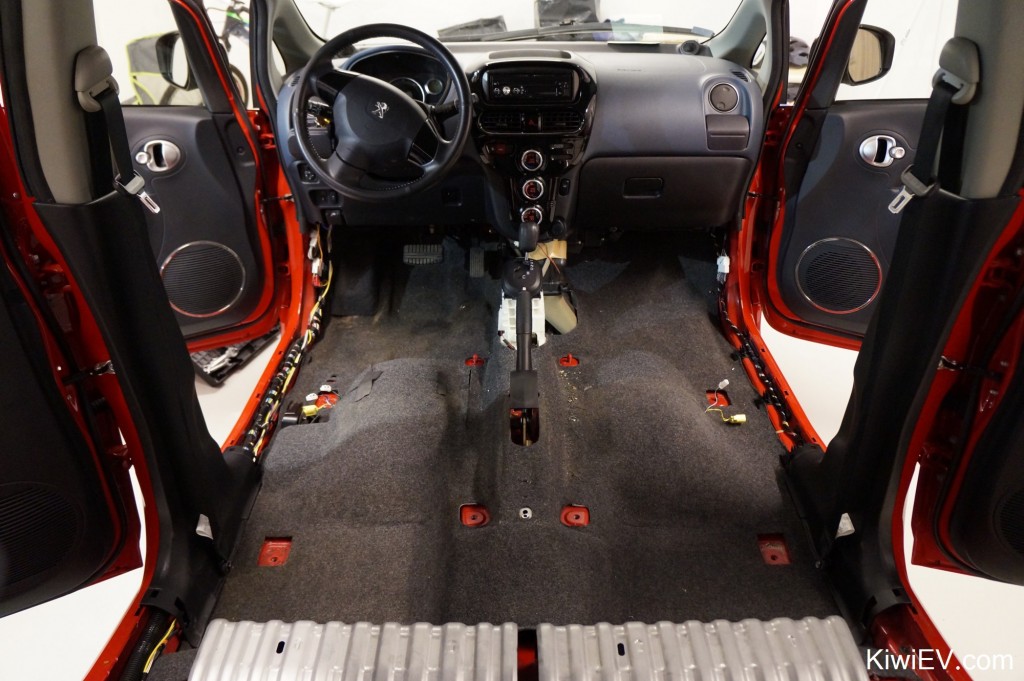
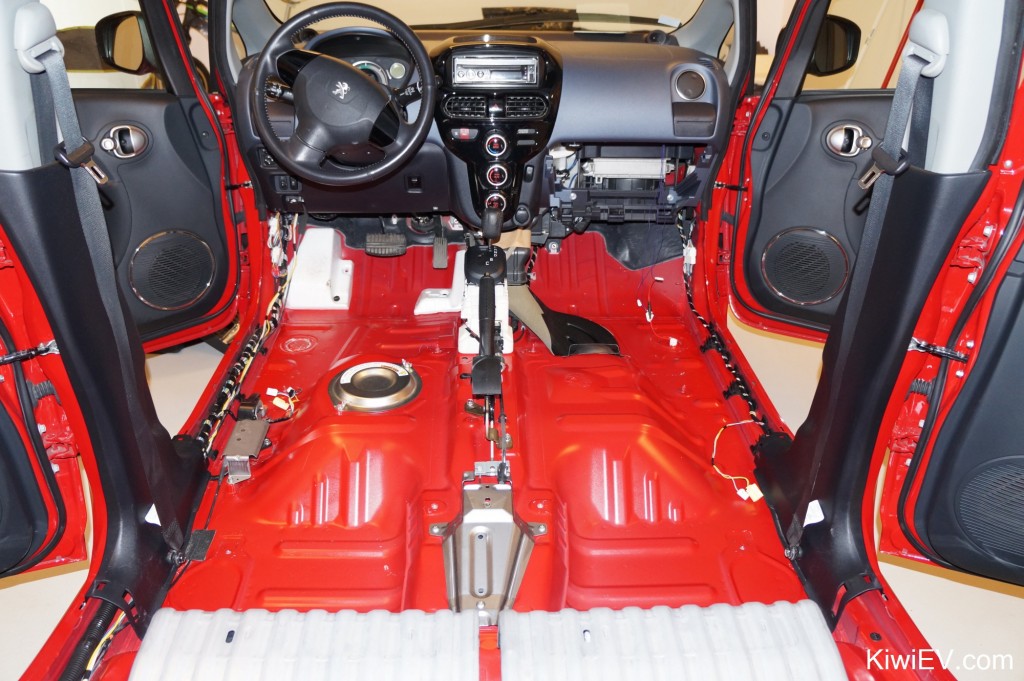
With the carpet out, it gave me a great chance to see how the bare floor of the Mitsubishi iMiEV / Peugeot iOn / Citroen C-Zero looks.
In many cars you have unused space under the passenger seats but not in this one. Because of the batteries under the vehicle there’s not really any space for amplifiers or computers or any future gadgets.
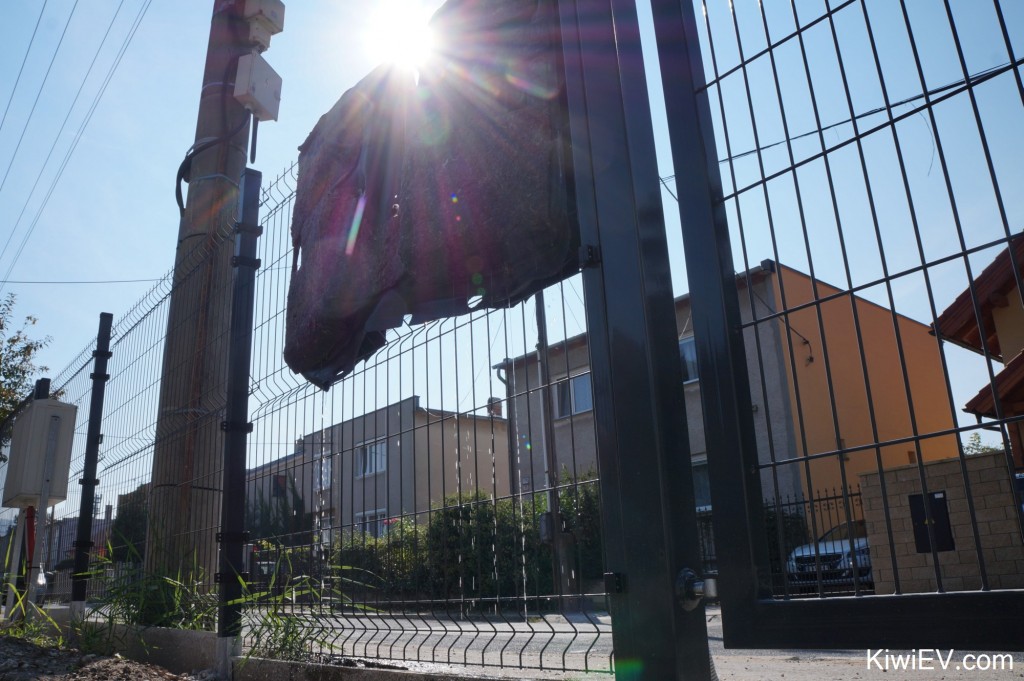
With the carpet washed thoroughly (I also used a flower-scented fabric softener) it was hung up to dry on the fence while I got busy cleaning the floor of the car.
After vacuuming and washing the floor of the car, I also applied a little oil to help in protecting it against snowy shoes coated in road salt in the quickly approaching winter.
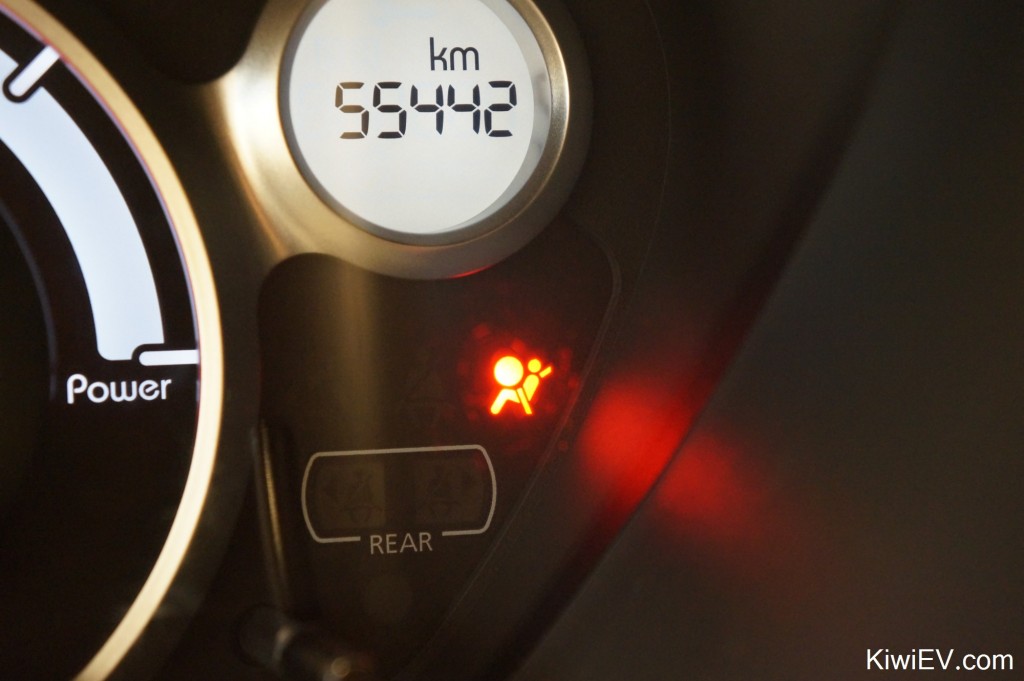
Once dry, I put the carpet back into the car and reassembled the interior. Everything went well, until (I think) I turned on the ignition before I’d plugged in the driver’s side airbag/seat belt pretensioner connector.
This meant I had to take the car to the local Peugeot dealer to get the error codes reset. Let this be a lesson to you: if you unplug any SRS connectors, there’s a chance you might need to go to the dealer afterwards.
Resetting the error codes cost me just shy of €15 (just under $17 USD) so I just added it to my “life lessons” folder.
Anyway, with winter quickly approaching, I needed to find a solution to a big problem from last winter: surviving in a cold car.
The problem is that the heater in my electric car uses a lot of electricity. In fact, on a cold winter day, the heater in my car can use as much as 30% of the battery’s total capacity! This means I needed to find ways to stay warm without using electricity. So, I looked around on the internet for all the crazy heating ideas people suggested.
It turns out that the internet has some terrible advice.
I tried preheating the car, wearing a blanket, dressing for the arctic, lighting candles, burning incense sticks, carrying hot bottles, having a very hot shower – even taking a cup of coffee with me – but nothing worked as well as simply running the car’s heater. Not only that, regardless of which method I attempted, the car was always cold at the end of the day in my work parking lot.
So… I looked at serious heating methods that (gasp!) burn fuel.
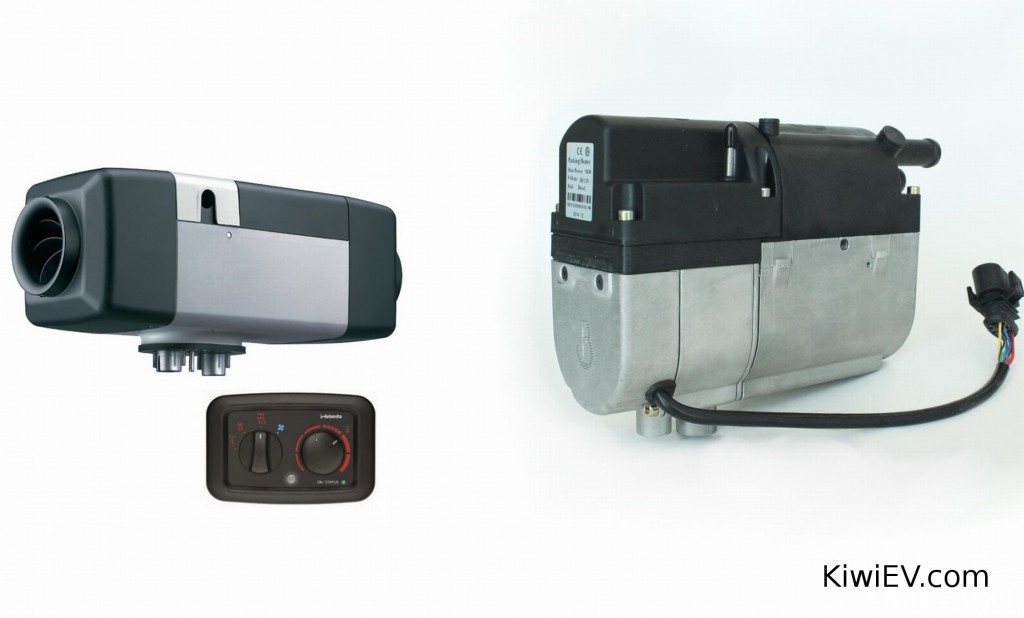
The options are either to install a heating device which taps into the car’s existing water heating system or a heating device which blows hot air directly.
I wanted to install a water “parking heater” like friends Ben and Jarkko installed into their cars, but with heavy EU import taxes and having to relocate my car’s battery to make it fit, it would cost around €739 ($810 US).
There’s just no way I could afford that. Don’t forget that the average wage in Slovakia is around €850 ($947 US) per month. With my income and with two mortgages, there’s no way a liquid parking heater can be installed. End of story.
The only other option to warm the cabin like in a gas-powered car would be a diesel-powered air parking heater. At €457 ($501 US) it was still a lot of money but it would be the only thing I could afford. While a little simpler in principle, installation could be difficult. It would also mean trying to find a supplier of biodiesel in Slovakia. Talk about giving myself a challenge, huh?
So, after a few weeks of careful thought, I got out my credit card and… pressed the Buy Now button. As I type, my heater is on its way to my doorstep.
But have I made a big mistake? How will I install it exactly? Will I be able to find a renewable biodiesel fuel source? I have so many questions and I’ll find out soon enough.
Until then, check out the video version of my cat, carpet, and cold weather problems by pressing “play” below. If you found it interesting, share this page!
Check back soon for the next chapter.
Unlocking hidden options!
My car has now turned five years old! This is interesting for two reasons:
1: It’s still running fine on the original battery pack. This is surprising because according to obnoxious electric car critics from years ago, “Ya’ll need to replace ’em batteries every three years in one of ’em new-fangled electrical cars! Mark my words!” (best read in a yokel accent for maximum effect)
2: The warranty has now expired…. This means I can really start tinkering!
A hardcore tinkerer friend of mine in Finland named Jarkko Santala discovered back in 2015 that there are extra ‘gears’ in the Peugeot iOn and Citroen C-Zero, which offer different types of regenerative braking just like in the Mitsubishi iMiEV. He reported on it in his own blog here.
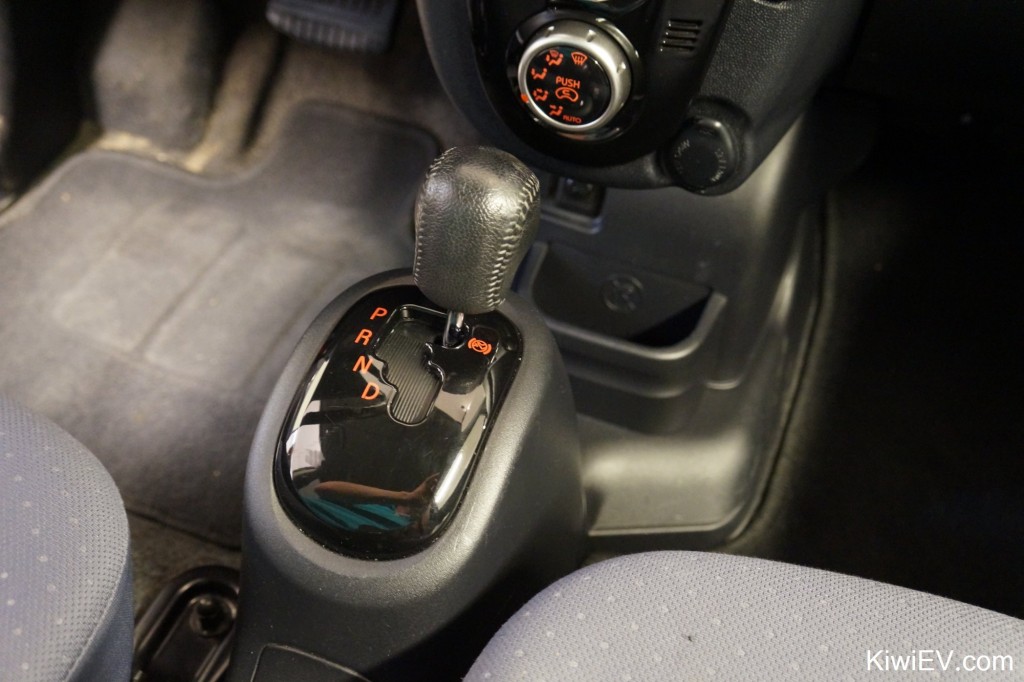
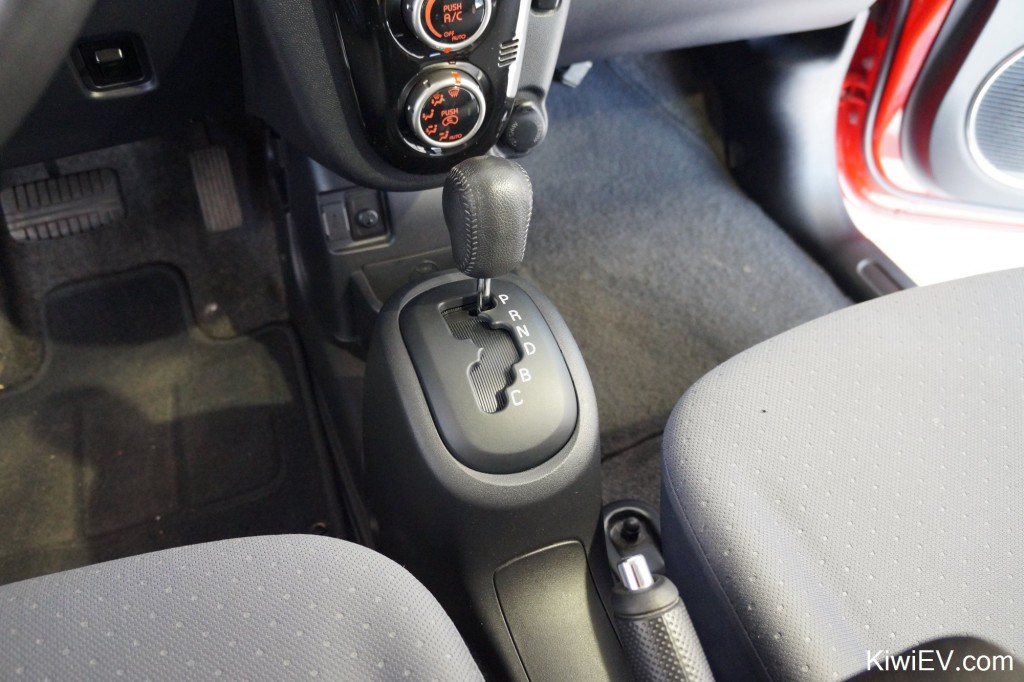
For some reason however the Peugeot iOn and Citroen C-Zero were produced without these extra options of regenerative braking. All you have in these European clones of the iMiEV is Park, Reverse, Neutral, and Drive.
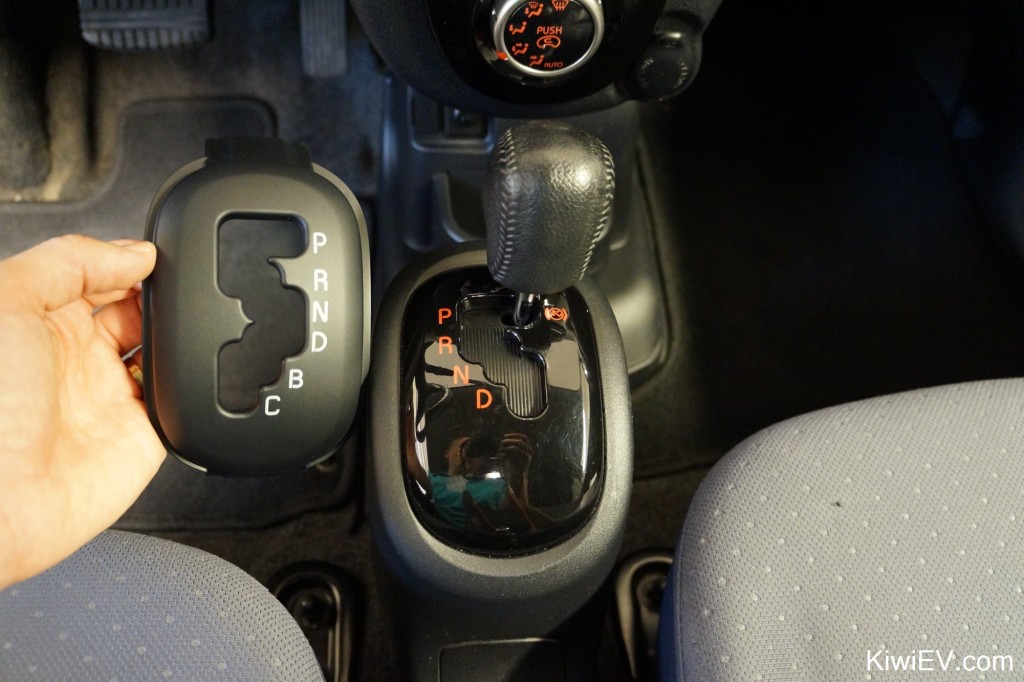
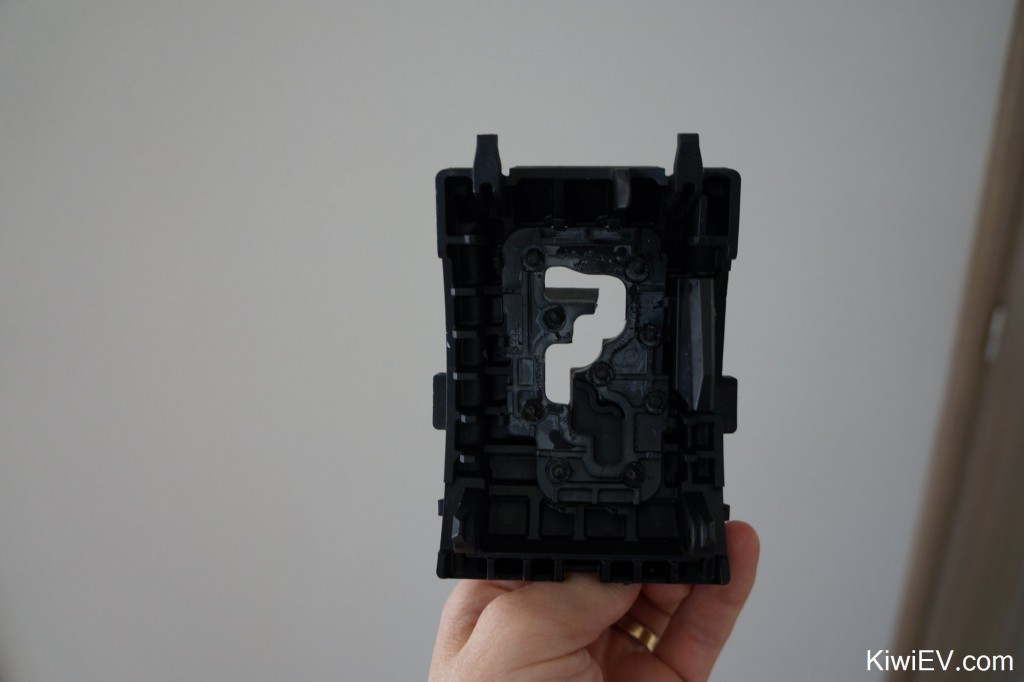
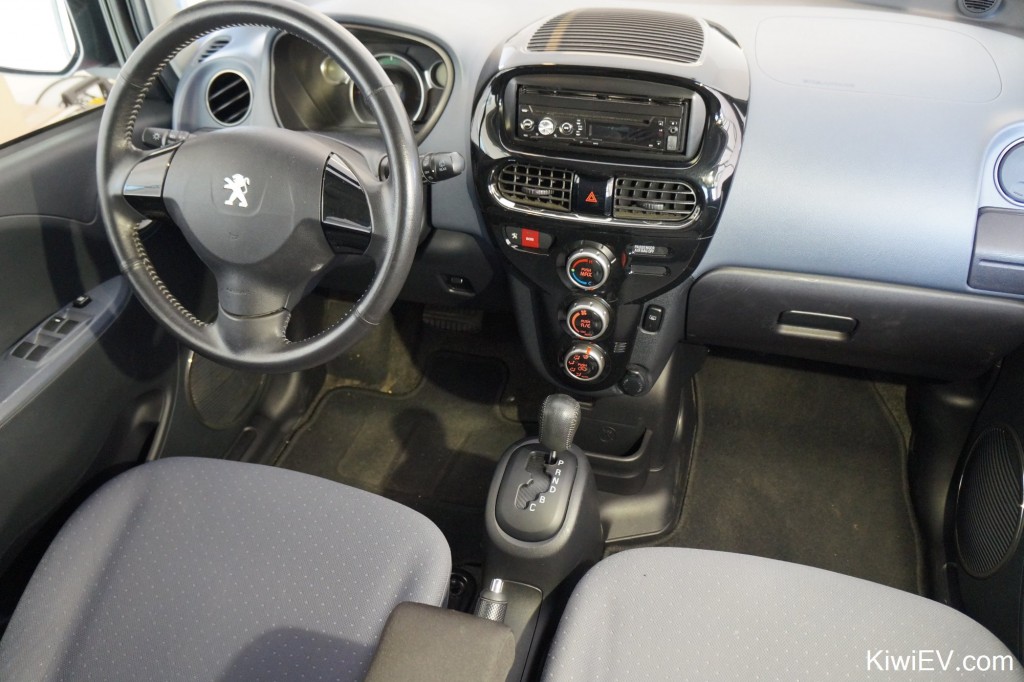
The thing is… those extra gear selections that the iMiEV has under “Drive” are actually there on the Peugeot and Citreon models, but they’re just blocked off with plastic!
So, this means all I need to do it remove the plastic which is preventing me from putting the gear shifter into B and C modes. Now, I’m not sure if this works on every model of Peugeot iOn and Citroen C-Zero, but it certainly worked on mine, so here’s how I did it.
The process of accessing those extra regen braking speeds is really easy, so I hope these simple instructions will allow you to uncover them in your own electric car.
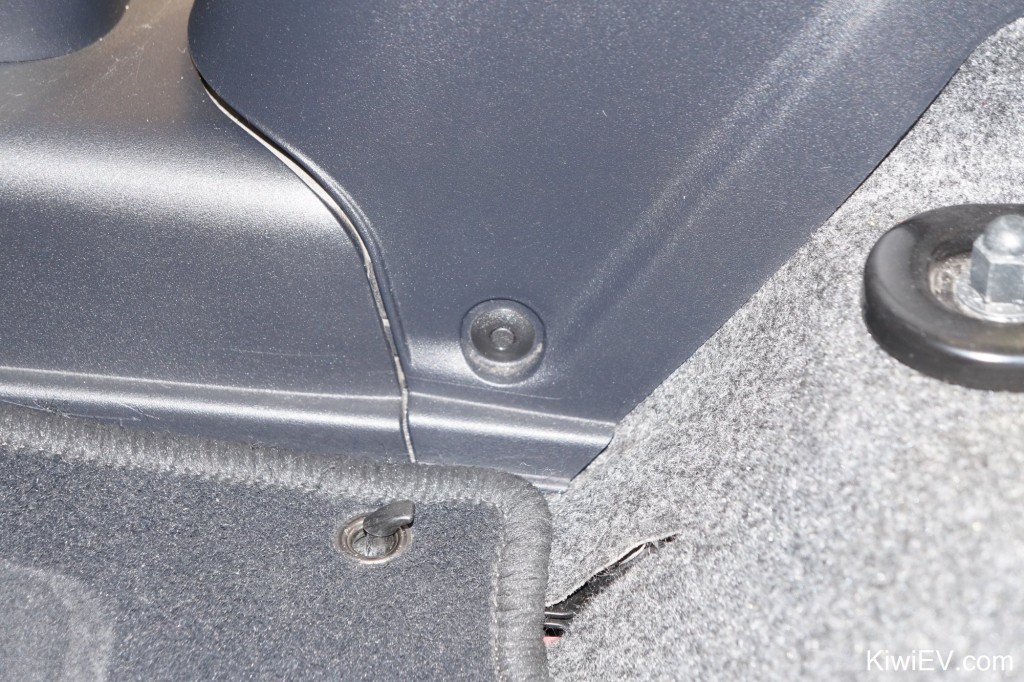
To begin, remove the plastic plugs holding in the centre console. To remove these (reusable) plugs, push the centre inwards with a small screwdriver, then the entire plug will pop out. Do this to both sides, near the floor.
Even with no mechanical ability, and even going at a slow, methodical pace, you can have those extra regen braking ‘gears’ available and working within 30 minutes. It’s such an easy job.
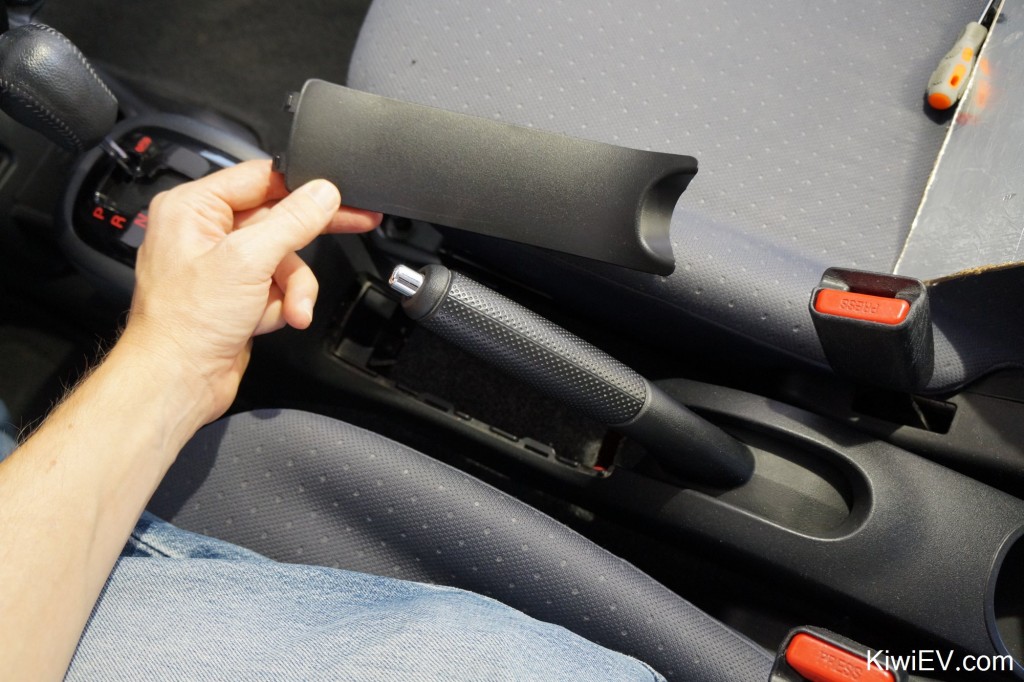
After removing the plastic plugs near the floor, remove the plastic panel in front of the parking brake. It simply pops upwards.
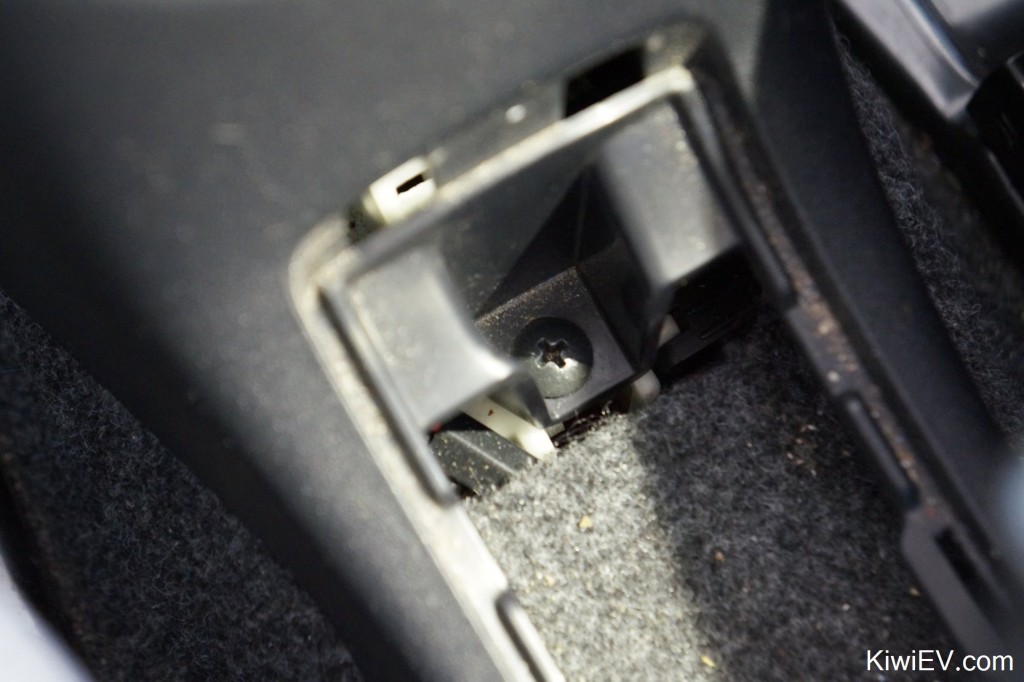
With that small panel panel removed, a screw will become accessible right behind the gear shifter plate.
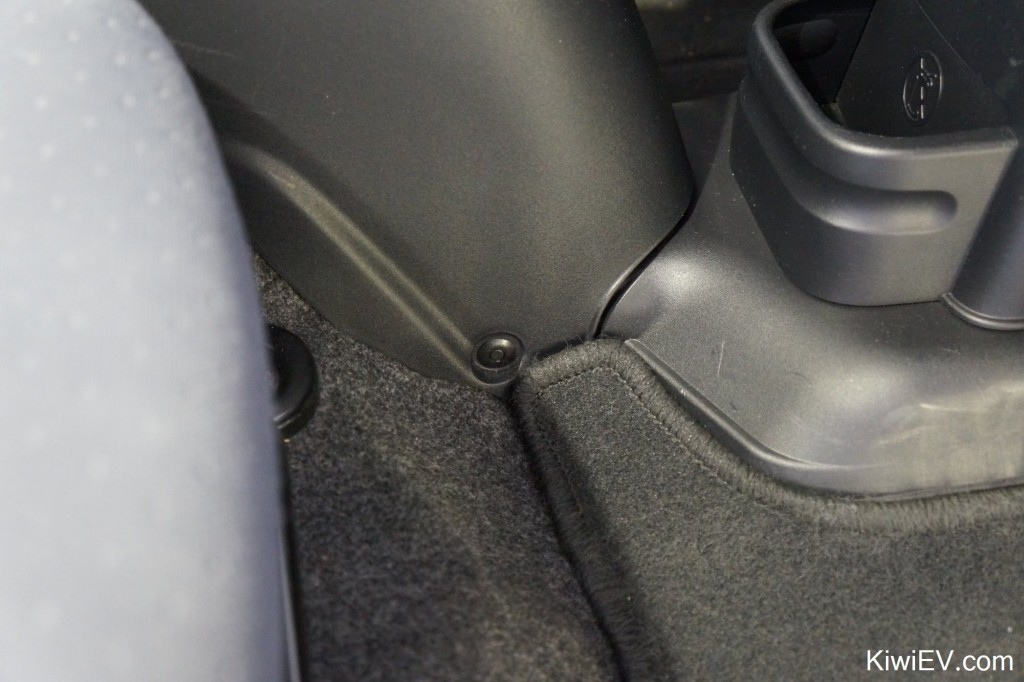
Once you’ve undone the above screw, the only one remaining is in the rear passenger compartment down on the floor in the middle of the car, behind the front seats. It’s the last screw holding the centre console in place.
This is a good time to remove the gear knob by turning it anti-clockwise.
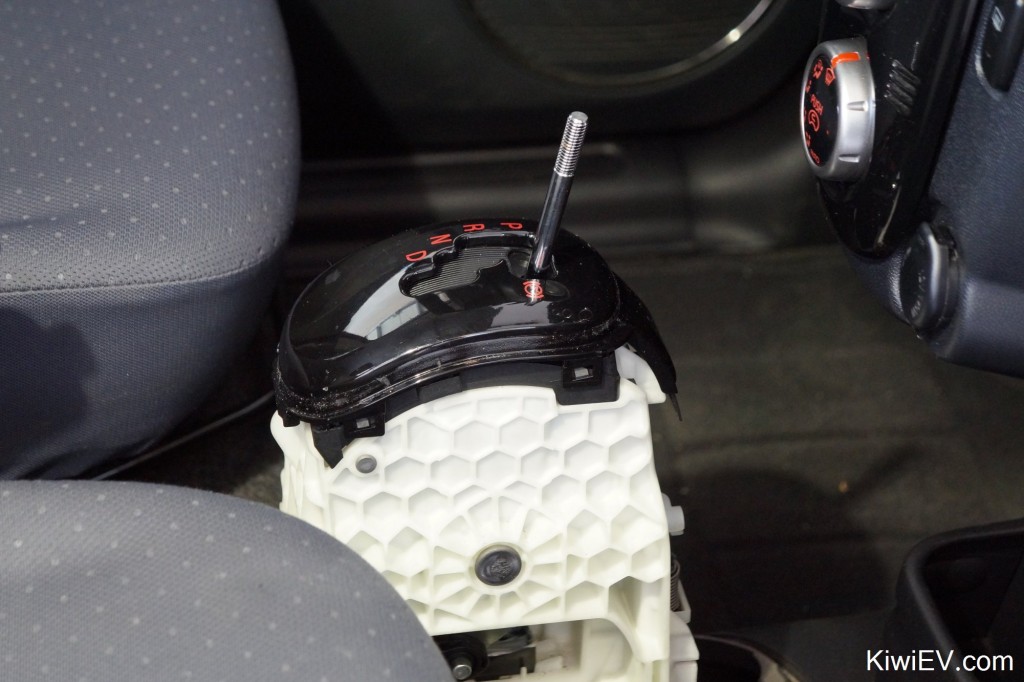
Then, with the centre console removed, unclip the gear shifter plate by prying out the four clips that secure it to the white cluster.
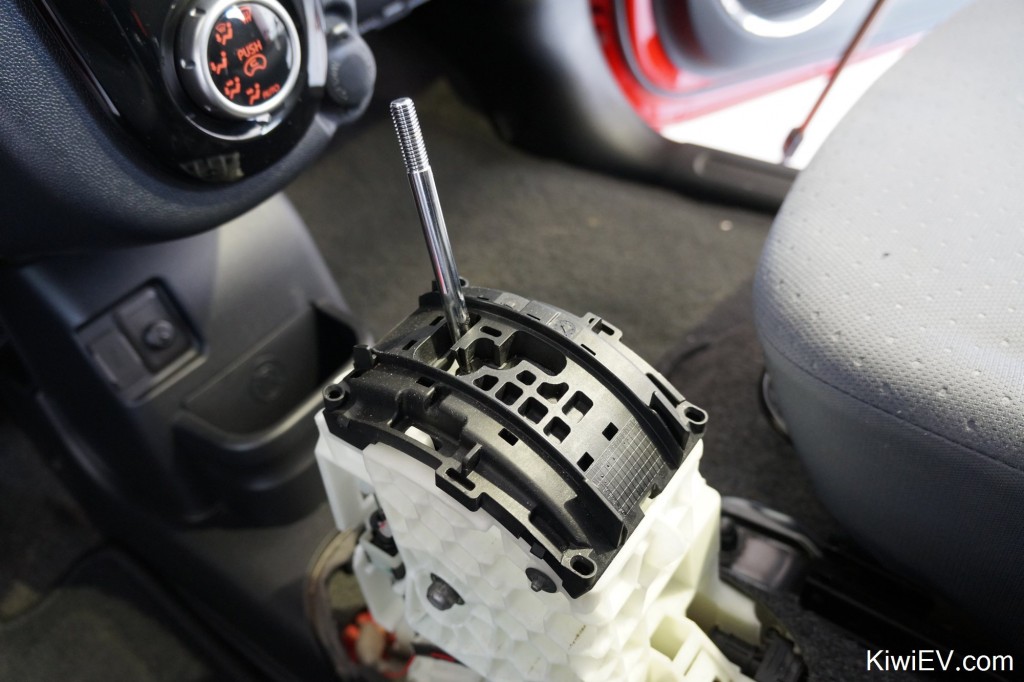
Now with the shifter panel naked and at your mercy, remove the little metal washer / disc on the bottom right of the above picture. It holds in a rod which secures the black shifter panel to the main white cluster.
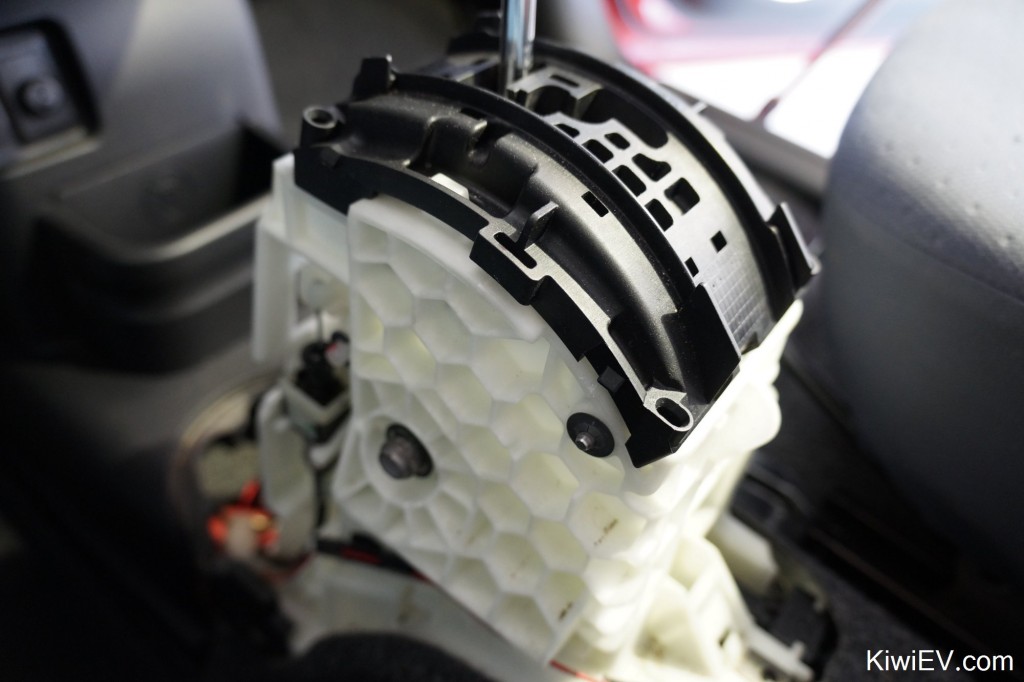
Above is a better image of the disc which needs to be removed. It can be pried off with a small flat-head screwdriver.
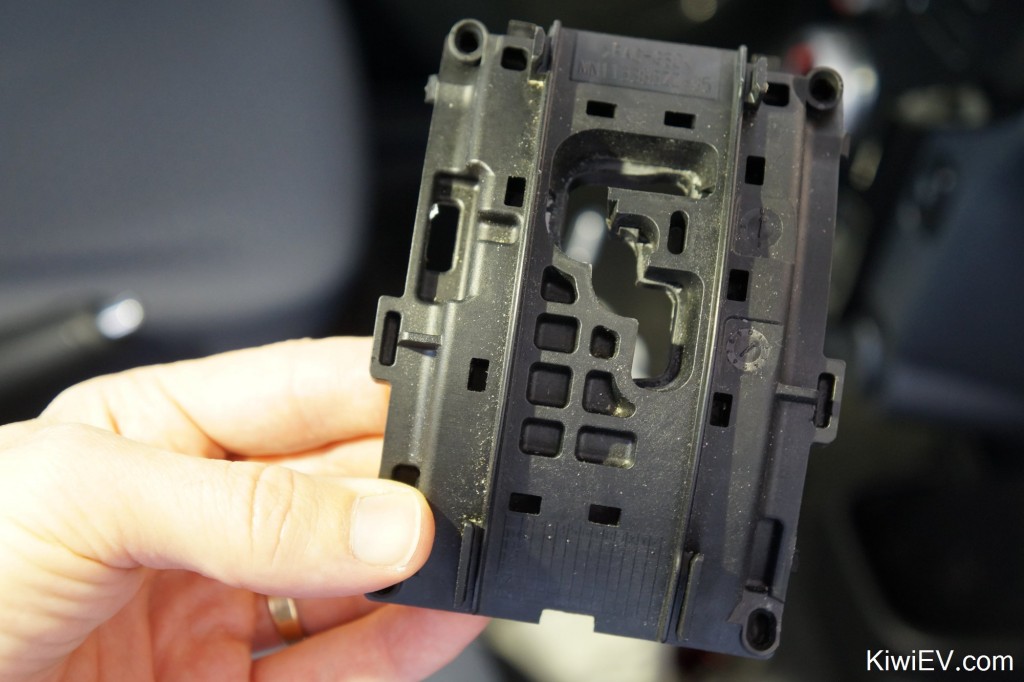
With that disc pried off, and the short metal rod removed, the black shifter panel (shown above) will lift straight off.
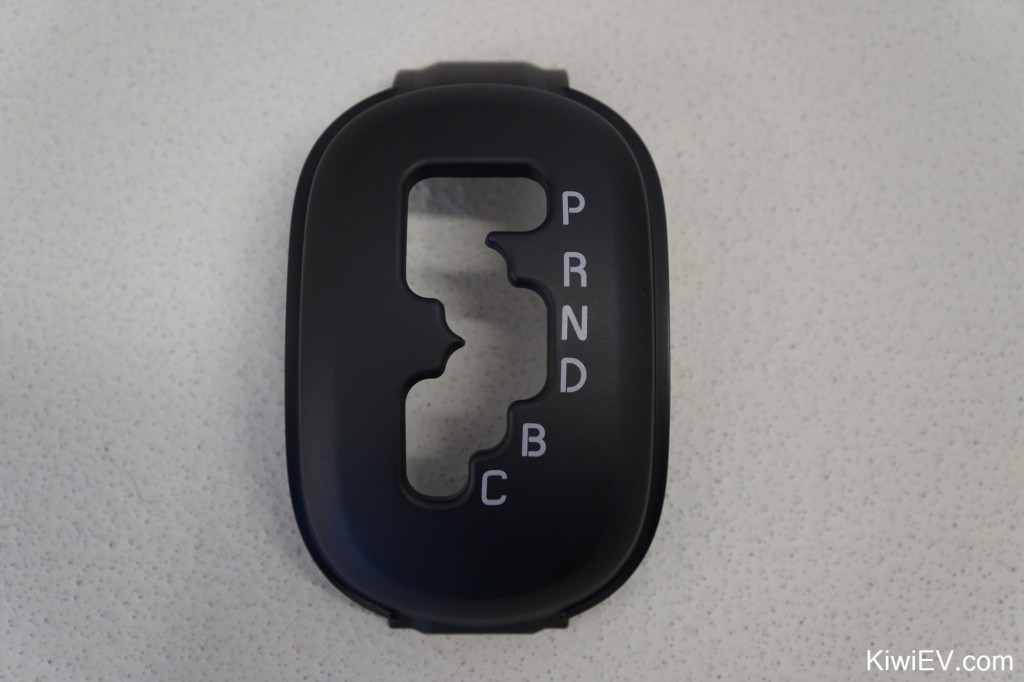
This is where you can see how it looks. Notice the “ice tray” effect on the bottom left of the panel where there would be extra gears on the Mitsubishi versions? That’s what we’re about to hack away at…
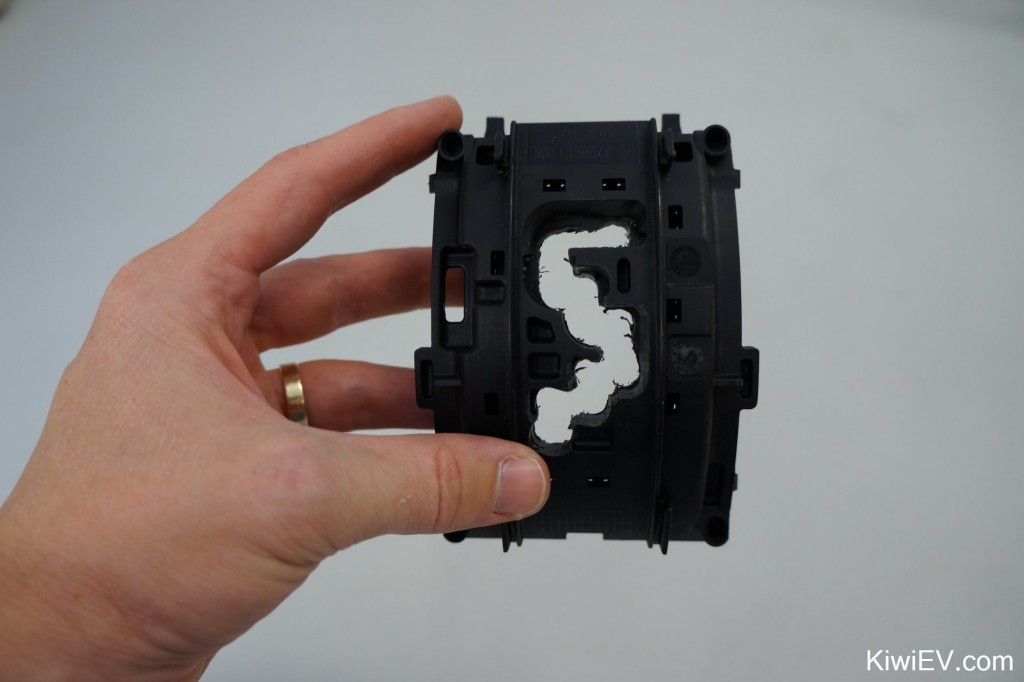
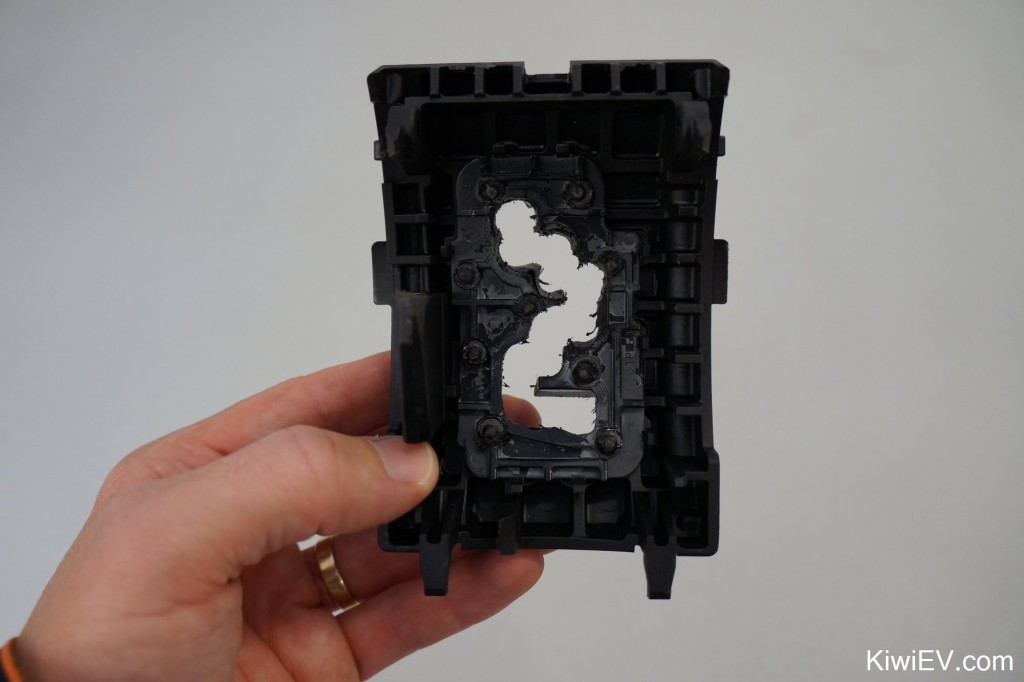
The easy solution to removing the blocked-put plastic on the gear shifter is simply to use a drill to make new “slots” for the gear knob. Here’s the “after” shot:
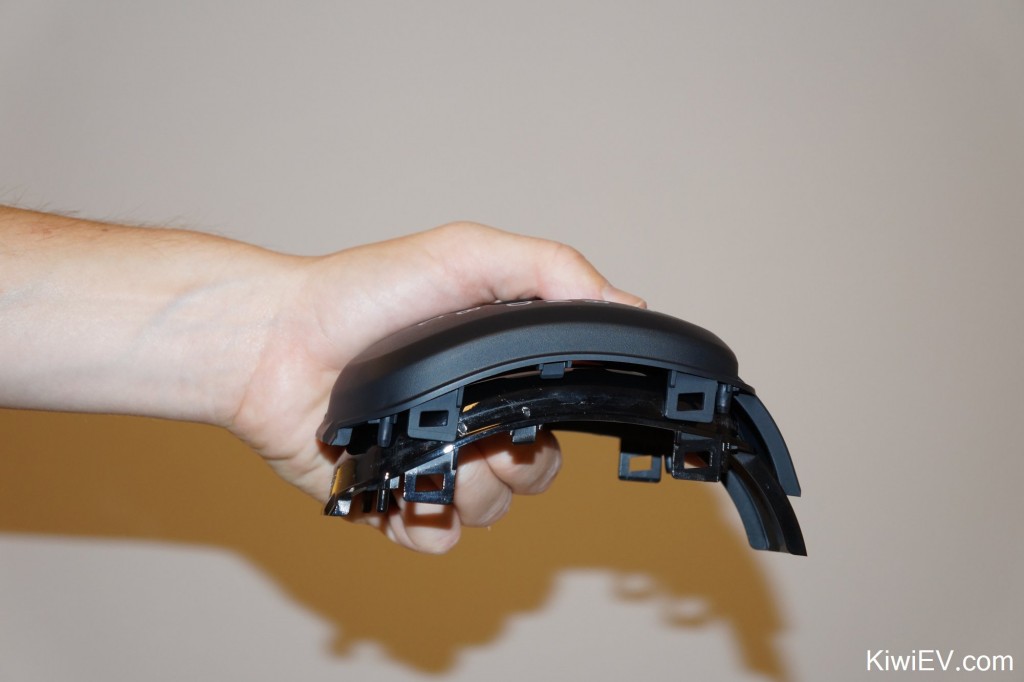
It was actually not scary at all, because I simply followed the pattern which Mitsubishi had provided when they made this car. Here’s the underside:
I was worried I would make a mess of the thing but it was actually pretty easy. You just need to take your time, drill a little at a time, and try the plate out a few times in the car to monitor the progress.
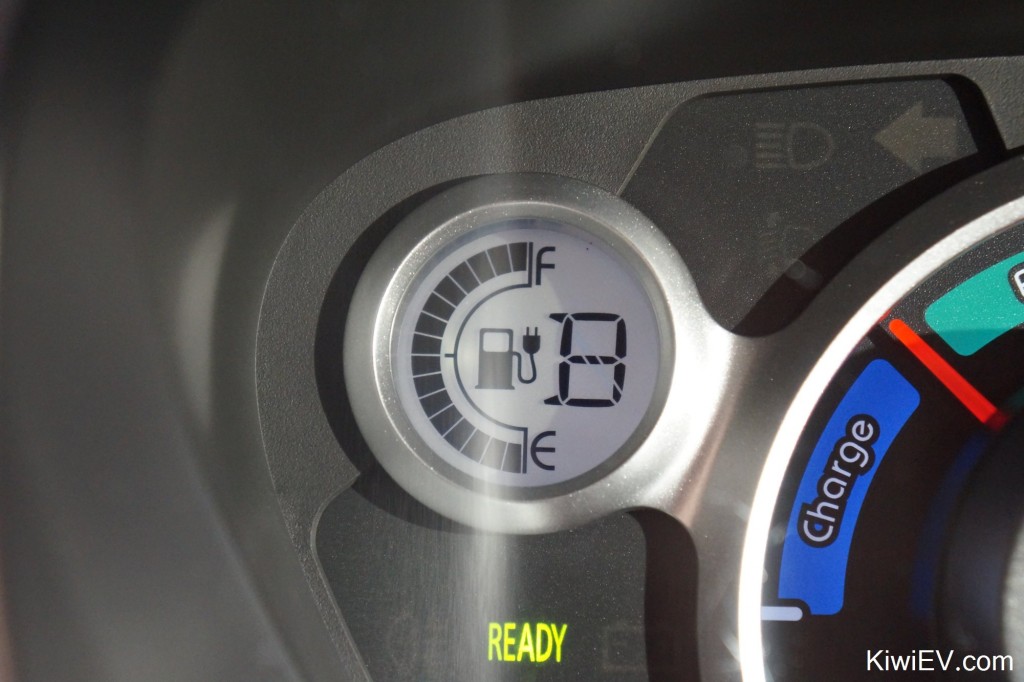
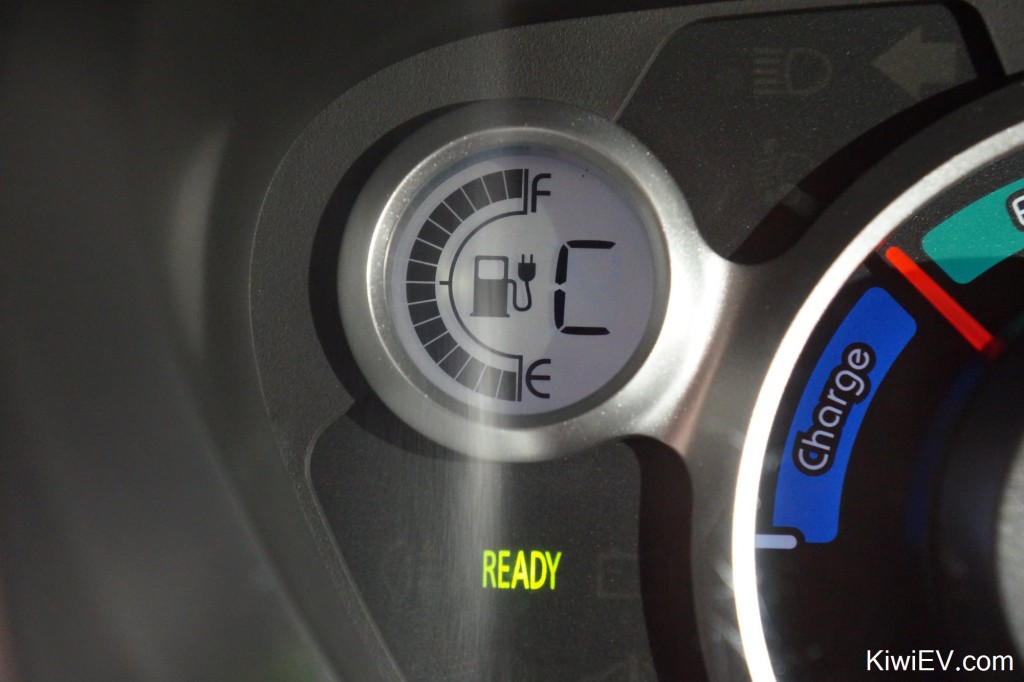
At this point, it pays to turn on the ignition and check that the new “speeds” or “gears” are showing on the dashboard. It should show as B mode and C mode.
So far so good: everything’s looking great! Time to put the centre console back together.
I discovered that there’s one last thing to keep in mind when installing a new gear shifter cover plate into your C-Zero or iOn: you may need to make a minor modification to it to ensure it clips into place.
In the above photo you can see the new shifter plate sitting on top of the original shifter plate. Notice the small clips where my index finger is? You might need to cut/chisel those off in order for them to fit. This is because the clips on the new adapter plate don’t seem to align with the old adapter plate.
It’s no problem, because after a few minutes with a file I’d chopped them off nicely and the new panel was installed!
That looks awesome!
I’ve always been a fan of making tidy modifications to cars. If a modification can’t be done tidily then I don’t want to do it as aesthetics are important when you spend all your driving time looking at your modifications. This means that I’m very satisfied with the results I’ve achieved today.
I can’t believe it was that easy.
The average person without much mechanical ability could easy unlock their extra regenerative braking in their Citroen C-Zero or Peugeot iOn within 20 to 30 minutes. It’s honestly so easy that I don’t know why they blocked them off in the first place!
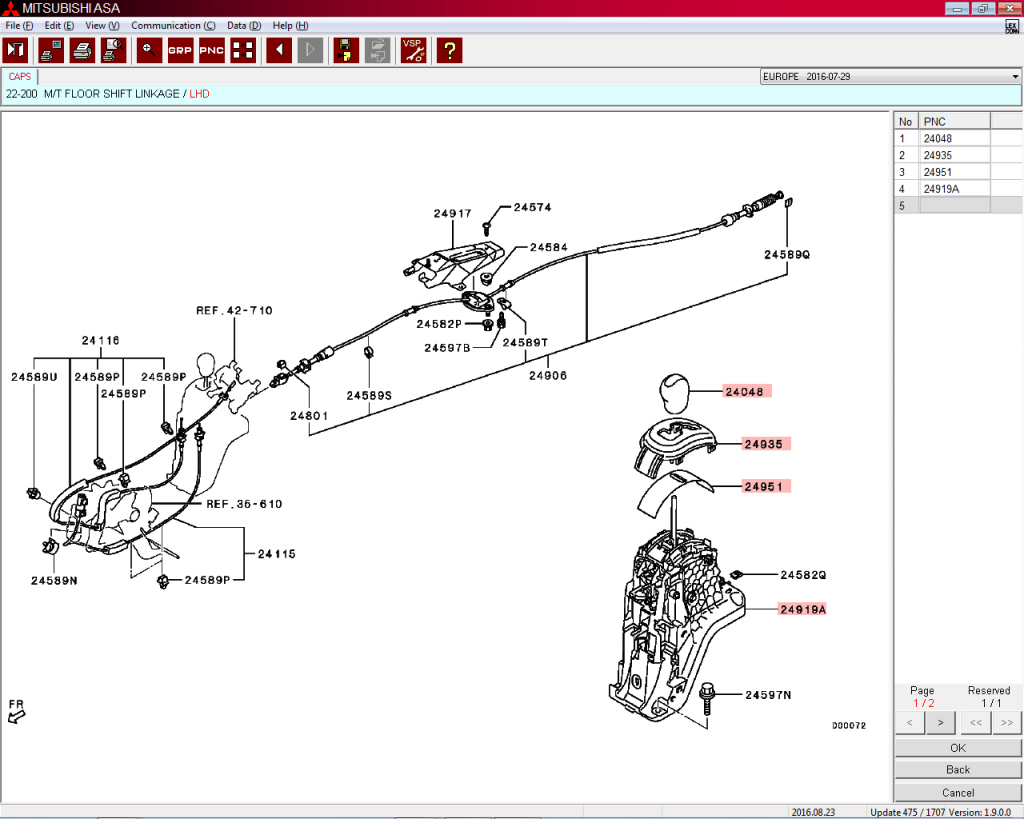
If you’re interested in buying a faceplate yourself, the part number is 2420A081XB and according to this picture which Mitsubishi Slovakia sent me to pinpoint the exact part I need, it’s also known as part number 24935.
The question remaining now… what do the extra B and C ‘gears’ do?
Well, there’s only one way to find out: click the play button on the video below!
Taking a road trip to Ukraine
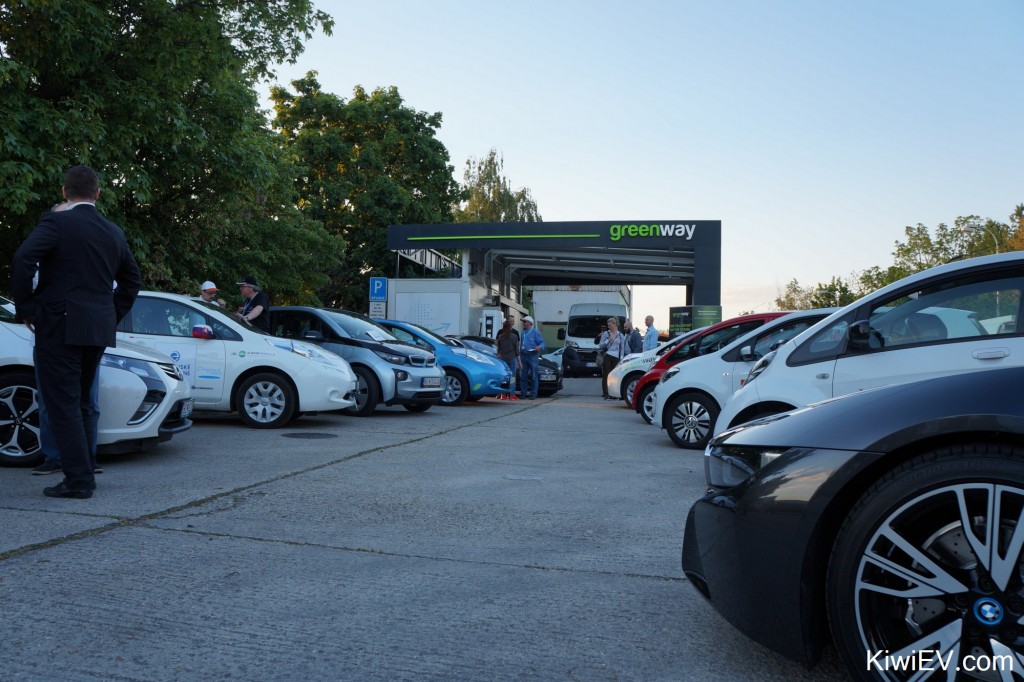
It’s been a few weeks since my last update on living with my electric car as there hasn’t been much to report on and electric cars don’t have much to fix or maintain so things have been quiet. In fact, a little too quiet… until 15 cars from eTourEurope arrived to recharge in Bratislava.
eTourEurope is a yearly event which sees a handful of different electric cars from different countries drive almost 4000 km / 2485 miles across Europe to raise awareness of electric vehicles.
I met up with the convoy as they entered the Slovak capital city of Bratislava. It was great to meet so many EV enthusiasts in one place. In fact, the event got me in the mood for a road trip of my own!
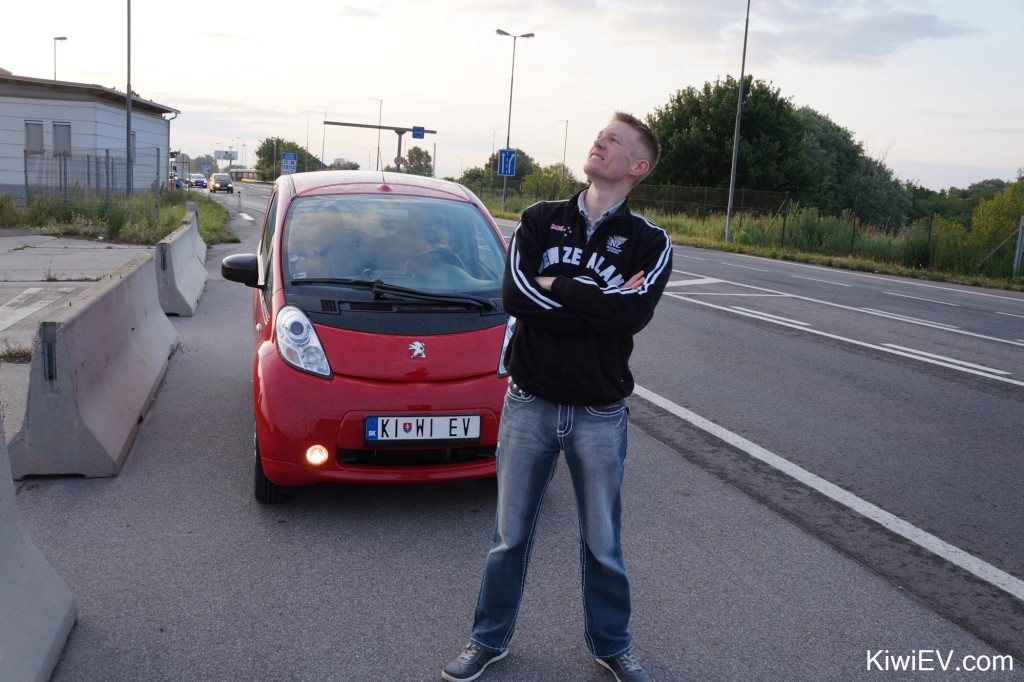
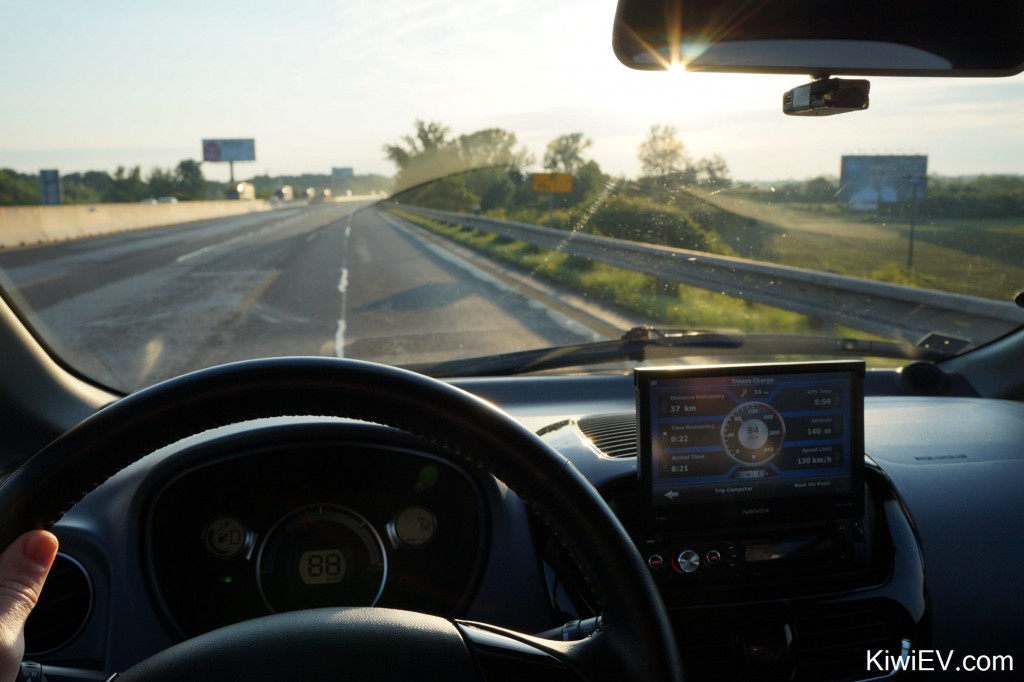
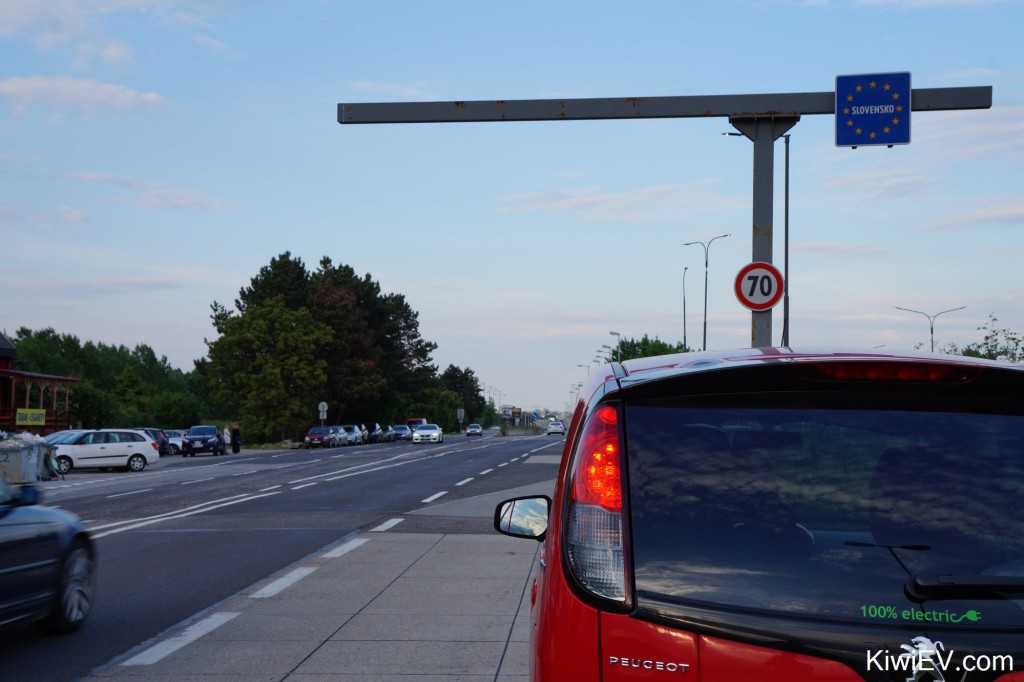
I decided to make a journey that (as far as I can tell) no one in Slovakia has ever done: driving from the Slovak-Austrian border on the far west to the Slovak-Ukraine border on the far east… and back again.
I’d worked out all the places we’d need to stop to recharge, and because my car is a city runabout, not a Tesla Model S, there would be many, many, many, many, many recharging stops involved. So, let’s get started!
The journey began at 5:30 AM on the other side of the Slovak border in Austria.
From here we’d be driving all the way across the country to the Ukraine border in a car that was never designed to leave the city!
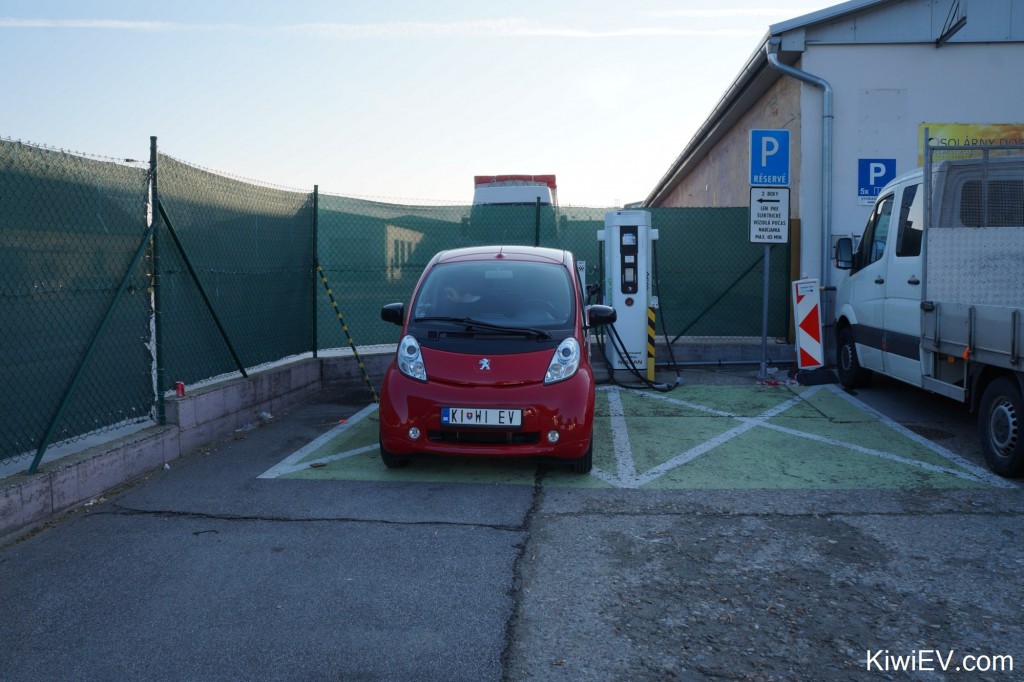
Our first stop was 49 kilometres / 30 miles outside the city of Trnava.
Not too bad so far, but we had a long way to go.
From here we went to Nitra, 46 kilometres / 29 miles away, where we grabbed another 20 minute quick-charge in order to reach the next stop:
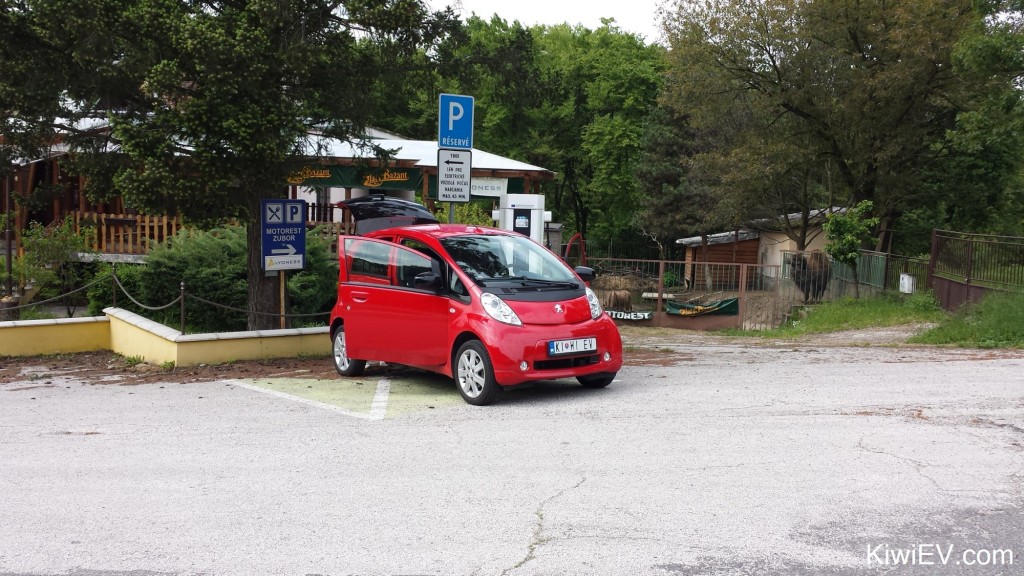
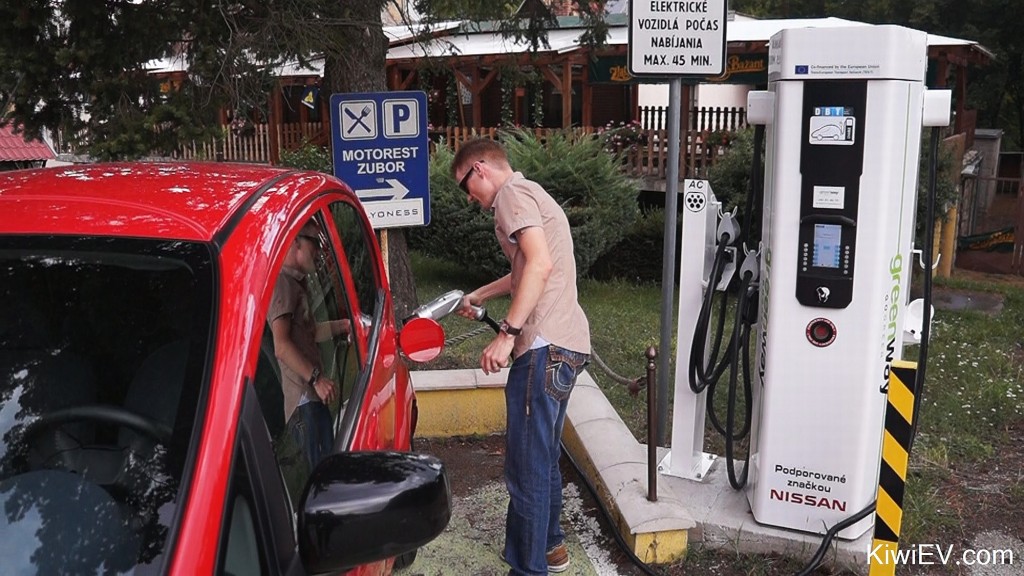
The third charging stop was at a place in the middle of nowhere called Motorest Zubor just 33 kilometres / 20 miles away. And yes, that’s a camel in the above photo. And no, I don’t know why.
From this location I forced the quick-charger to go beyond the regular 80% top-up, all the way to 95%. This is because the next stop was 83 kilometres / 51 miles away and last time we attempted that stretch of road we arrived to the city stressed out and on ‘turtle mode’.
Because my car is designed for cities only, it means it’s not as aerodynamic as a Nissan Leaf at higher speeds. Coupled with the cold temperatures and the strong winds, this meant I had to stick to around 80 km/h or 50 mph most of the way – not always easy in a country where driving at high speed is king!
We arrived to the quick-charger in the central Slovak city of Banska Bystrica with no bars of electricity remaining – but at least we weren’t on ‘turtle mode’.
We grabbed a bite to eat while the car charged up to 93% for the next leg – a mountainous journey to Donovaly, a skiing resort 1000m / 3280 feet above sea level.
Despite the rain turning to snow the higher we climbed, we made it to the top of the mountains with heaps of battery power to spare! I also got abducted by aliens by the looks of the above photo…
Next stop: Ruzomberok.
Ruzomberok was down on the other side of the mountains, 55 kilometres / 34 miles away. We topped up there to 95% because the next leg to Poprad was going to be a long one…
We made it to Poprad 75 kilometres / 46 miles away with a few bars of battery remaining thanks to economical driving. From here we grabbed a coffee and prepared for the next leg of the journey to Presov.
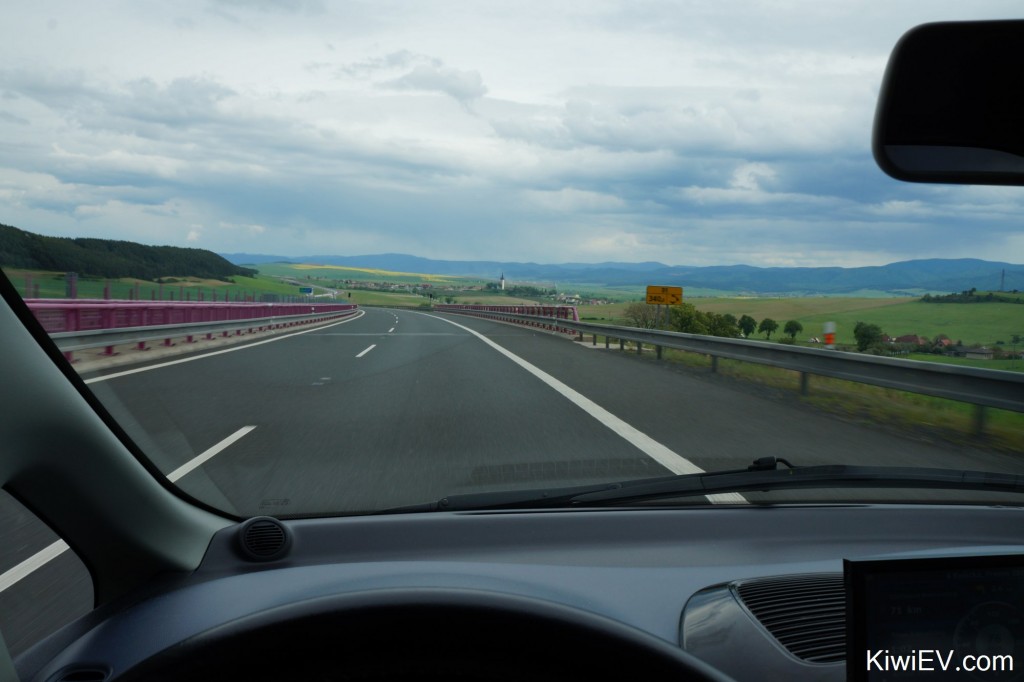
We lapped up the many miles through eastern Slovakia, admiring the thousands of years of history rolling by, as we traversed the country in a vehicle which wasn’t designed to do it! That added a real pioneering dimension to the journey.
Before long, we’d arrived to Presov, 82 kilometres / 51 miles away from our last stop. We only charged for 18 minutes here as the next charging point was only 31 kilometres / 19 miles away.
This meant we could fly down the highways as fast as we liked to the final charging stop in Slovakia, in the city of Kosice!
From here things were about to get spicy. Ukraine was 95 kilometres away, we had to cross a series of mountains, the temperature had fallen to around 14 °C (57 °F), the wind was strong and the rain was heavy.
So with a quick prayer to the patron saint of batteries (is there one?) we commenced the longest, riskiest part of the journey – with no more charging infrastructure at our disposal.
Driving up and down the mountains seriously took its toll on the car’s battery. I mean let’s be honest: Mitsubishi built the iMiEV to pop around the city streets of Tokyo, not traverse the Slanske vrchy mountains in eastern Slovakia.
The Remaining Range gauge (also known as the guess-o-meter) said that we wouldn’t make it, so I drove more economically than I ever have in the past – even if it meant holding up dozens of cars behind me – something I hate doing.
With night falling – along with the battery meter – the mountains turned into flat valleys and the border to Ukraine appeared on the horizon!
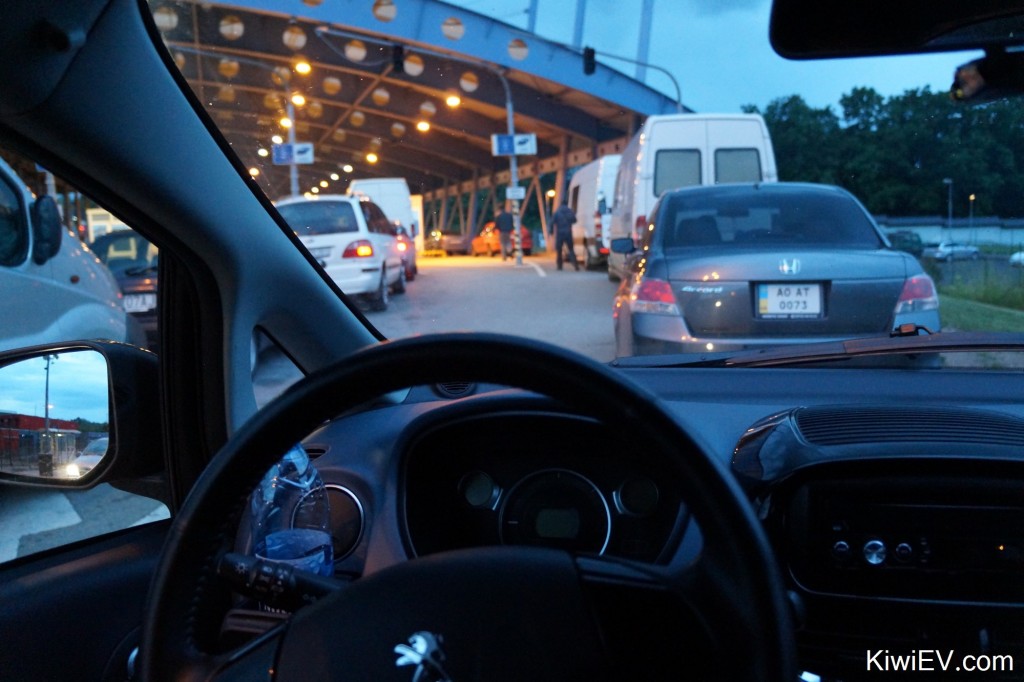
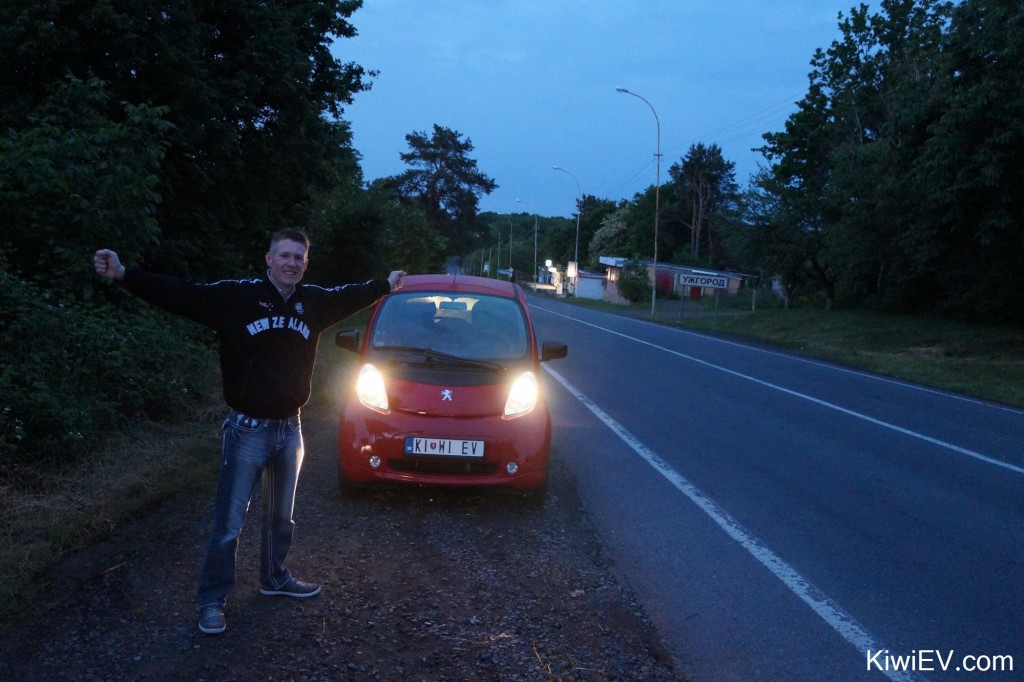
We made it to the Ukraine border! Woohoo!
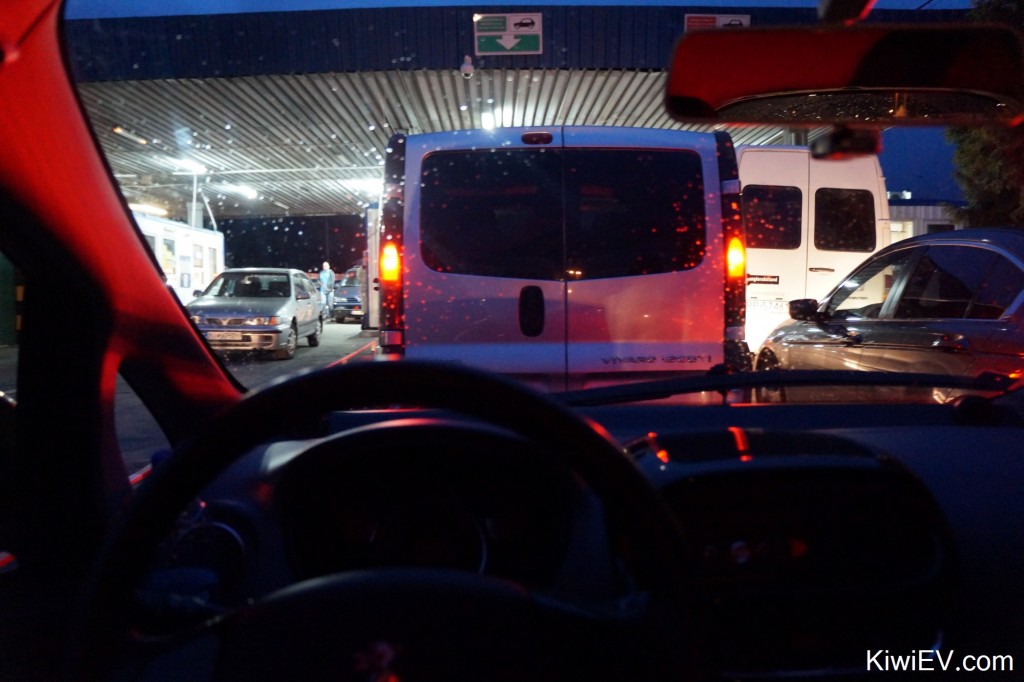
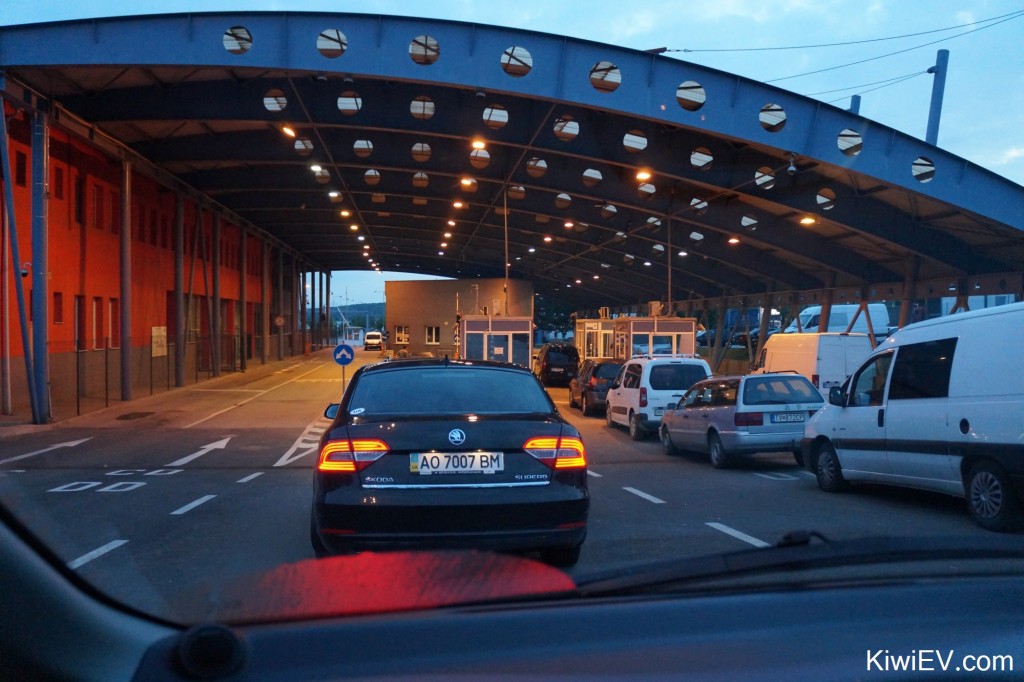
However, we still had an hour to wait in order to clear Slovak customs, and our hotel was still a few kilometres away in the city of Uzhhorod on the other side of the border.
We got through to the Ukraine side where we had to wait in more confusing lines for another hour. We found someone that spoke enough English to help us out, and eventually we got through the border inspections…
WE DID IT!
After 546 kilometres / 339 miles across the Slovak Republic we made it to Uzhhorod in Ukraine!
From here we were exhausted, so we found our hotel (with two bars of battery remaining) and went straight to sleep.
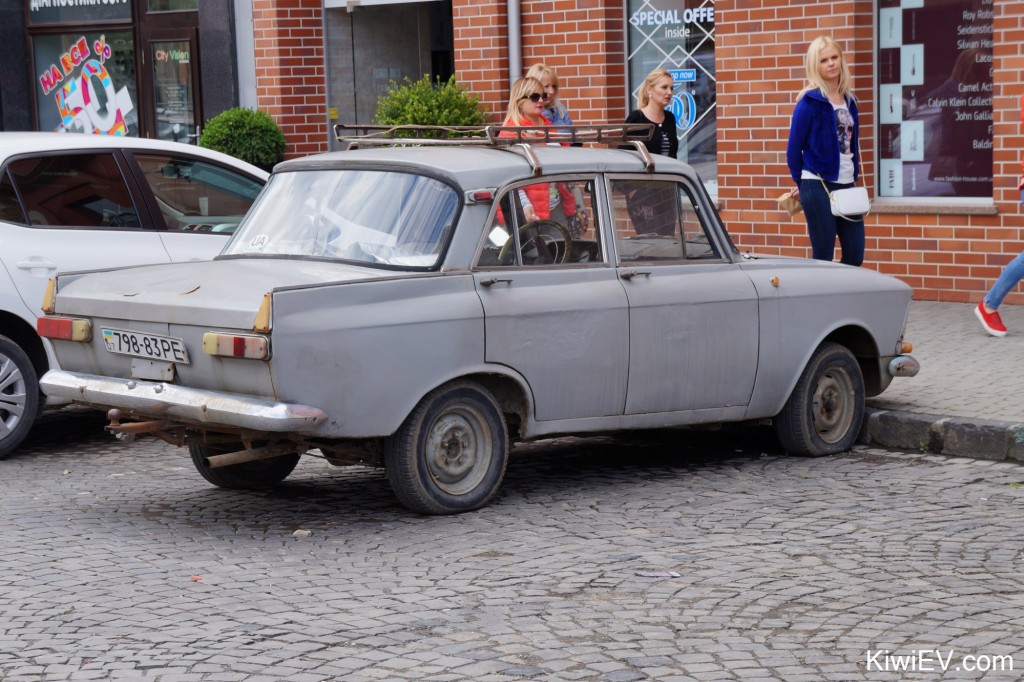
The next morning we went exploring the ancient town of Uzzhorod. It’s a fascinating place with plenty of history yet there were absolutely no tourists. We felt like we were exploring an undiscovered secret.
Magnificent churches, cobbled streets, great food – and heaps of unusual Soviet-era cars like the one above. Imagine that beast painted deep, glossy black and converted to run on electricity!
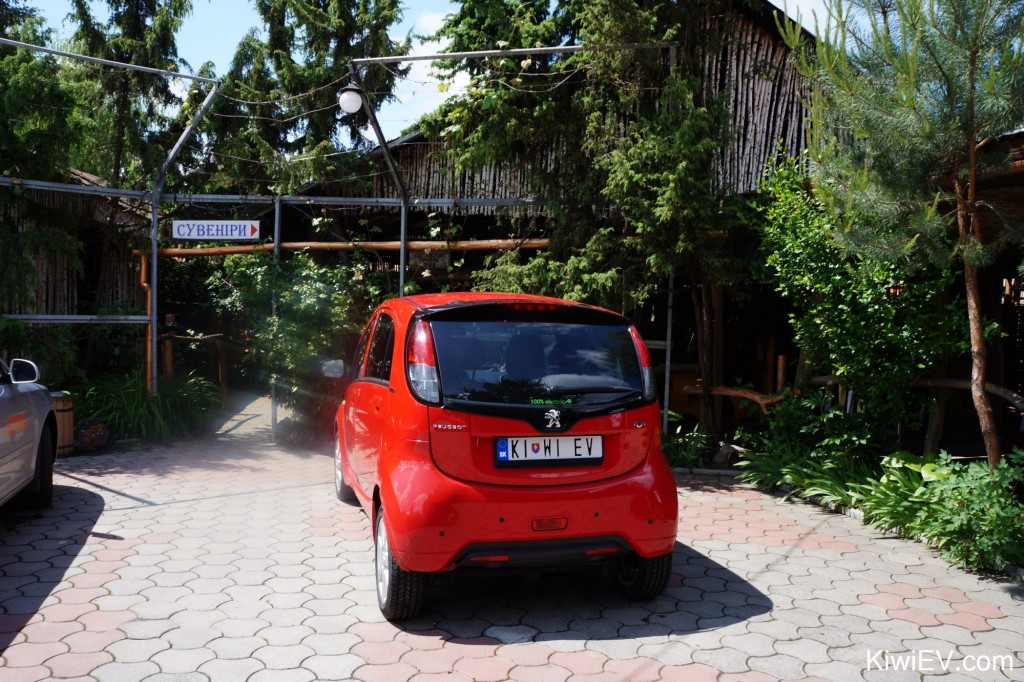
For lunch we plugged in the car and took it to a restaurant just outside the city centre.
My EV turns heads in Slovakia, but I had never expected as much curious attention as what I received in Ukraine. I saw dozens of people stop and turn their heads and heard many folks saying something like “electrikny” as I drove around town with my window open. Neat! 🙂
We found the restaurant about 8 kilometres / 5 miles out of the city centre and stopped for lunch. We enjoyed traditional Ukrainian cuisine for two, comprising borscht with different breads, coffees, mineral water and apple pancakes all for 122 UAH (around €4.32 / $4.85 USD). The food in Ukraine is filling and tasty yet so incredibly cheap.
After a fun day of exploring Uzhhorod it was time to head back to the European Union. We started early in the morning again and made our way through the border. This time everything went quickly and smoothly, and within an hour we were back in Slovakia.
On the way back through Slovakia we were able to take our time. The weather was much better and there was no wind, so we made it to each charging point with much more power left over than when we came the other way.
The journey back was much faster and more enjoyable, thanks largely to the weather. One of the villages we stopped in was Liptovska Osada. I couldn’t resist grabbing a shot with both the old & the new.
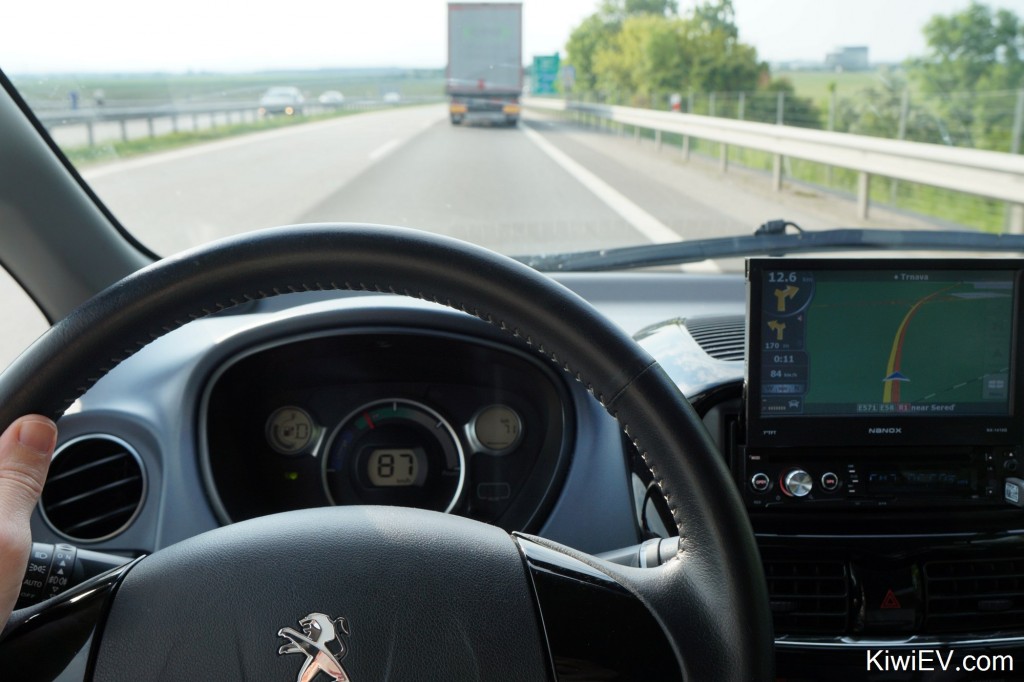
One great idea to maximise range in long-distance EV driving for cars like mine, is to go “truck-surfing”. This means you find a truck and sit along behind it. This method stops you from going too fast and wasting power, and you don’t slow down any cars behind you.
I pressed on for another 500 kilometres / 310 miles, recharging 8 times across the country, and before I knew it I was back in Bratislava. From here it was just a few kilometres from the Austrian border; where the whole journey began!
Go, me! 🙂 As far as I can tell, I’m the first person in Slovakia to make this journey.
Interestingly, when my car was brought by the previous owner back in 2011 it was actually the first privately registered electric car in Slovakia. So in a way, it was the perfect vehicle for this semi-pioneering trip.
And as always, the experience was captured in an easy-to-watch video, below:
I hope you enjoyed the ride. The only question remaining… where to next?
Winter!
To be fair, the above picture isn’t actually winter. It was taken while Veronika and I enjoyed a trip to New Zealand in December 2015 in order to experience Christmas time in the summer once again – the way Christmas should be.
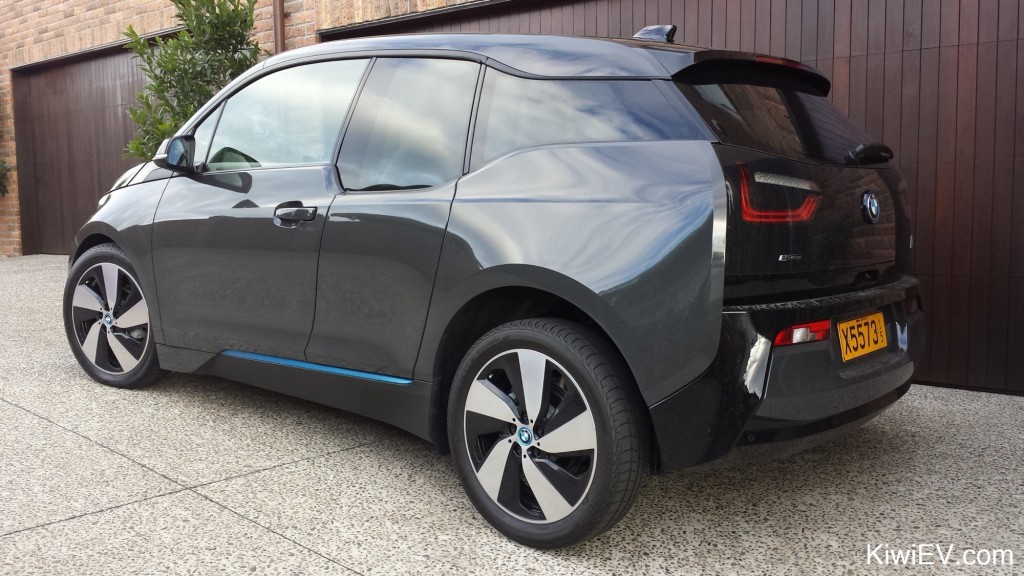
I also had the opportunity to test-drive a brand new BMW i3 with a range-extended petrol engine built in. It was a comfortable if unremarkable electric car, but it sure has some good acceleration. I wouldn’t mind one if they were more realistically priced and if they came with a bigger battery instead of an old-fashioned internal combustion engine installed. I guess BMW aren’t ready to follow Tesla just yet.
Before long, it was time to leave the warmth and sunshine and head back to Slovakia, which meant learning to drive my electric car in winter.
The cold winter weather meant that I had to effectively learn the characteristics of my car all over again. There wasn’t that much of a difference to be honest, but I’d be lying if I said there was no difference at all. I learned that the car gave me less range in the colder temperatures, though not a huge reduction.
I quickly learned however that using the heater takes a massive chunk out of the range. I mean that little electric heater uses heaps of electricity. So much so, that I think next winter I’ll copy the brilliant idea from Ben Nelson, and install a tiny fuel-sipping “parking heater”. He did a really tidy, professional install of an tap-in heating system which costs almost nothing to run yet heats the cabin of the car brilliantly while using no more electricity than just running the fan. Cool huh?
Another idea to create more space under the tiny hood in the Peugeot iOn / Mitsubishi iMiEV / Citroen C-Zero in order to install a parking heater system is to move the big lead-acid “starter” battery to a different location. And, while you’re at it, get rid of it and put a lightweight lithium battery in it’s place, as Jarkko Santala did here! He also installed a fuel heater in his electric car, along with heaps of other modifications. Both the aforementioned blogs are great reading with lots of pictures. If you like tinkering, then grap a cuppa and check them out!
There are endless blogs and research info on the internet about winter affecting electric cars, but as we all know, the best way to learn is through hands-on experience. So I did a few warm weather versus cold weather comparisons which I included in the video at the bottom of this page.
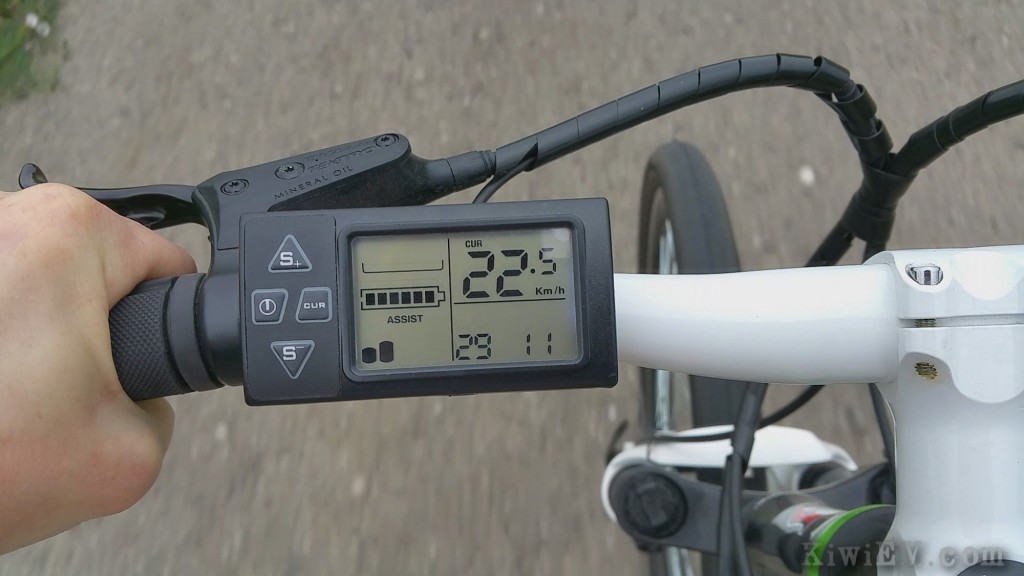
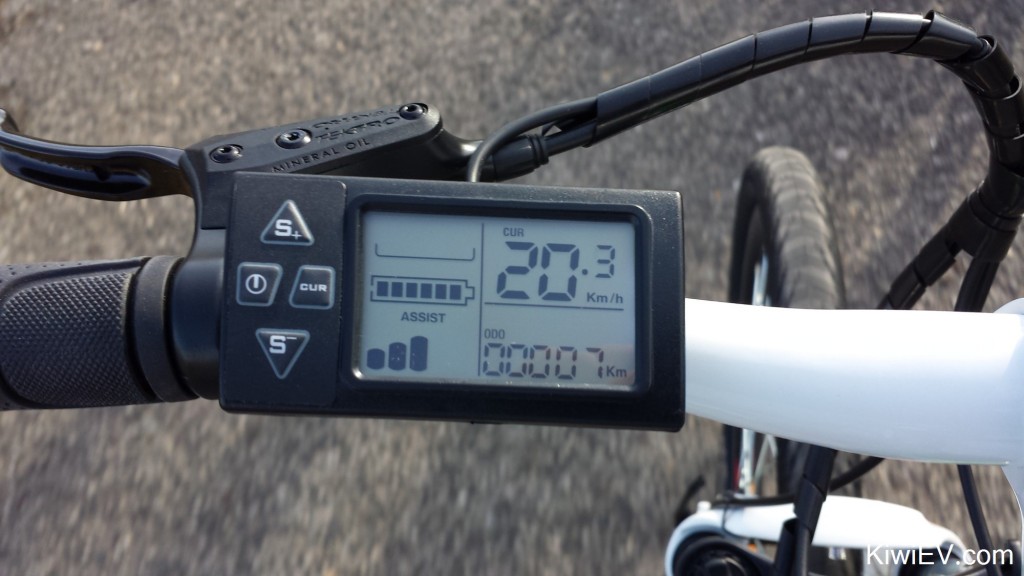
As you can see in the above picture, I finally bit the bullet and bought myself a plug-in hybrid (secret code for an electric-assist bicycle) which is something I wanted for years. Thank you, Christmas bonus!
The only problem was that it was the middle of winter so I couldn’t exactly take it for a spin.
Well, thanks to a planet full of gas cars and coal power stations I only had to wait a couple of days for winter to temporarily end as a freak mid-winter heatwave arrived.
This meant I was able to go for a nice long ride in a sunny 11°C (52°F) when it should have been -11°C (12°F). Very, very strange indeed.
On one hand I loved being able to ride my bike in the middle of the Slovak winter, but on the other it made me sad because we all know this shouldn’t be happening. We’re really pulling our delicate climate apart.
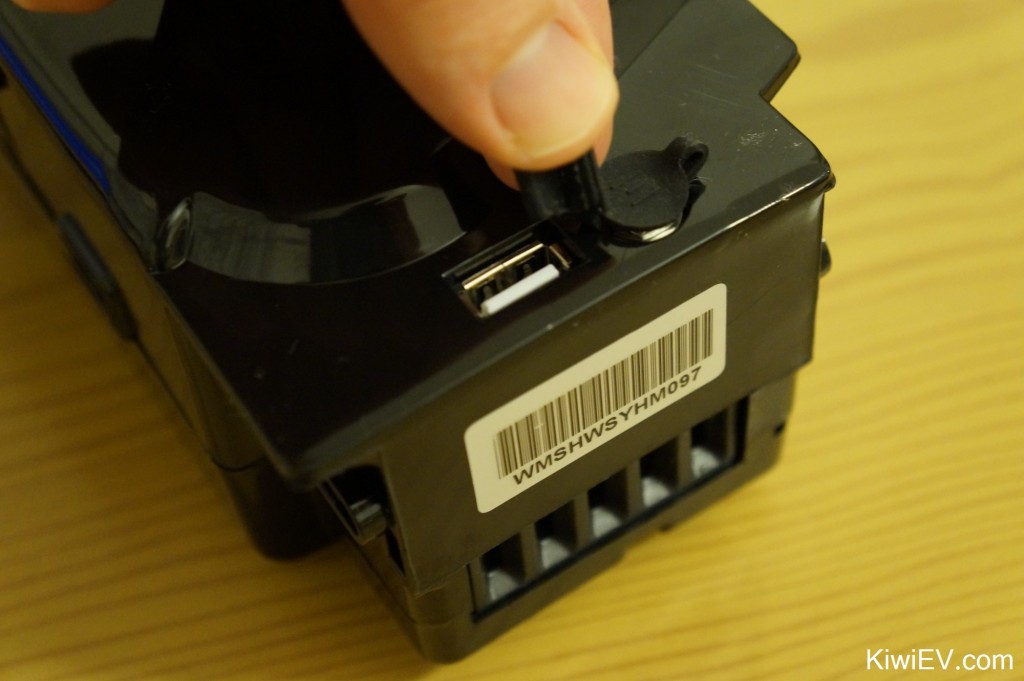
On a more positive note, I noticed my electric bike’s battery comes with a USB socket. This means I can charge my phone on the go. Kinda cool.
Overall it’s been a real adventure this winter, learning the eccentricities of my little city electric car, but I’ve had no unpleasant surprises because the range difference wasn’t staggering (as long as you don’t touch the heater).
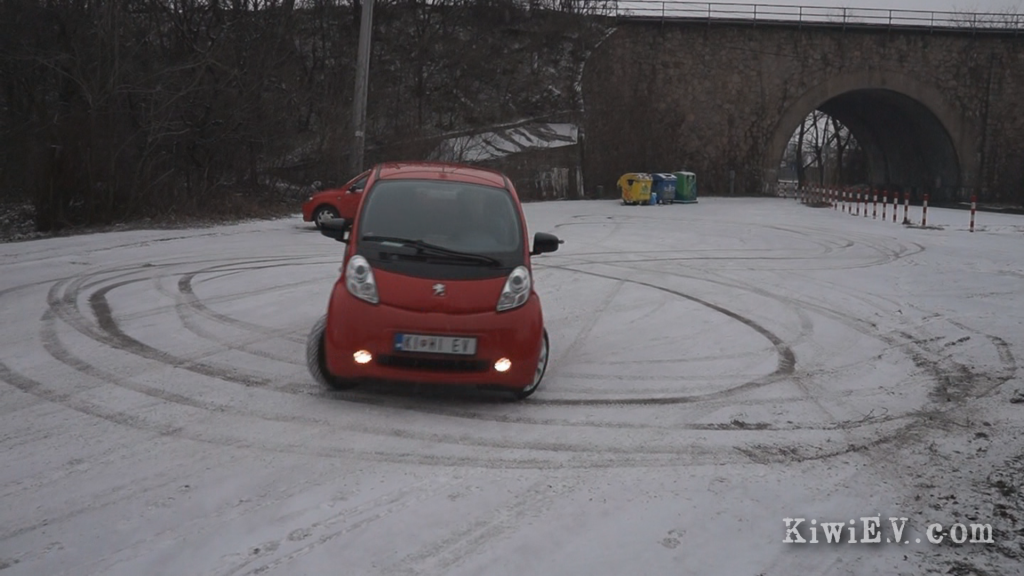
Another thing I discovered about my electric car was the button that turned off the stability and traction control. This meant that when the snow began falling, I was able to use this button to devolve into a fully-grown manchild, sliding my electric car around an empty street!
I experienced and learned a lot more than what I’ve just explained in text however, so to see the rest, including cold weather comparisons, my brief TV appearance, and even a cameo by Hitler wearing ridiculous socks, click on the video below!
Drive safe, and of course, drive electric!
Damage, data, and preparing the electric car for winter
Winter has arrived to Slovakia, bringing rain, sleet, snow and short days. However something else arrived which I was really looking forward to: my new high-speed, bluetooth OBDII adapter!
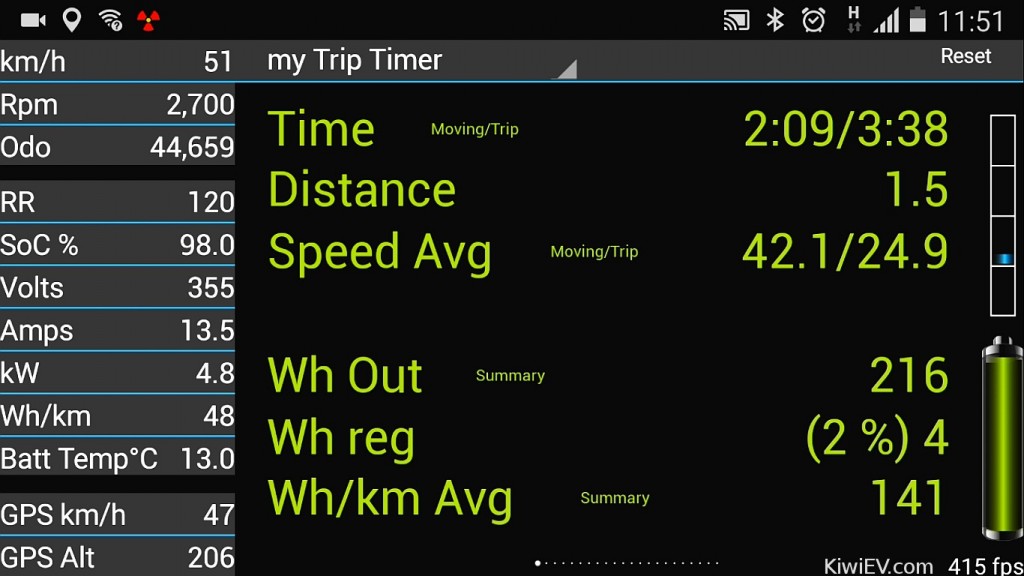
As you’ll remember, I had a bit of bad luck with my last two connectors, as I didn’t know that they needed to be high speed devices. I wrongly assumed they were all pretty similar, but that’s not the case. To read all the data coming from my car you really need a powerful adapter. So I plugged this new toy into the OBDII plug under the dash, turned on the caniOn application for smartphones (thoroughly recommended!) and waited for that sweet, sweet data.
I’ve gotta say, this application is just awesome and you should download it here. It’s completely free, but such a well-designed piece of software that I tried to find some way to donate to them, but they had no donate button on their website. So instead, while typing this I opened another browser tab and …there… I just donated €10 in their honour to Sloboda Zvierat, an animal shelter here in Bratislava which cares for stray or neglected cats and dogs.
So, caniOn creators: both I and many Slovak kittens & puppies say thank you! Good karma is coming your way.
As for the data, it’s impressive. On my phone or tablet I can see everything from regenerative braking efficiency to accelerator history to heater power consumption to motor speed – you name it. This meant I was able to accurately work out that my car costs 1.6 cents per kilometre, when driving at 50 km/h (31 mph). No gas or diesel car can get even close to that!
*(50 km/h = 0.05 kWh; our electricity costs €0.08 per kWh).
At expressway speed however it was a different story. In Slovakia, the expressway speed limit is 130 km/h (81 mph) and as you can see in the above image, driving at this speed used a lot more power because my little city car just isn’t designed for it. It worked out at 3.1 cents per kilometre, which is even more than a Tesla Model S uses at similar speeds, according to some online discussions I saw.
Although, while uneconomical in electric car terms, when compared to even the most high-tech diesels, such as a 2015 Volkswagen Jetta ‘Clean Diesel’ it still works out half the price to drive electric. And as the world recently discovered, even at it’s most uneconomical, my car’s still cleaner and cheaper than Volkswagen’s cleanest, most efficient diesel. That’s pretty cool.
Some quick & dirty math:
2015 VW Jetta TDI: 46 MPG / 5.1 l/100km at 100 km/h; current diesel price: €1,104 / litre = €0.056 per kilometre in the Diesel.
2011 Peugeot iOn: 0.25 kWh per km @ 130 km/h; current electricity price €0.08 per kWh = €0.03 per kilometre in my electric car.
With so much to learn about my car, I’ll be playing with the caniOn app a lot, especially as winter approaches! If you have a Mitusbishi iMiEV, Citreon C-Zero, or Peugeot iOn (they’re all the same car) then I strongly recommend getting an OBDII adapter and downloading the app. It’s brilliant!
On another note, the time has arrived for me to take my car for its first vehicle inspection. In Slovakia, new cars don’t need vehicle inspections until they are four years old. And seeing that my car is about to turn four, it was time to go for a safety test. But… being the first privately registered electric car in the country (back in November 2011), it meant there was a big chance the inspectors had never seen an electric car before.
This got me worried. Being a formerly Communist country, Slovakia still has a lot of bureaucracy and if the inspection forms say “test the vehicle emissions” then they must test the emissions, exhaust pipe or not.
So, I wondered how hard it would be to install a temporary exhaust pipe on the car… just in case. Then, I decided to hook it up to a kettle out of curiosity to generate “emissions”. Then, to make it really authentic, I played the sound of an internal combustion engine on the car stereo.
Then I realised I was being ridiculous, so I took the junk off the car and took it for its first official safety and emissions inspection.
It turns out I was right: this was the first electric car they’d ever tested. It meant we held up the line while phone calls were made and vehicle inspection officers discussed how to test its emissions. In the end, logic prevailed and the car skipped the part where exhaust emissions were checked. Whew.
The rest of the test was a piece of cake, checking brakes and suspension parts for wear or rust, and before I knew it the whole thing was over. Then, just as I was in a great mood from passing the test, I noticed something pretty horrible:
That massive, cut-to-the-metal scratch on the left, rear pillar.
It upset me, because I try to look after the car, drive safely and courteously, and park carefully – but nothing can protect you from an army of clumsy people out there that don’t care about your possessions. Sigh…
So we called the insurance company and took the car to get fixed. This meant I had to take the bus for a week, and get out of pocket €150 for the excess to get my car back like new again. Such is life, I guess.
Now I should say that buses in Bratislava are pretty good, compared to many countries. The buses here are modern, often with TVs and free WiFi – but if you’re an electric car owner, you’ll know that once you’ve gone electric, nothing is ever as good as your car. Then there’s the cost: my car uses 19 cents of electricity to drive to work, yet the bus ticket costs 90 cents! You can’t beat that!
So you can imagine my joy when it was time to pick up my car again.
It’s so good to be driving on electrons once again, but now comes the tough part for any electric car: winter. There’ll be snow, ice, salted roads, and a lot of heater use. Stay tuned to see how my little car survives.
In the meantime, you can see all the craziness I just mentioned (and much more) by watching the latest Kiwi EV video below:
P.S. You can download the 100% electric sticker on a transparent background by clicking here.
Please drive safely, and park well away from metal fences!
Time for a road trip!
I decided to escape the city to spend a night nice in Banská Bystrica, a city in central Slovakia, 227 kilometres (141 miles) away from Bratislava.
I decided to take the back roads to get to our first charging point in a city called Nitra because I was afraid taking the highway would drain the battery too much.
In retrospect it was a terrible decision because, while we got to see some nice villages, the roads were shockingly bad and the normally 70 minute journey took two and a half hours! It would have been faster to take the highway, even with a mid-journey top-up in another town called Trnava. Oh well, lesson learned.
When we arrived to top up we plugged in and found that our access code didn’t work! Argh! Fortunately it was simple to fix. One phone call to the 24-hour Greenway charging network operator and we started charging within 1 minute. Pay attention charging operators: that is how you do it!
Next stop was only 35 km away at a place called Motorest Zubor in… well, the middle of nowhere.
The quick charger at Motorest Zubor scared me a little. When we plugged in and entered our code it gave us an error. I panicked, tried again, and fortunately it worked.
Just like in Nitra, the charger brought the car up to 82% in 20 minutes and we carried on our way to Banská Bystrica. This next part of the journey would be the most stressful and I wanted to charge to at least 90%, but it didn’t show me how, so I assumed 82% was as high as it would go. Big mistake…
Because we were driving for an hour at high speed, we drained the battery and barely made it to Banská Bystrica with the last 10 kilometres on “Turtle mode”. This meant the car only gave us the absolute minimum in power, which also meant the car was crawling up the hill to the fast charger at walking pace. I have never been so stressed out!
I’ve never seen my car battery go so low before. Combined with a six hour journey it was an experience I was keen to forget. Fortunately, from here we could relax and enjoy a night in Banská Bystrica, a beautiful medieval town in the middle of Slovakia.
We walked all over this beautiful town, took in the many sights, and had a lovely dinner, all before tucking ourselves in for a long sleep.
We needed our energy because tomorrow we would be doing it all over again…
I awoke to good news! When charging in the morning I discovered an extra menu in the quick charger allows you to charge all the way to 100 percent full! This is brilliant news!
Unfortunately in my case it refused to go past 94% but hey, that’s better than yesterday’s 82% so I’ll take it!
Understandably we were pretty nervous about making the same long journey back to the Motorest Zubor charger, so we drove slowly and carefully at around 85 km/h (53 mph).
We were passed by every vehicle on the highway (the most humiliating was a diesel Smart car) but after an hour we finally made it to the quick charger with THREE bars of battery remaining! No turtle mode!
It goes to show that charging an extra 12% and driving like a grandmother can make all the difference. Good to know for next time.
After stopping in Nitra, we decided to go via the highway all the way, making a quick stop at Trnava before heading home to Bratislava. It was a very good decision as it saved us about an hour.
We learned a lot about the car. The 227 km (141 mile) journey back from Banská Bystrica was much more streamlined and took 4 hours. This works out about one hour longer than using a regular gas car, if you add in a stop for lunch. Not bad for a low-range city electric car, huh?
As always, here’s a video of the whole thing with a lot of cool stuff thrown in:
Thanks for watching and I hope you’re enjoying my EV journey!
My unlucky electric car journey
The car needed it’s 40,000 kilometre service, so I took it into the Peugeot dealer and they really serviced it thoroughly. They changed almost everything you can change on an electric car:
- Plastic scuff-guard (free as part of a factory recall).
- Brake fluid.
- Pollen filter.
Yep, they replaced three whole things… All three of them.
Normally, when I take a gas car to be serviced I end up with three pages of replaced parts and a promise to donate my first born child to pay for the extreme cost, so this was a really pleasant surprise. Plus, now I have a shiny, new battery skid-guard under the car and it cost me nothing:
After the service, I decided to take the car on it’s longest ever trip: a drive from Bratislava (where I live) to beautiful Vienna, in Austria.
At 90 kilometres (56 miles) it’s actually not that far away, but it’s far enough that I must rely on the quick charging system to get me home. No big deal, as I have a VIBRATe (Vienna-Bratislava electro-mobility) access card for a fast-charger in Vienna.
Unfortunately, I soon discovered that my VIBRATe card is not valid for the charger outside Burger King in Vienna. Argh! I need this charger to get home! I panicked and called the support desk and they tried to help, but told me that it’s not yet compatible with the VIBRATe network and they can’t get access to unlock it! What do I do?!
Despite this major system flaw, the helpdesk was as helpful as they could be and they directed me across town to an underground parking lot which had a Level 2 (3.7 kW) charger. This meant I was in for about 3 hours of waiting.
It was also the first time I’ve been “ICEd”, which is when an Internal Combustion Engine car parks in front of an electric car charging point which they cannot possibly use.
So, I wandered around the streets of Vienna for 3 hours, charged up, then made the long, perilous journey home – and I almost didn’t make it. The best way to really experience the drama of this day is to watch this video below.
I got so angry with the incompetence of electric car fast-charging companies that I even put on a suit to make my point!
